Stability AI, the innovative startup behind the fascinating image AI Stable Diffusion, has recently unveiled an exciting AI model called Stable Video Diffusion. This model allows you to create stunning video clips using simple image descriptions – all in the blink of an eye!
Just like its predecessor, the predecessor specialising in static images, the Stable Video Diffusion model works in a unique way. You give the model an image with the scene to be displayed as a video and the AI conjures up a completely finished video clip based on it, which unfortunately is currently only about 4 seconds long. This is not just AI in action that you can experience here, this is a further step towards creativity at the touch of a button!
What particularly characterises Stability AI as a start-up is its progressive approach to transparency. The startup continues its tradition of making not only the code but also the model weights for running the Stable Video Diffusion model freely available. This open approach clearly distinguishes Stability AI from other players such as OpenAI, who are increasingly keeping their ground-breaking research results behind closed doors and thus also preparing the ground for further development, as has just happened with Q*.
For all the creative minds out there, Stability AI offers a refreshing way to dive into the world of AI-driven video production. So, let your imagination run wild and experience how the future of creativity and technology go hand in hand – thanks to Stable Video Diffusion by Stability AI!
Limitations:
The model is currently intended for research purposes and there are many restrictions on its use. Nevertheless, it is fun to try out the possibilities.
- The videos that are generated are relatively short and usually last less than 4 seconds.
- The model is not intended to produce perfect photorealistic images.
- Often the model generates videos without movement or very slow / static camera movements.
- It is not possible to address the model with a text prompt. An image must be passed as an input parameter.
- Text that is legible cannot be generated or displayed by the model.
- People with proper faces are not generated correctly.
- The images are often generated with losses by the autocoding part of the model.
Installation – Ubuntu System:
When I try out new software, I always install everything in a separate virtual Anaconda environment on my Linux system. So I will also start here by setting up an Anaconda environment. You can find out how to install Anaconda on your Ubuntu system here on my blog. Stability AI has published everything on GitHub and you can read a lot more there.
GitHub URL: https://github.com/Stability-AI/generative-models
But now the environment is created first. To do this, please execute the following command.
Command: conda create -n StableVideoDiffusion
Once the environment has been created, it is now activated. To activate this newly created virtual environment, execute the following command.
Command: conda activate StableVideoDiffusion
Next, download the Stable Video Diffusion project from GitHub. I recommend installing it in the home directory of the current user.
Command: cd ~
Command: git clone https://github.com/Stability-AI/generative-models.git
Now change to the generative-models directory that was created after cloning the repository.
Command: cd generative-models
Now all the software that is still required is installed in the virtual environment via the requirements.
Command: pip3 install -r requirements/pt2.txt
After the installation is complete, please execute the following command.
Command: pip3 install .
Now everything is actually set up and the models still need to be downloaded in order to be able to generate the videos at all. You can find these via the two links below on Huggingface.
Always download the two files with the safetensor extension here.
URL SVD: https://huggingface.co/stabilityai/stable-video-diffusion-img2vid/tree/main
URL SVD_XT: https://huggingface.co/stabilityai/stable-video-diffusion-img2vid-xt/tree/main
Once the four files with the safetensor extension have been downloaded, they must be stored in a checkpoints directory in the generative-models folder. Create a folder with exactly this name.
Now go to the generative-models/scripts/demo folder and copy the Python file video_sampling directly into the generative-models folder. Now execute it within your virtual environment with the following command.
Command: streamlit run video_sampling.py --server.port 7777
The Streamlit app can now be accessed via the URL <IP address:7777> on the intranet and video generation can begin.
Create a video:
I have created a few images in Automatic1111 with the following prompt which hopefully can be used well. The prompt I have used is as follows.
Generate an image of a surreal alien creature, seamlessly blending with its surroundings. This liquid-like entity should have an otherworldly appearance, with fluidic tendrils and constantly shifting patterns. Imagine a creature that defies our understanding of biological forms, appearing as a mesmerizing combination of liquid and ethereal shapes. Let the colors and textures evoke a sense of mystery and wonder, as if observing a creature from a distant, undiscovered planet. Be creative with the interplay of light and shadow, emphasizing the fluid nature of this extraordinary alien being.
The model I used in Automatic1111 has the name: sdxlUnstableDiffusers_v8HeavensWrathVAE.safetensors [b4ab313d84]
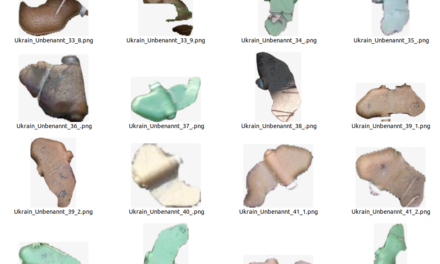
The generated images then looked like this.
I have put the pictures here as a ZIP file for you: Alien pictures
Now open the URL to the Streamlit APP and the web overlay of Stable Video Diffusion should be displayed.
Now click on the “Load Model” checkbox so that the svd model is loaded. This takes a few seconds until it is in the memory of the graphics card.
After the model is loaded, I always get the following error message. However, the video generation still works.
Now load the prepared picture. In my case it’s the alien picture that I really liked.
Now scroll all the way down and press the Sample button. The video generation will then start. I didn’t change anything in the settings at first. The following image shows how much memory is used by the svd model on the GPU.
The resulting video will look like this.
Here is another short video.
Summary:
I’ve already had a lot of fun with the project, even though I’ve often crashed because the graphics card’s memory has overflowed. This means that the demands on the system are still very high. But there are already the first models that only need 8GB of video RAM in conjunction with ComfyUI. You can read more about this here CIVITAI. I am very curious to see how things will progress and when it will be possible to generate really long scenes as text prompts. In principle, this is already possible, e.g. with Automatic1111 and AnimateDiff as an extension.
