


After you have added the Dreambooth extension to your AUTOMATIC1111 system, I would like to briefly explain how to set up and start a training. Since I’m still learning and trying out myself, this tutorial should be understood as a first idea of how the processes are and what you have to pay attention to. Surely I will add to this guide from time to time or correct it when I have more knowledge and experience. But for a first start and to get a feeling how complex the whole thing is I hope that the description helps you to train a first own net that also shows something, i.e. can generate via a prompt what you have trained on top of the existing net.
Again it is important to have a good NVIDIA GPU in your computer so that the training or this small project is fun. I always recommend the 30XX series or even higher performance. I use an NVIDIA A6000 in my computer and am quite satisfied with the speed. Probably an RTX 4090 would already be faster again. But I do not have a comparison.
Note: This article is currently a documentation for me how I have fine-tuned the model. I will keep updating the article as I learn more.
Set up the first training
Start AUTOMATIC1111 on your computer as usual, call up the web interface and open the Dreambooth tab on the web interface of Stable-Diffusion. Now create a model via the Create tab. To do this, you give it a name so that you know later what is behind this model, i.e. the property that you have taught it.
I start the training from the source checkpoint v1-5-pruned.ckpt because this net is good for fine tuning what I want to do with my PFM-1 mine images. The description of the net and the download link for it can be found here.
URL: https://huggingface.co/runwayml/stable-diffusion-v1-5
Where to put the net etc. you can find in my description here.
URL: Stable Diffusion – AUTOMATIC1111 Ubuntu Installation Teil 2/2
The following image shows the view for creating your own mesh, which we will now train on top, i.e. fine-tune. If you have made all settings, i.e. the name and the selection of the net, then click on “Create Model”. The creation of the mesh takes a few seconds.
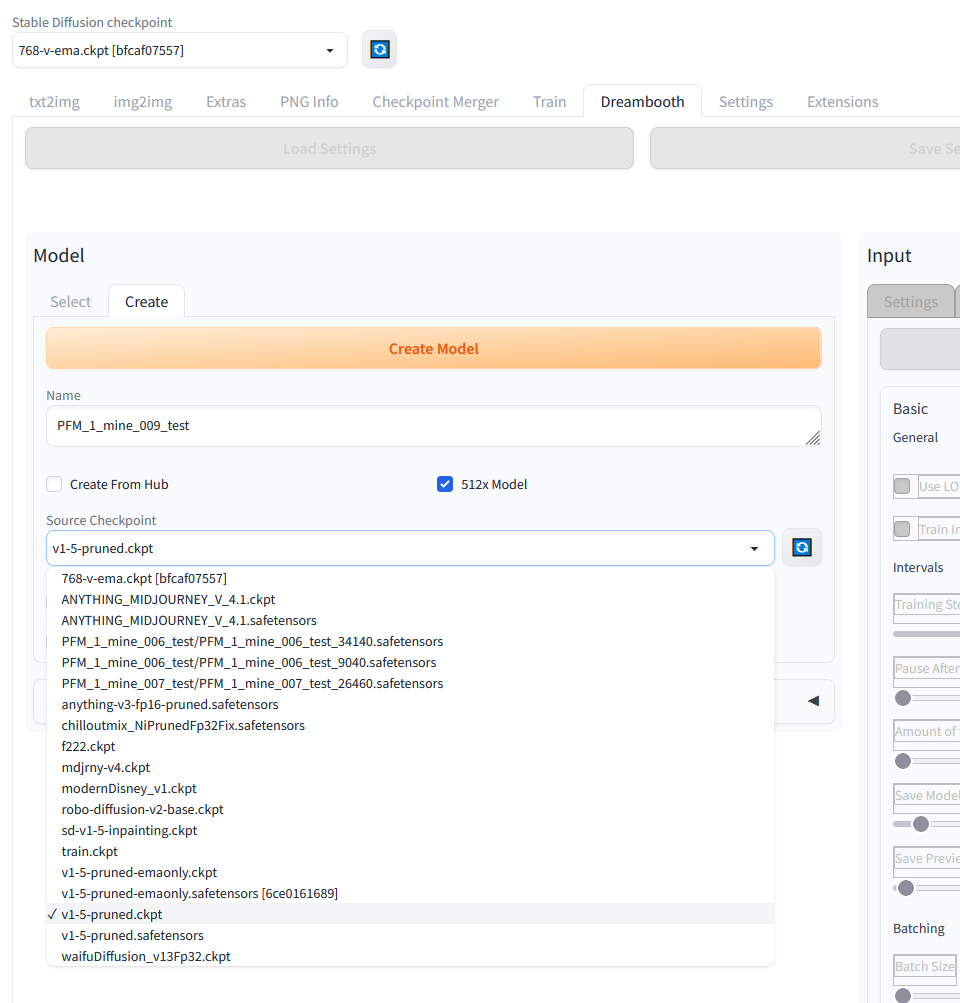
Automatic1111 Stable Diffusion Training – Create your model
I myself am still trying out which settings give good results and have more or less experimented here with a result that I personally found quite good. Of course, no PFM-1 antipersonnel mines were generated that look 1:1 like the original, but the majority of the generated images looked very much like the model in its geometry.
Therefore now once as screenshots the settings chosen by me.
Settings 1/3
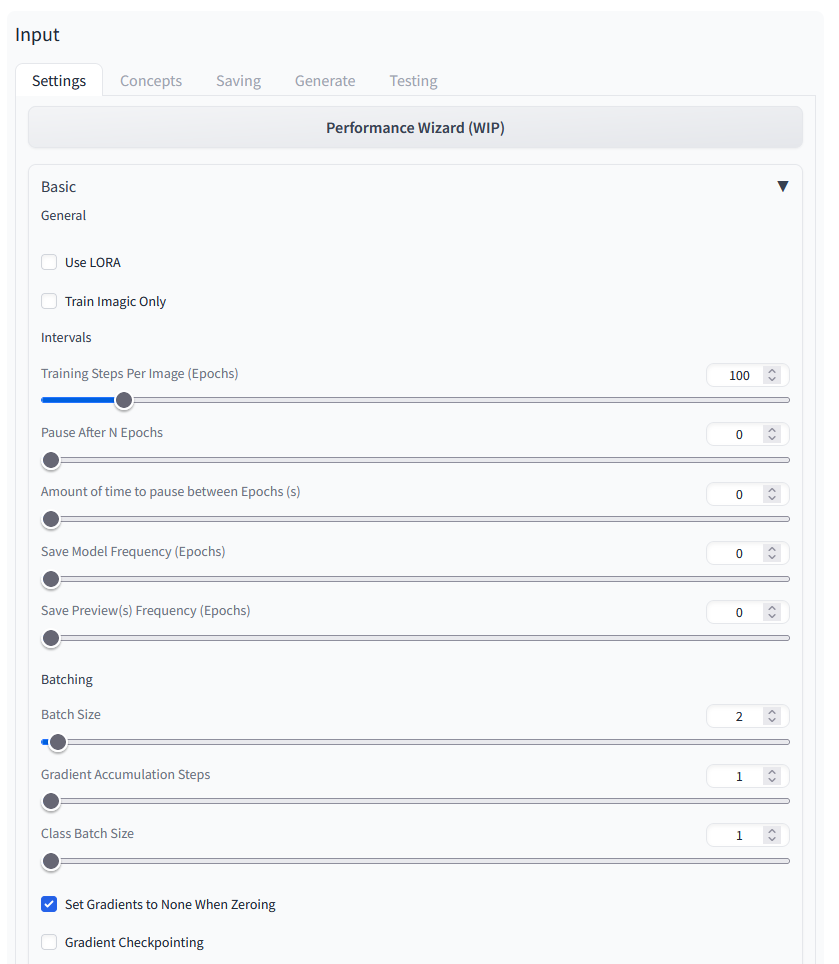
Stable Diffusion Training Dreambooth Settings 01
Settings 2/3
Here I only set the Learning Rate to 0.000001 and selected 8bit AdamW for the Optimizer. With the Mixt Precision I went to bf16.
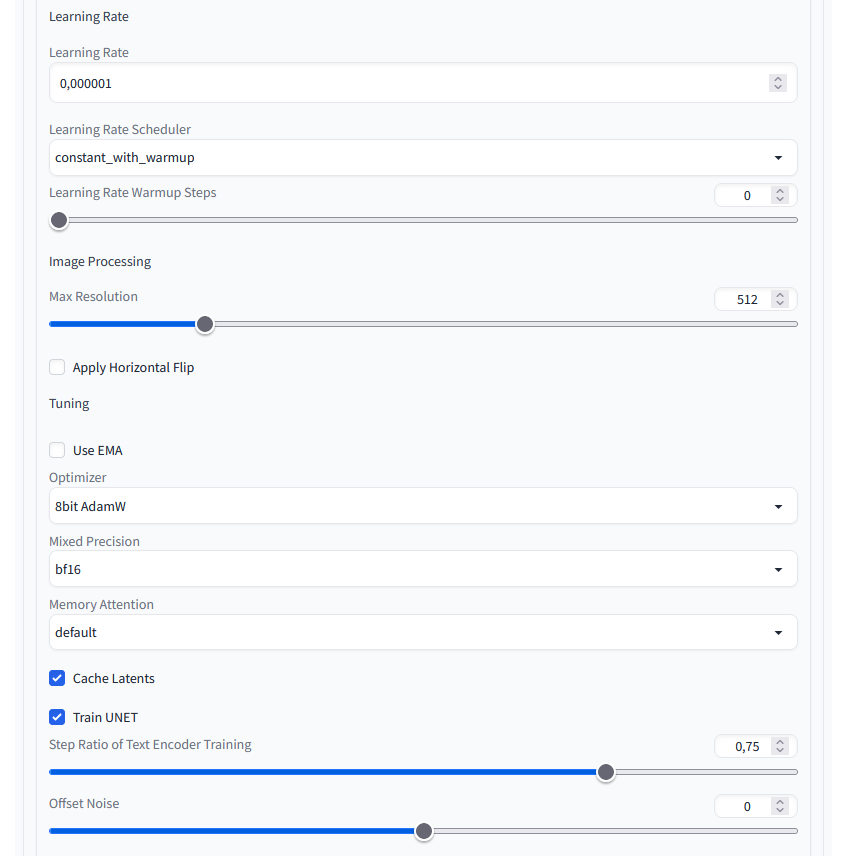
Stable Diffusion Training Dreambooth Settings 02
Settings 3/3
In this section I did not change anything in the upper section and left the suggested values for finetuning objects. Only in the Advanced section I have added a Sanity Sample Prompt.
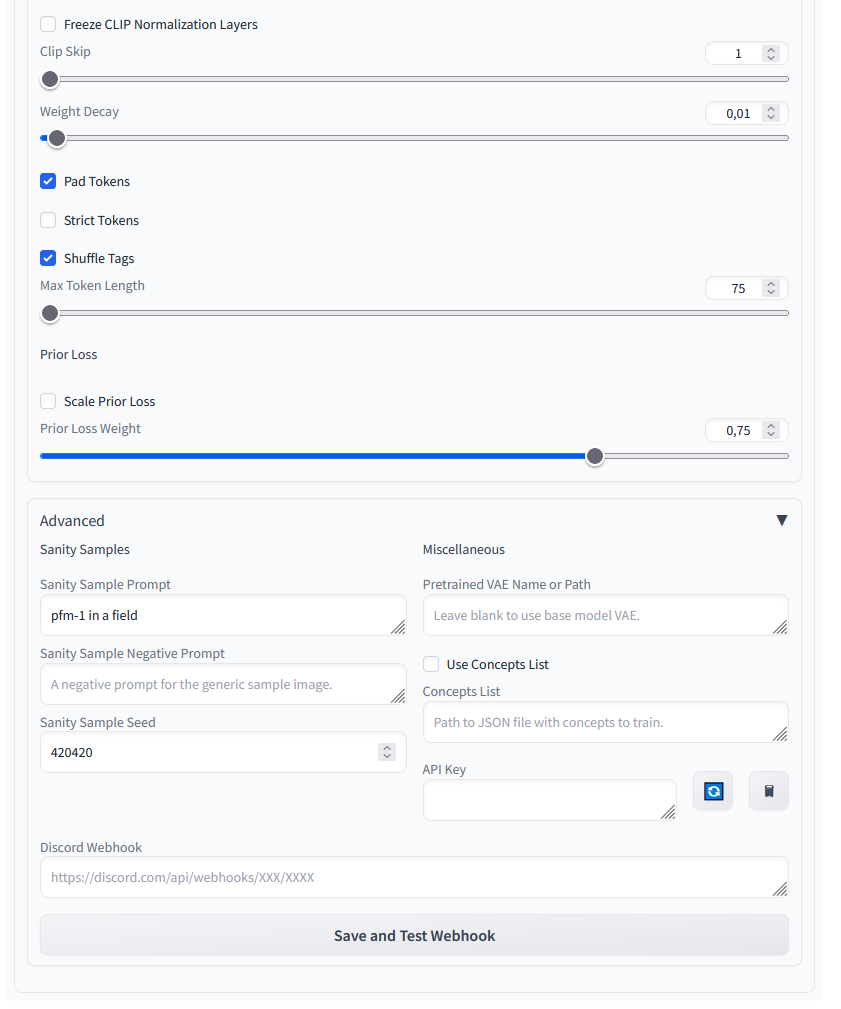
Stable Diffusion Training Dreambooth Settings 03
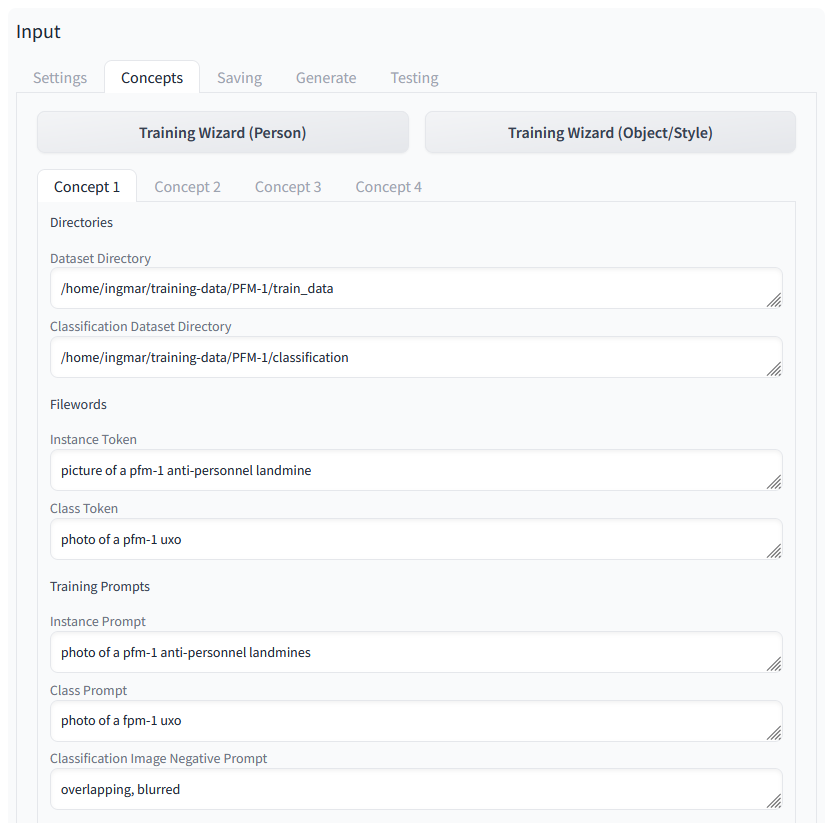
Concepts 1/2
Here at Concepts it is important to specify the paths to the images. I once put about 280 images of the PFM-1 mine in a “train_data” folder. Another 20 images are stored in the folder “classification” so that the network can check whether the result corresponds to what I would like to have as a result.
In addition there are more prompts which are important for the training and should be new, so very rare. So the chance is greater that also something is generated which corresponds to my approx. 280 images with which I make the fine tuning.
Stable Diffusion Training Dreambooth Concepts 01
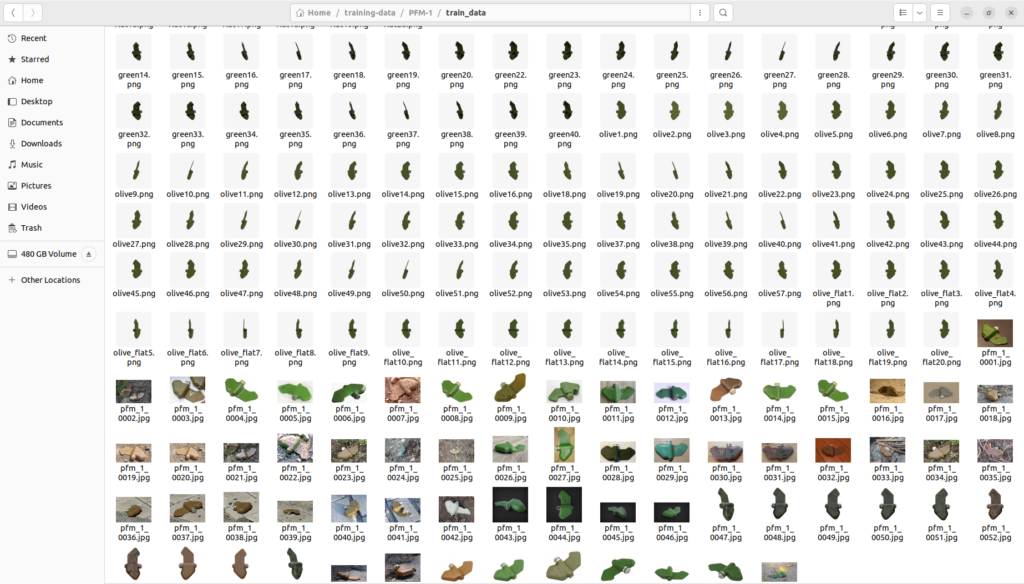
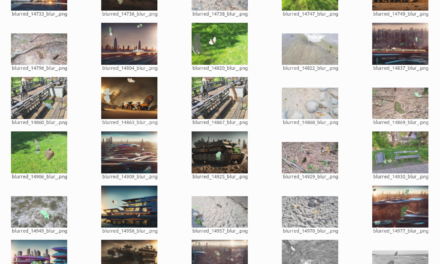
The data I used for finetuning of those PFM-1 anti person mines looks like shown in the following picture. One part is rendered with blender and the other part was collected via the internet and social media platforms. I collected and created 251 pictures.
Stable Diffusion Training data PFM-1 anti person mine
Concepts 2/2
Here, more or less the suggested settings have been kept. Only at the adjustment screw “Class Images Per Instance Image” I have tried the one or other value and here I have gone with the number 4 as a value quite well. If the value is e.g. very high like 100 then my computer would have produced only images for approx. 35 hours what would have been probably not purposeful. Below I have included pictures of the different tests of the terminal windows together with a small time calculation.

Stable Diffusion Training Dreambooth Concepts 02
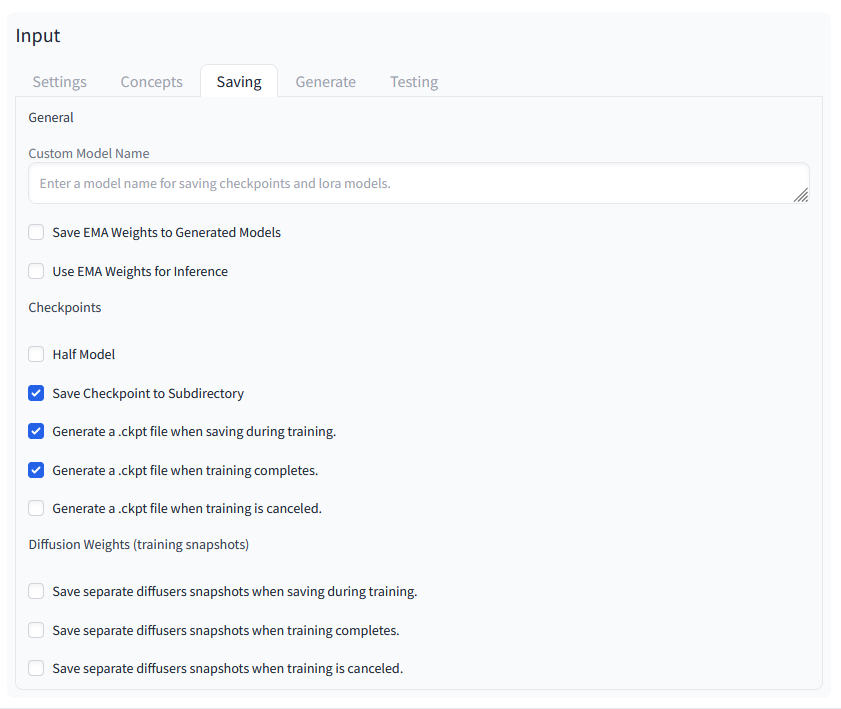
Savings 1/1
Again, I did not change anything here and used the suggested settings.
Stable Diffusion Training Dreambooth Savings 01
Generate 1/2
Again, I did not change anything here and used the suggested settings.

Stable Diffusion Training Dreambooth Generate 01
Generate 2/2
Again, I did not change anything here and used the suggested settings.

Stable Diffusion Training Dreambooth Generate 02
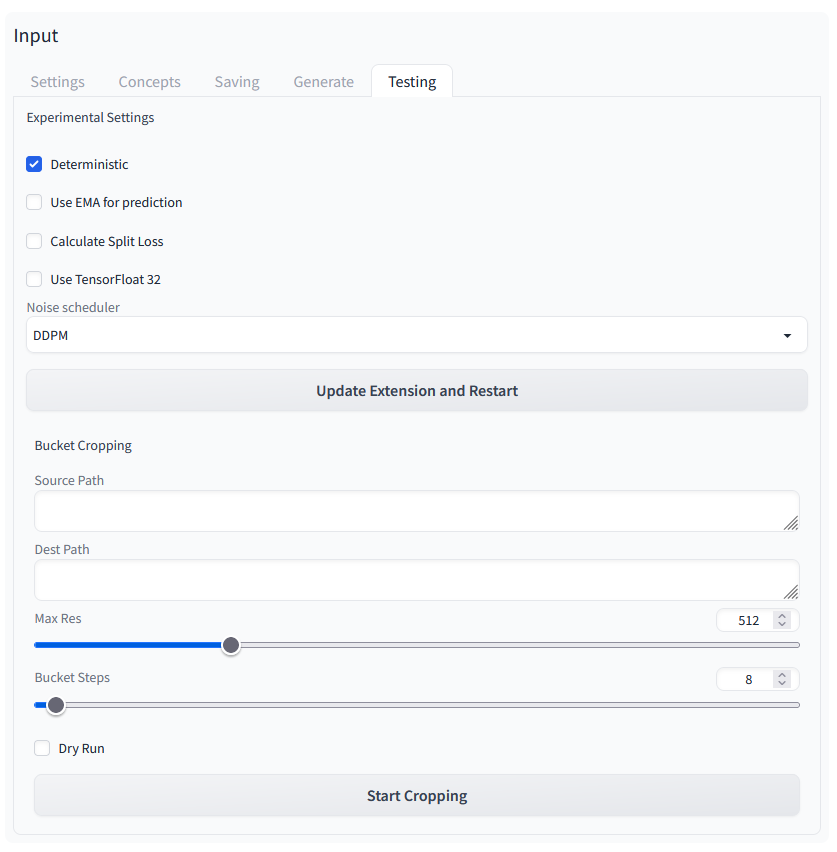
Testing 1/1
Again, I did not change anything here and used the suggested settings.
Stable Diffusion Training Dreambooth Testing 01
The following pictures show the training on my computer. Once you can see the stable diffusion terminal window in which the training is running. Below is the output of nvidia-smi with the load of my NVIDIA RTX A6000 card. This one has really good work to do here and the mesh that is being computed right here fits nicely into the graphics card’s memory with its approximate 11 GB.
Active Training
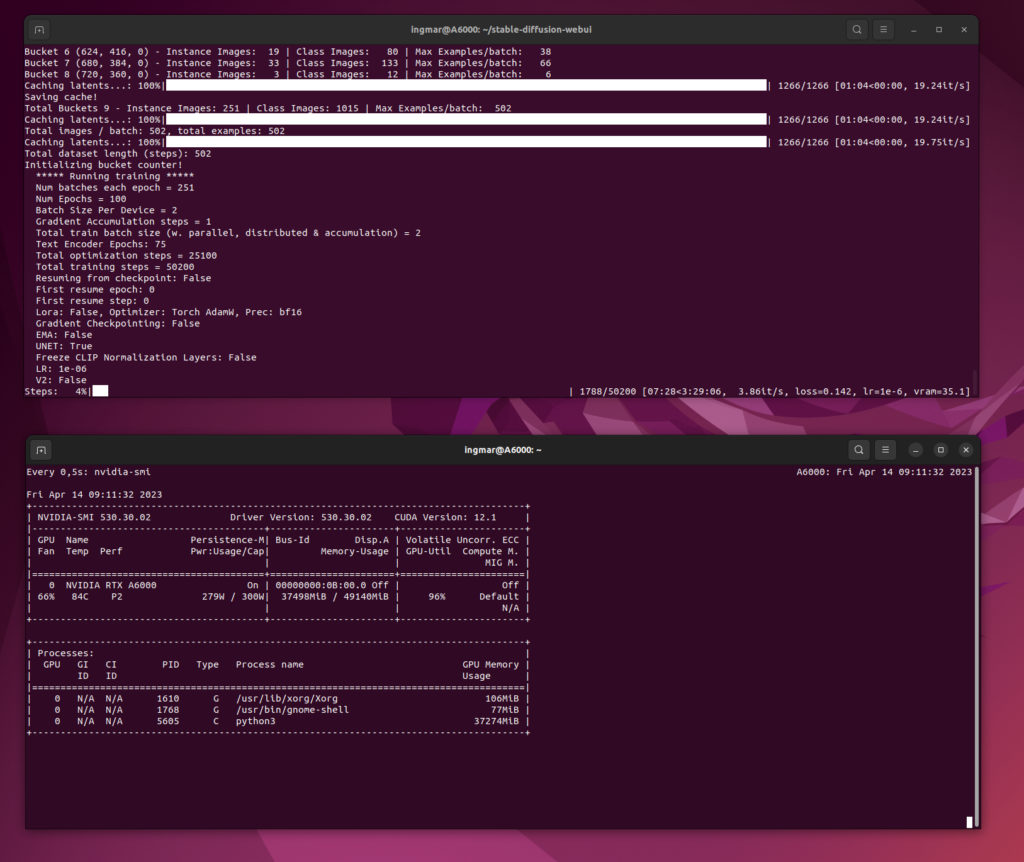
Stable Diffusion Training Dreambooth training active running
Generation of 284 Class Images
Here you can see the generation of the class images. I have added a small calculation how long this takes. Above I already mentioned the configuration and the images of the terminal windows.
Time for the creation of the Class Images:
284 x 5 sec = 1420 sec
1420 sec / 60 = 24 min

Stable Diffusion Training Dreambooth training generating class images
Generation of far too many Class Images 25,100
Time for the creation of the Class Images:
25.100 x 5 sec = 125.500 sec
125.500 sec / 60 = 2.091 min
2.091 min / 60 = 35 hours
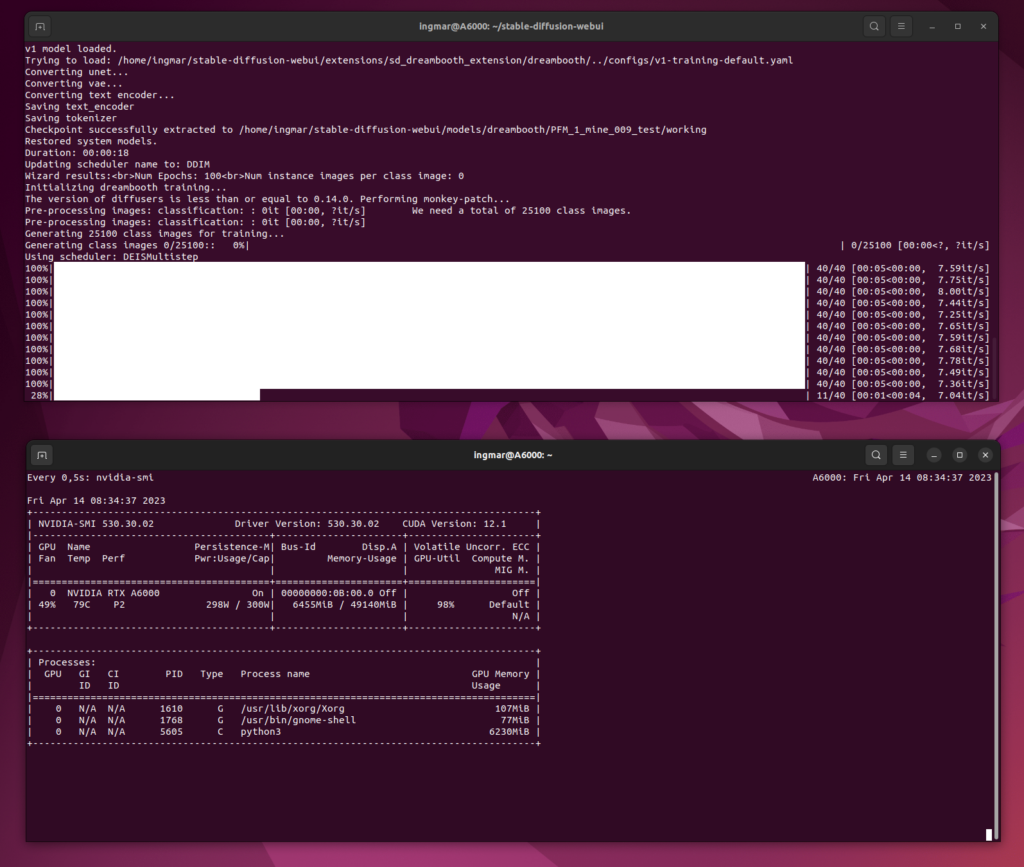
Stable Diffusion Training Dreambooth training generating too much class images
This shows more or less how I trained the net. As a result, the following picture of the PFM-1 anti-personnel mine has now been created.
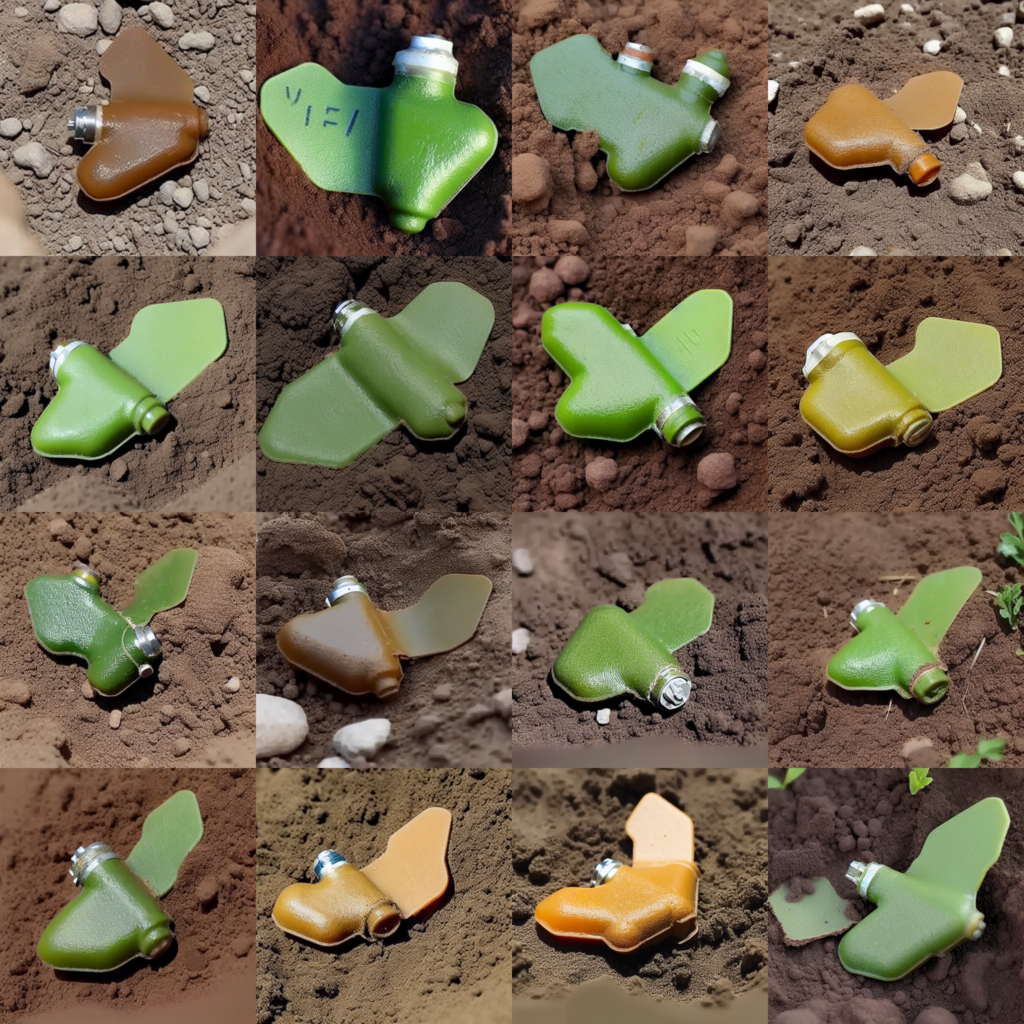
PFM-1 Stable Diffusion generated mine 20230414
Summary
For me, the result is okay so far. I will create a few more images of this mine with Blender and use them for training. Maybe I will limit the rendered images from Blender to the front and back side and not use so many more images from the side. This is because most of the time mine will be flat on the ground and not standing on end. The results I could achieve with such a training dataset I will add here as soon as I get to it.
Article overview - Stable Diffusion:
Stable Diffusion - AUTOMATIC1111 Ubuntu installation part 1/2Stable Diffusion - AUTOMATIC1111 Ubuntu installation part 2/2
Stable Diffusion - Generate images locally with prompt examples
Stable Diffusion - Dreambooth Training Finetuning Setup Part 1/2
Stable Diffusion - Dreambooth Training Finetuning Run Part 2/2


The tutorial offers a clear and practical guide for setting up and running the Tensorflow Object Detection Training Suite. Could…
This works using an very old laptop with old GPU >>> print(torch.cuda.is_available()) True >>> print(torch.version.cuda) 12.6 >>> print(torch.cuda.device_count()) 1 >>>…
Hello Valentin, I will not share anything related to my work on detecting mines or UXO's. Best regards, Maker
Hello, We are a group of students at ESILV working on a project that aim to prove the availability of…