

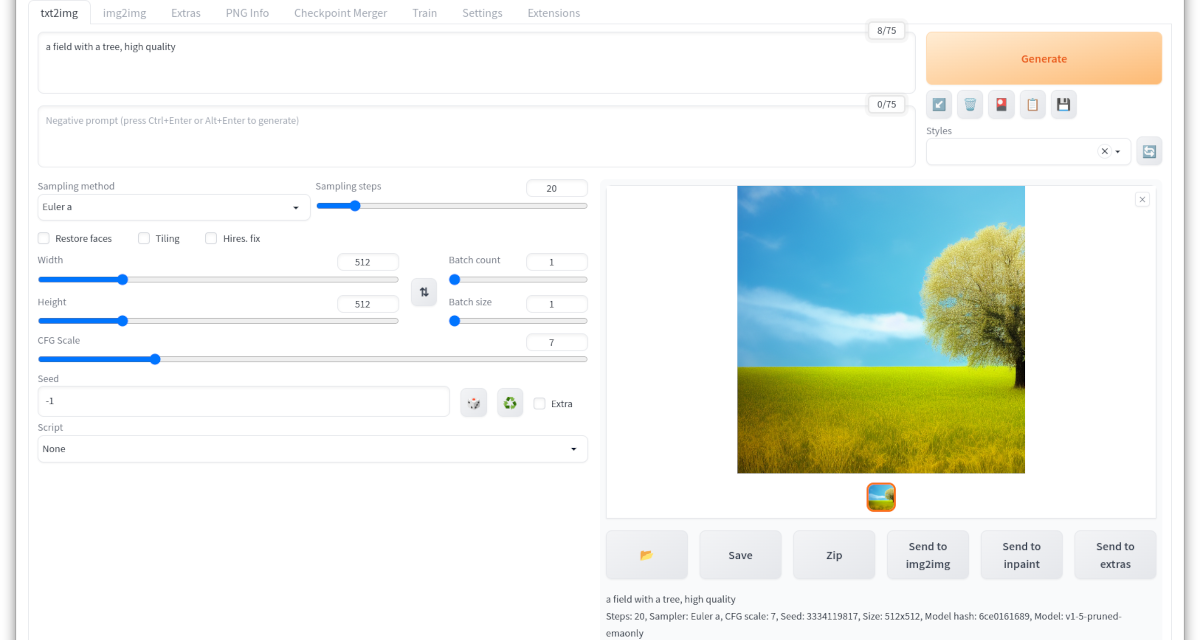
After the first part of the installation instructions all prerequisites were created, the second part of the instructions now follows the installation of Automatic1111. This works so well that I myself was very surprised how easy it was. It is important that you do the installation in the active Anaconda environment “stable-diffusion”. If you don’t use Anaconda then you install Automatic1111 directly in your system. You can see how the web overlay looks like in the following picture which I have inserted here in advance.
Automatic1111 Stable Diffusion – installation finished
But now it’s time for the installation.
AUTOMATIC1111 installation
The original installation instructions for AUTOMATIC1111 that I followed can be found at the following URL. I have listed the commands here one after the other so that you only have to copy them one after the other into your terminal window.
URL: https://github.com/AUTOMATIC1111/stable-diffusion-webui#automatic-installation-on-linux
Now you can start with the installation. Please execute the following two commands in the terminal window under Ubuntu 22.04 to install the current and required Python3 libraries.
Command: sudo apt install wget git python3 python3-venv
Now the preconditions are created and you execute the following command. This installs Automatic1111 and installs some software on your system. This will take a few minutes depending on your internet connection and the speed of your computer.
Command: bash <(wget -qO- https://raw.githubusercontent.com/AUTOMATIC1111/stable-diffusion-webui/master/webui.sh)
The following picture shows once the output in the terminal window like this looked with me.
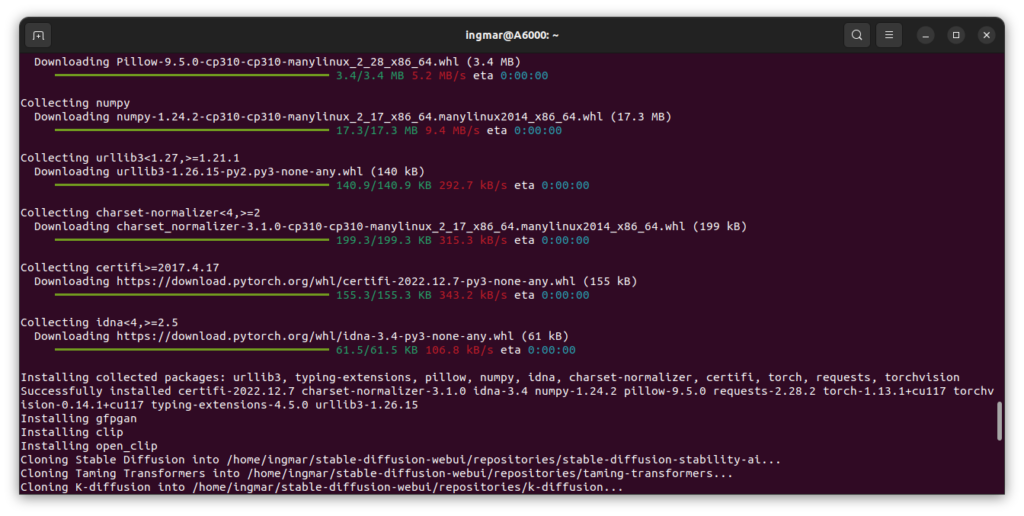
Stable Diffusion installation process
After everything has been installed, the Stable Diffusion web UI environment will start automatically. If you want to start the environment manually after a restart of the PC, you can do this with the following command executed via the terminal in the installation folder “stable-diffusion-webui”.
Command: bash webui.sh
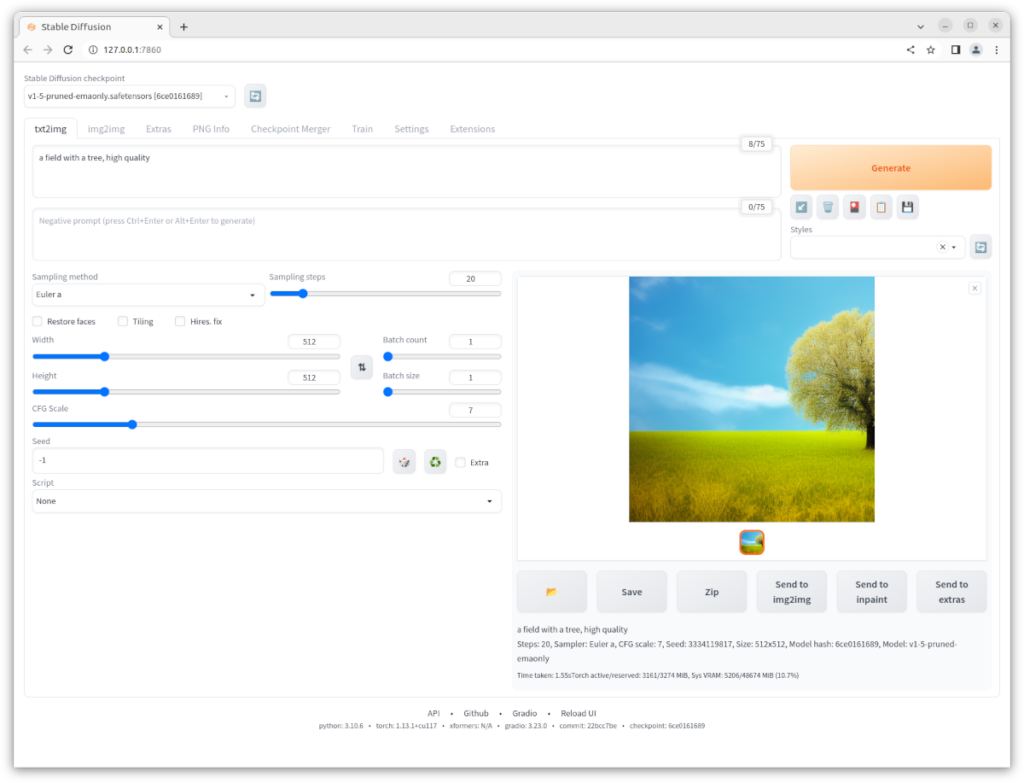
In the browser you can now access the web interface of the stable dissufion environment via the following URL. The network v1-5-pruned-emaonly.safetensors was already downloaded during the installation and you can use it to generate the first images.
URL: http://127.0.0.1:7860/

stable diffusion webui
Add trained models
In order to be able to use the environment and generate images, the various CheckPoint files offered on the Internet for the already trained models must also be downloaded. To start with, download the Stable Diffusion 2.0 model as a checkpoint file.
Download checkpoint Model: 768-v-ema.ckpt
Further you need the config file which you also have to download.
Download Config: config file,
This configuration file must be renamed so that it is named like the model, i.e. as follows
neuer Dateiname: 768-v-ema.yaml
Now the checkpoint file and the renamed configuration file must be moved to the installation folder of the Stable Diffusion web UI.
Pfad: /home/<Benutzername>/stable-diffusion-webui/models/Stable-diffusion
<picture of that folder>
Then close the environment if it was still running and reload it.
Command: bash webui.sh
When the environment is started in the terminal window, open it again via the browser. You can select the added model in the top left drop-down box. This drop down box becomes relevant when you have added different models.
URL: http://127.0.0.1:7860/
If you want other computers in your network to be able to access the web interface, you must execute the following command with --listen appended.
Command: bash webui.sh --listen
If several instances are to be used in parallel with different neural networks loaded into the graphics card, then these instances should each be started on a separate port. The command for this looks as follows.
Command: bash webui.sh --listen --port XXXX
Port example:
Command: bash webui.sh --listen --port 7861
If you have further questions about the configuration of AUTOMATIC1111, you can find the parameters or possibilities of the configuration under the following page:
URL: https://github.com/AUTOMATIC1111/stable-diffusion-webui/wiki/Command-Line-Arguments-and-Settings
From now on you can build your own prompts and try out what happens how.
Offer pre-trained networks
I do not want to create a selection of already trained meshes here myself. On the page of Stable-Diffusion-Art.com there is a very good collection of such models with a short explanation and at least one example picture each. Therefore I refer here to the great work of Stable-Diffusion-Art.
URL: https://stable-diffusion-art.com/models/
Also interesting model around the topic of architecture or food / food we can be viewed as well as downloaded. An integration or version based on AUTOMATIC1111 is also being worked on if I have understood this correctly. That would simplify the access to these models of course clearly.
But here once the page.
URL: https://civitai.com/
I myself have downloaded the following networks once so far and am currently using them to try them out.
- 768-v-ema.ckpt
- 768-v-ema.yaml
- anything-v3-fp16-pruned.safetensors
- chilloutmix_NiPrunedFp32Fix.safetensors
- f222.ckpt
- mdjrny-v4.ckpt
- robo-diffusion-v2-base.ckpt
- sd-v1-4.EVyFFLZs.ckpt.part
- train.ckpt
- v1-5-pruned-emaonly.ckpt
Summary
I was very surprised how easy the installation was and how easy it was to access the web interface. So it is now possible for everyone interested in this technology to get familiar with the topic of stable diffusion. Then you realize what is possible and how difficult it will be to trust your eyes in the future. We are now simply with Chat-GPT or also completely freshly from META segment Anything in a completely exciting AI time arrived. In my opinion, it is important not to be afraid of the technology as such, but to understand it and know what is possible. Only in this way can you understand the world in which you now find yourself, whether intentionally or not.
Article overview - Stable Diffusion:
Stable Diffusion - AUTOMATIC1111 Ubuntu installation part 1/2Stable Diffusion - AUTOMATIC1111 Ubuntu installation part 2/2
Stable Diffusion - Generate images locally with prompt examples
Stable Diffusion - Dreambooth Training Finetuning Setup Part 1/2
Stable Diffusion - Dreambooth Training Finetuning Run Part 2/2


The tutorial offers a clear and practical guide for setting up and running the Tensorflow Object Detection Training Suite. Could…
This works using an very old laptop with old GPU >>> print(torch.cuda.is_available()) True >>> print(torch.version.cuda) 12.6 >>> print(torch.cuda.device_count()) 1 >>>…
Hello Valentin, I will not share anything related to my work on detecting mines or UXO's. Best regards, Maker
Hello, We are a group of students at ESILV working on a project that aim to prove the availability of…