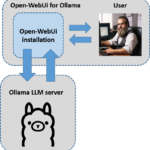
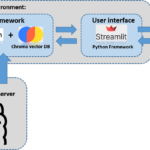
This short guide is made up of several articles and takes you step by step from the installation to the finished application. First of all, the instructions are structured so that Ollama is installed. Ollama is used as a server that provides the various language models. The big advantage of Ollama (https://github.com/ollama/ollama) is that it can provide different language models that are addressed via an API from the actual Python application. This means that everything runs locally on your own computer and there are no additional costs such as those incurred when using OpenAI services, for example. I’m always a fan of running everything locally at home and I also think this solution is quite good from a data protection point of view.
Note: I am installing everything on an Ubuntu system with an NVIDIA A6000.
Ollama installation
The first step is to install Ollama on the Ubuntu system. I have executed the following command in my user session.
Command: curl -fsSL https://ollama.com/install.sh | sh
After the installation, we download the large language model mistral, which does not have too high demands on the graphics card and should therefore run on an RTX3090 or similar for many. Please execute the following command for the installation.
Ollama language models
Here you will always find the current overview of the models available for Ollama: https://ollama.com/library
Command: ollama pull mistral
Command: ollama pull gemma:7b
Command: ollama pull gemma:2b
The models are then located under Linux or WSL in the following path: /usr/share/ollama/.ollama/models
With the following command you can check whether mistral and the other models have been downloaded and are successfully available in ollama.
Command: ollama list
If you want to delete a model, the command is as follows.
Command: ollama rm <Model-Name>
If a model is to be updated, this can be done again with the familiar command for installing models.
Command: ollama pull <Model-Name>
Ollama TextEmbedding
The most important information about text embeddings can be found here: https://python.langchain.com/docs/integrations/text_embedding/ollama
Ollama start
Now simply start the Ollama server once with the following command. Our application will then communicate with this and call up the mistral LLM.
Command: ollama serve
Note: If the following message is displayed, the Ollama server is already running and you do not need to do anything else for the time being.
(ollama_rag) ingmar@A6000:~$ ollama serve
Error: listen tcp 127.0.0.1:11434: bind: address already in use
Now everything is set up and you can start writing the small RAG application. With this you will be able to search a PDF document with natural language.
Ollama update
The installation of Ollama can be updated quite easily. The command to display the currently used version of Ollama is as follows.
Command: ollama --version
At that moment I had the version “ollama version is 0.1.25” installed.
The currently available version of Ollama can be found here in the menu on the right: https://github.com/ollama/ollama
You can update Ollama under Ubuntu with the following command already known from the installation.
Command: curl -fsSL https://ollama.com/install.sh | sh
After running the command again, the current version 0.1.27 installed.
Ollama accessible in the network
To do this, please open the file ollama.service in the path /etc/systemd/system/ and insert the following line in the [Service] section.
Environment="OLLAMA_HOST=0.0.0.0"
I then restarted the computer to restart Ollama and I was able to access the API interface via the network.
Summary
With the Ollama framework, it has become very easy to run different language models locally and make them available on the network via an API. The really great thing about this is that LangChain supports Ollama, making it very easy to program the call to the endpoint in your own Python application. In the rest of my article, I will discuss the Python program that brings this small RAG application to life.
