

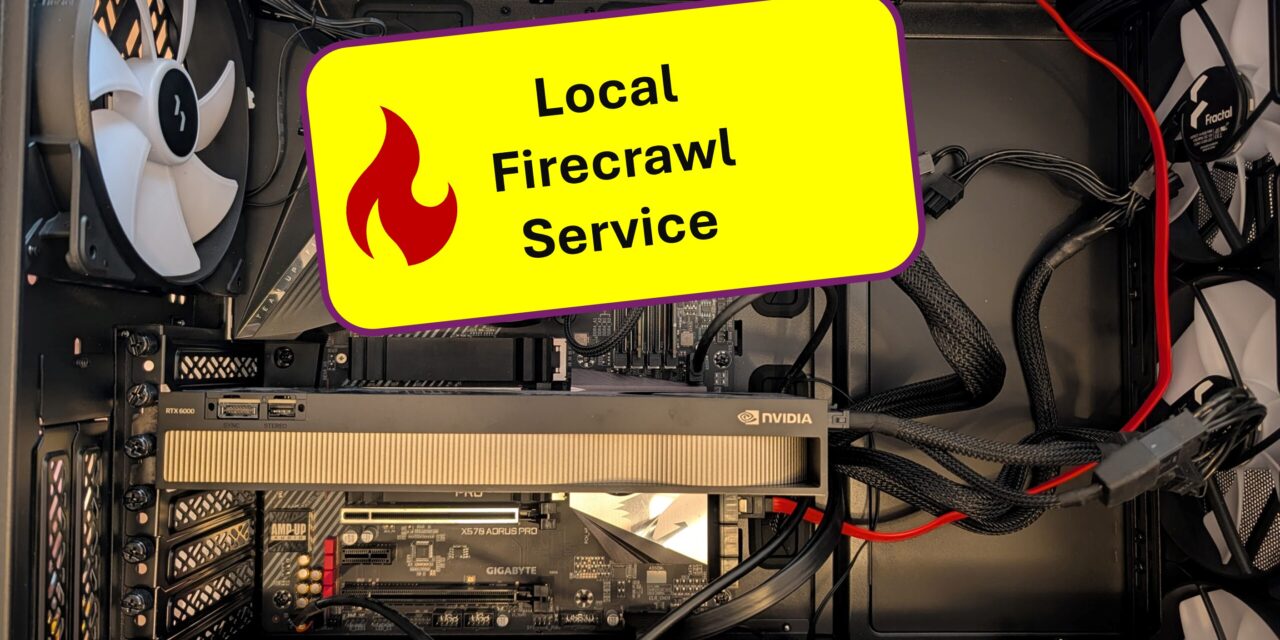
It has been itching me for quite a while: Firecrawl self-hosted, in my own LAN, with no cloud dependencies, connected to my local Ollama server. Web scraping is one of the key capabilities a AI agent needs if it is supposed to do serious research and also have access to up-to-date information from the internet. I wanted to run exactly this capability on my own infrastructure for my NemoClaw experiments, and as a side effect get a better understanding of NVIDIA’s OpenShell. Today I’ll show you how I set up Firecrawl on my second A6000 workstation.
The main problem upfront: The popular self-hosting tutorials you find on the web are no longer up to date. The Firecrawl codebase has evolved significantly in recent months – with new containers, different environment variables, and a nasty race condition at startup that everyone runs into who simply executes docker compose up -d. I’m collecting exactly these stumbling blocks here and giving you a guide that takes you straight to your goal.
local ai stack – firecrawl hermes agent
What has changed compared to older guides
Three things that really cost me time on my first attempt:
- New containers in the stack: Instead of just
api,worker,playwright-serviceandredis, there are now additional containersnuq-postgres(for queue persistence) andrabbitmq(as a message broker). The separateworkercontainer is gone – its tasks are now embedded inside theapicontainer. - Different variable name for the LLM connection: Older guides use
OLLAMA_BASE_URL=http://host:11434/api. The current codebase ignores this variable completely. Instead, you have to setOPENAI_BASE_URL=http://host:11434/v1, because Firecrawl now speaks Ollama’s OpenAI-compatible endpoint. - Race condition at startup: The
apicontainer tries to open a Postgres connection immediately on startup. But Postgres takes 10 to 20 seconds before it accepts connections. The result: The API container crashes and takes all workers down with it. The solution: Start backend services first, wait, and only then bring up the API.
This also makes it clear: This guide applies to the state of May 2026. If you’re rebuilding this later, it’s worth taking a quick look at the Firecrawl repo to check whether something has changed again.
The target architecture
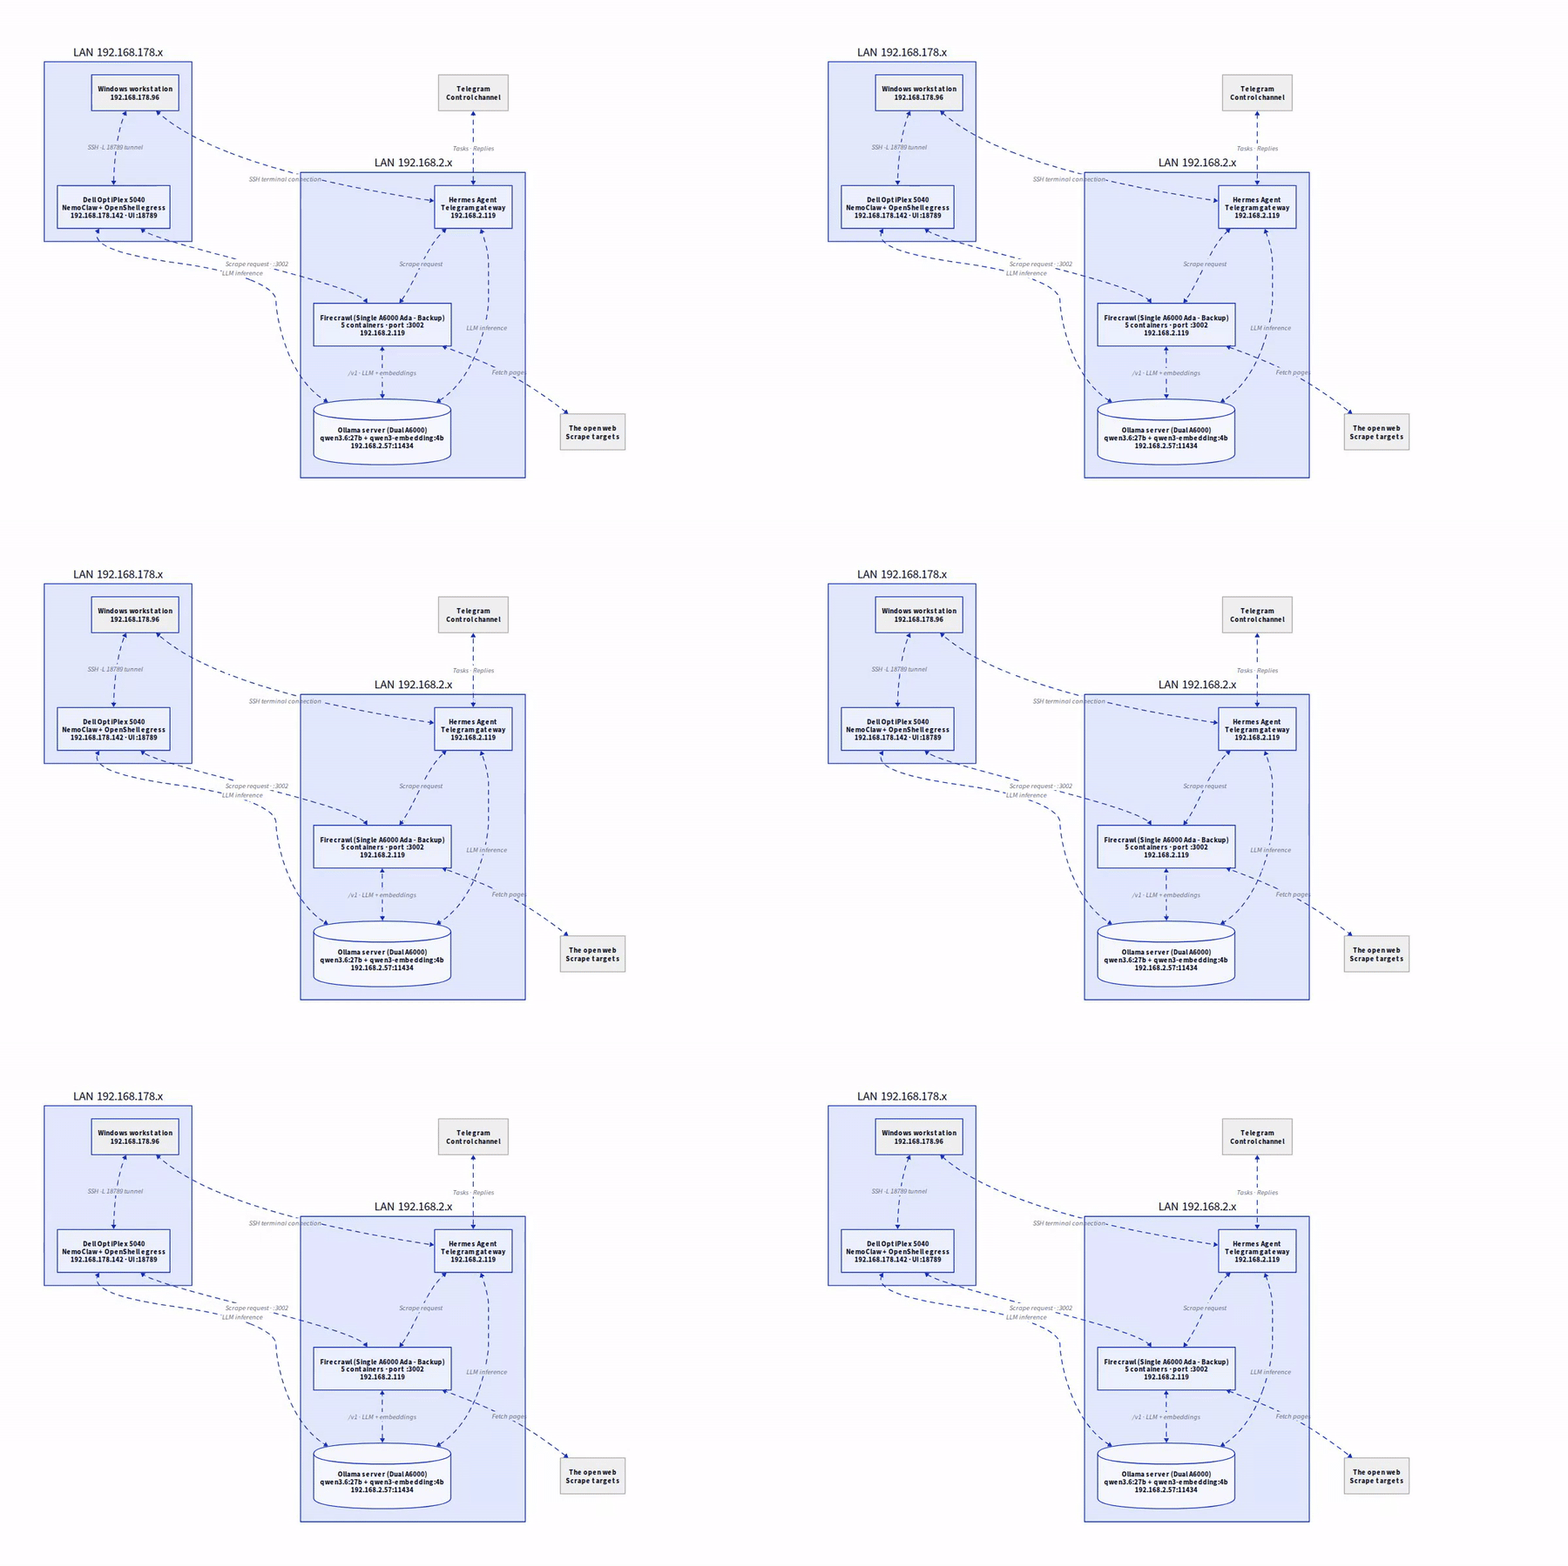
Before I dive in, here is the overall picture:
- Ollama host (192.168.2.57): My A6000 server with the local models
qwen3.6:27bfor chat andqwen3-embedding:4bfor embeddings. - Firecrawl host (192.168.2.119): My A6000Ada workstation, on which the Firecrawl stack runs and exposes port 3002.
- Communication: Firecrawl calls Ollama via the OpenAI-compatible endpoint
/v1. Completely without cloud, completely inside the LAN.
Why Firecrawl actually needs an LLM and an embedding model
A legitimate question I asked myself when I first looked at the .env: Why does a web scraper need a language model at all? Let me break this down briefly, because the answer is crucial for the model choice.
Firecrawl can in fact do a lot without AI. Loading HTML, extracting markdown, following links during a crawl, building a sitemap – all of that is classic, rule-based software. If you just call a simple scrape with formats: ["markdown"], no LLM is involved at all.
The LLM only comes into play when you want structured extraction. For example, when you ask Firecrawl to build a JSON object from a page according to a specific schema („give me title, main topics and publication date as JSON”). This semantic translation of plain text into structured data is something a deterministic rule simply cannot do. That is exactly what you need a language model for – one that understands the content and can rewrite it accordingly.
The embedding model serves a different purpose. It converts texts into vectors, so that Firecrawl can compare semantically similar content. Firecrawl uses this, for example, when filtering a crawl down to topically relevant pages or when reranking search results.
In practice, this means for my setup: My agent calls Firecrawl most of the time only with the request „give me markdown” and does the actual analysis itself with its own reasoning model. Even so, I configure both models in the .env so that the premium features are available when I need them, or when my OpenClaw or Hermes agent wants to use them. This costs me nothing extra – the models run on my Ollama server anyway. That is the beautiful thing about local AI: whether Firecrawl uses them or not, it costs me nothing.
Preparing the Ollama inference server
All the following steps run on the inference server on which I have set up Ollama. Ollama provides the language models that Firecrawl needs for the AI features described above. I’m not going to cover here how you set up Ollama and make it available across the network as an inference service for all your machines – I have described that in earlier articles in detail.
What’s important for the further Firecrawl configuration is that the models you configure in the .env are actually available on the Ollama inference server.
Check and pull the models if necessary
I’m using the qwen3.6:27b model for chat and the qwen3-embedding:4b model for embeddings. That’s already everything you need to provide on your Ollama server.
Testing the OpenAI-compatible endpoint
As already mentioned, Firecrawl no longer talks to Ollama’s native /api/... endpoints, but to the OpenAI-compatible endpoints on /v1/.... I do the test best from the Firecrawl host, so I also verify network reachability:
Command: curl http://192.168.2.57:11434/v1/models
Expected output: A JSON list with the locally available models. If you get a 404 there, Ollama is either too old or not reachable.
Installing Docker on the Firecrawl host
Now we are back on the machine that will become our Firecrawl host. If you already have Docker and the Compose plugin installed, you can skip this section. With the following command you can check whether everything is in place.
Command: docker --version && docker compose version
If not, here is the short version of the official Docker installation for Ubuntu.
First, let’s remove any old packages:
for pkg in docker.io docker-doc docker-compose docker-compose-v2 podman-docker containerd runc; do
  sudo apt-get remove -y $pkg 2>/dev/null
done
Now add the official Docker repository:
Command: sudo apt-get update
Command: sudo apt-get install -y ca-certificates curl
Command: sudo install -m 0755 -d /etc/apt/keyrings
Command: sudo curl -fsSL https://download.docker.com/linux/ubuntu/gpg -o /etc/apt/keyrings/docker.asc
Command: sudo chmod a+r /etc/apt/keyrings/docker.asc
Command: echo "deb [arch=$(dpkg --print-architecture) signed-by=/etc/apt/keyrings/docker.asc] https://download.docker.com/linux/ubuntu $(. /etc/os-release && echo "$VERSION_CODENAME") stable" | sudo tee /etc/apt/sources.list.d/docker.list > /dev/null
Then run the update command and afterwards install the Docker Engine plus the Compose plugin:
Command: sudo apt-get update
Command: sudo apt-get install -y docker-ce docker-ce-cli containerd.io docker-buildx-plugin docker-compose-plugin
Now add your own user to the docker group:
Command: sudo usermod -aG docker $USER
Command: newgrp docker
To wrap up, verify once more that everything works:
Command: docker run --rm hello-world
With that, everything is prepared and we can clone Firecrawl to our host.
Cloning Firecrawl
I clone the repository to /opt/firecrawl and take over the owner rights, so I don’t have to work with sudo all the time later:
Command: cd /opt
Command: sudo git clone https://github.com/firecrawl/firecrawl.git
Command: sudo chown -R $USER:$USER /opt/firecrawl
Command: cd /opt/firecrawl
The central configuration file .env
This is where newcomers make most of the mistakes. The .env file determines how Firecrawl talks to Ollama and which models are used. Pay close attention to the variable names. They have changed compared to older guides and caused me a few headaches.
Creating the .env
With the following command you open an empty .env file to fill it.
Command: nano /opt/firecrawl/.env
Now insert the following content into the .env file. Make sure to adapt the IP address to your Ollama inference server and also the model you want to use.
# ===== Mandatory =====
PORT=3002
HOST=0.0.0.0
USE_DB_AUTHENTICATION=false

# ===== Ollama via OpenAI-compatible API =====
# IMPORTANT: The variable is now called OPENAI_BASE_URL (no longer OLLAMA_BASE_URL!)
# The path is /v1 (no longer /api!)
OPENAI_BASE_URL=http://192.168.2.57:11434/v1
OPENAI_API_KEY=ollama
MODEL_NAME=qwen3.6:27b
MODEL_EMBEDDING_NAME=qwen3-embedding:4b

# ===== Queue admin =====
BULL_AUTH_KEY=CHANGE_ME_TO_A_LONG_RANDOM_STRING

# ===== Optional: allow local webhooks =====
ALLOW_LOCAL_WEBHOOKS=true
You save your changes with CTRL+X, then Y and ENTER.
Generating a secure BULL_AUTH_KEY
I replace the placeholder CHANGE_ME_TO_A_LONG_RANDOM_STRING with a real random string:
Command: openssl rand -hex 32
Paste the output into the .env. This key ends up in the admin URL for the queue later, so really make sure it’s random and long.
The three most important points about the .env
- The variable name
OPENAI_BASE_URLis new. Older guides useOLLAMA_BASE_URL. That variable, however, is ignored by the current codebase. - The path
/v1instead of/apiis mandatory. Because Firecrawl speaks Ollama’s OpenAI-compatible endpoint. - The OPENAI_API_KEY must be set, but it accepts any arbitrary string. I just use
ollamaas a dummy.
By the way, self-hosting does not support Supabase or Fire-engine. The many warnings you will see at startup about missing SUPABASE_*, SEARXNG_* and SLACK_* variables are all expected and harmless.
Build & start of Firecrawl – watch out for the race condition!
This is the phase where most guides simply recommend docker compose up -d, and then you sadly have to pull a face because nothing actually runs. That’s exactly what happened to me. It may be down to my hardware, which is not the fastest – but more on that in a moment.
Building the container images
First, we build the container images with the following command:
Command: cd /opt/firecrawl && docker compose build
The first build takes 15 to 35 minutes depending on your hardware. On my workstation it was about 25 minutes. Plan for that with plenty of tea or coffee.
The staggered start
If you now simply run docker compose up -d, here is what most likely happens:
- All containers are reported as „Started”.
- Seconds later, the
firecrawl-api-1container is gone again. - In the logs of the API container you find
ECONNREFUSED 172.19.0.2:5432.
This is the race condition with Postgres. The nuq-prefetch-worker inside the API container tries to open a Postgres connection immediately on startup and dies if Postgres is not ready yet. This tears down the entire API container along with all worker processes.
My workaround that works reliably for me consists of four steps:
Step 1: Start the backend services and let them warm up.
Command: docker compose up -d nuq-postgres rabbitmq redis playwright-service
Step 2: Wait 20 seconds until Postgres accepts connections.
Command: sleep 20
Step 3: Optionally verify that Postgres is ready.
Command: docker compose logs nuq-postgres --tail=5
What you want to see in the output is the line database system is ready to accept connections.
Step 4: Pull up the API container.
Command: docker compose up -d api
Checking the status
Now check with the following command that all containers are running and ready.
Command: docker compose ps
You should now see five running containers:
firecrawl-api-1(with embedded workers)firecrawl-nuq-postgres-1firecrawl-rabbitmq-1firecrawl-redis-1firecrawl-playwright-service-1
All with status Up. If the API container shows Exited or is missing entirely, check the logs:
Command: docker compose logs api --tail=80
Functional test
Now we just need to find out whether Firecrawl really runs on our host. I ran the following command on the host itself in a terminal window:
Command: curl http://localhost:3002/
Expected response:
{"message":"Firecrawl API","documentation_url":"https://docs.firecrawl.dev"}
Simple scrape
curl -X POST http://localhost:3002/v2/scrape \
  -H 'Content-Type: application/json' \
  -d '{
    "url": "https://ai-box.eu",
    "formats": ["markdown"]
  }'
Expected response: A JSON object with the field data.markdown, in which the scraped page is returned as markdown. That is the moment when I always briefly rub my hands. Now I have my very own web scraper, fully local, in my own network.
Testing the AI feature
To verify the Ollama connection, we now run a structured scrape that returns the result in the JSON format we specify:
Command: curl -X POST http://localhost:3002/v2/scrape -H 'Content-Type: application/json' -d '{
"url": "https://ai-box.eu",
"formats": [{
"type": "json",
"schema": {
"type": "object",
"properties": {
"title": {"type": "string"},
"main_topics": {"type": "array", "items": {"type": "string"}}
}
}
}]
}'
If a clean, structured JSON with title and topics comes back, your Ollama connection works.
Queue admin UI
Open in your browser:
URL: http://<firecrawl-host>:3002/admin/<BULL_AUTH_KEY>/queues
Here you see running, failed and waiting jobs. Handy for debugging and monitoring during longer crawl sessions.
My personal conclusion
Running Firecrawl in my own LAN was the next logical step in the Sovereign AI setup for me: If I already have my Ollama server local and my agent host (NemoClaw) local, then the web research component also belongs in my own server park. With this setup, my agent can now read and browse web pages without a single byte leaving the house. Exactly the mindset that draws me to the whole local AI topic.
What cost me the most nerves during the setup was not the standard Linux tasks, but the outdated guides on the web. I spent a good two hours trying to understand why my API container kept dying. It took me a while to realise that it was not my setup, but a race condition baked into the current build of the codebase. That’s exactly why I’m writing this updated guide: so you save the time I had to invest.
In the next article I’ll show you how I connected this Firecrawl instance to my OpenClaw agent inside the NemoClaw sandbox – including the somewhat tricky OpenShell egress policy I had to configure for it. That is the actually exciting part, where all the building blocks come together.
See you in the next part!




The tutorial offers a clear and practical guide for setting up and running the Tensorflow Object Detection Training Suite. Could…
This works using an very old laptop with old GPU >>> print(torch.cuda.is_available()) True >>> print(torch.version.cuda) 12.6 >>> print(torch.cuda.device_count()) 1 >>>…
Hello Valentin, I will not share anything related to my work on detecting mines or UXO's. Best regards, Maker
Hello, We are a group of students at ESILV working on a project that aim to prove the availability of…