


This time it’s about the exciting topic of image segmentation or as META calls it Segment Anything Meta has published an article and the software for their project Segment Anything a basic model for image segmentation online at the beginning of April 2023. META or Facebook AI Research has put the software and model for image segmentation online as open source on GitHub. With this release, a powerful neural network is now available that can be safely used in many fields. This is because image segmentation is an important task in the field of computer vision and allows images to be divided into different regions and these regions to be identified. On the basis of this data, objects can be recognized or paths for robotic vehicles can be planned, which the robots can then follow without colliding with objects or obstacles.
The presented model called “Segment Anything” is based on the Transformer architecture and was developed with the goal to achieve a higher precision in the segmentation of objects. Compared to other models, Segment Anything achieves better results in terms of segmentation accuracy and ability to recognize complex scenes. Here is the link to the official release of this project.
URL: Introducing Segment Anything: Working toward the first foundation model for image segmentation
Facebook AI Research is making the model available as open source software so that it can be used by other researchers and developers. The model is already being used in several applications, including object recognition and image segmentation of medical images.
Overall, the blog post shows how advances in artificial intelligence can help solve complex image processing and computer vision tasks, and the possibilities offered by Facebook AI Research’s new model.
Live Demo – Segment Anything
If you want to test the possibilities of Segment Anything without installing the software yourself, you can use the offered live demo. In the following example you can see a Russian Shoab 0.5 cluster ammunition, which can be very well released from the background with the live demo. The result is then not limited in resolution as with many similar web services but available in full resolution. If you want to build up a database for training a neural network, the manual steps are not quite ideal but the potential is there and can be used. Of course there are many more possibilities which are now in the hands of the users with appropriate ideas.
Here is the link to the live demo for those who want to try out the possibilities for themselves.
URL: https://segment-anything.com/demo#

live demo Shoab 0.5
But now I would like to discuss the installation of Segment Anything on an Ubuntu system in the following section.
Installing and using Segment Anything
I followed the instructions on GitHub and used the GPU support of Torch for my NVIDIA A6000. But first of all here is the link to the project page whose instructions I used for myself.
URL: Segment Anything
First of all, I ran the following command in the terminal window to install Toch in a version >= 1.8 as required with the appropriate CUDA 11.x support. I also installed torchaudio even though it is not required.
Command: pip3 install torch==1.9.0+cu111 torchvision==0.10.0+cu111 torchaudio==0.9.0 -f https://download.pytorch.org/whl/torch_stable.html
I then installed Segment Anything as such on my computer using the following command.
Command: git clone git@github.com:facebookresearch/segment-anything.git
Command: cd segment-anything
Command: pip install -e .
Now the META trained model as such is missing, which performs the segmentation. This has to be downloaded separately and occupies about GB of space if all three available meshes are downloaded. The meshes themselves can be downloaded here.
Download Check Points: https://github.com/facebookresearch/segment-anything#model-checkpoints
For my part, I simply downloaded all three networks once and saved them in the models folder.
- ViT-H SAM
- ViT-L SAM
- ViT-B SAM
Segment Anything usage
Now everything is set up and I highly recommend to install Jupyter Notebook on the computer if not already done. Because the included notebook “automatic_mask_generator_example.ipynb” is just great to try out the project yourself.
Command: pip3 install jupyter
Now in the terminal window change to the folder where Segment Anything was stored and execute the following command to start Jupyter Notebook.
Command: jupyter notebook
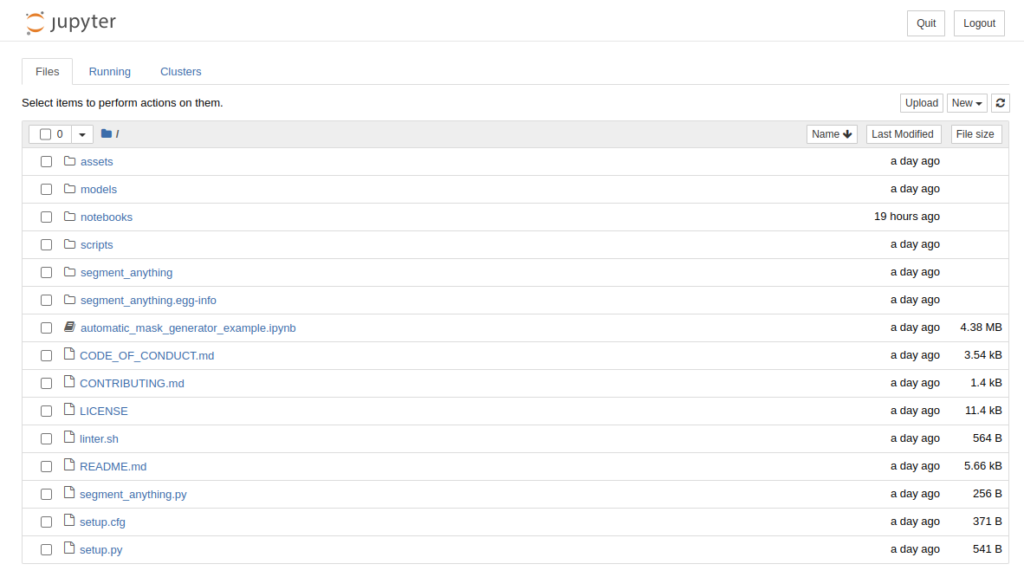
Now the browser should open and you will see the following folder structure. Change to the notebooks folder and select the notebook “automatic_mask_generator_example.ipynb”.
Now the notebook opens and you can execute the individual functions.
Jypiter Notebook segment anything
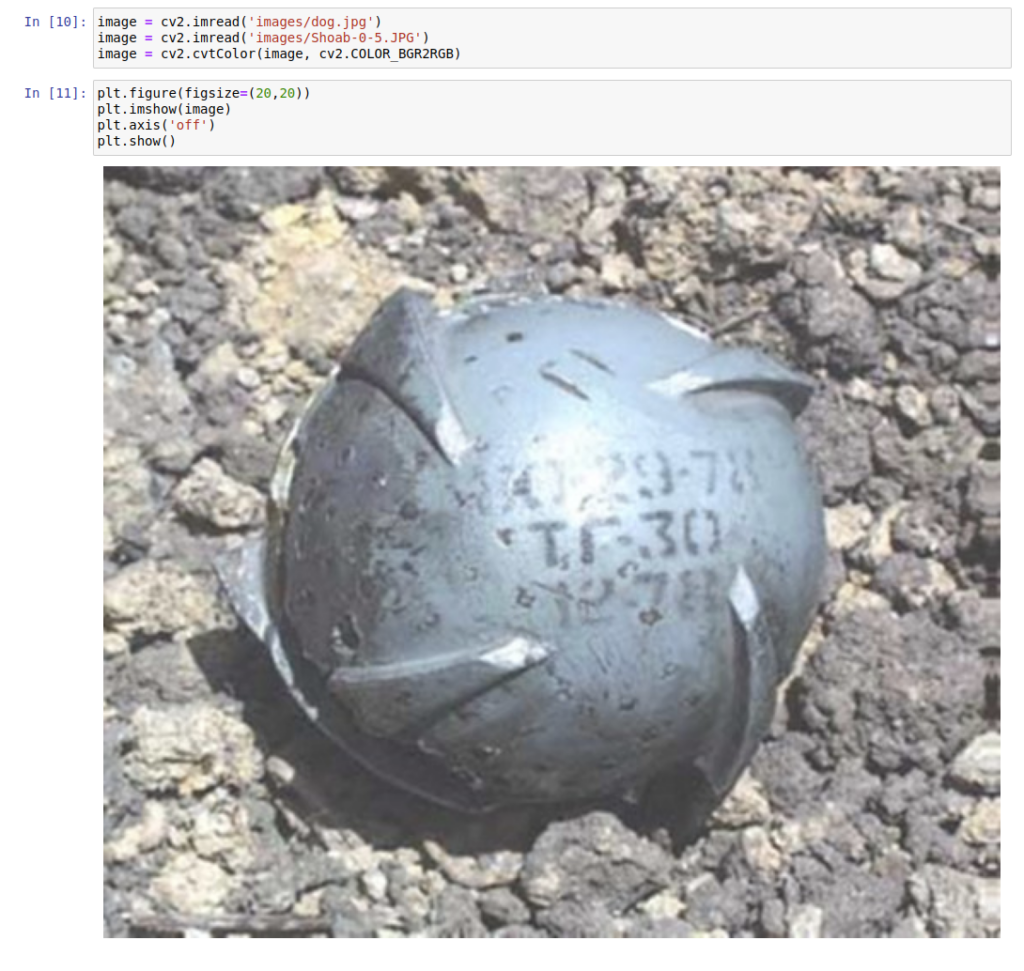
If you want to use your own images, you have to put them in the folder images and replace the default image with the filename “dog.jpg” with the name of your image or the path to it.
segment anything set file path
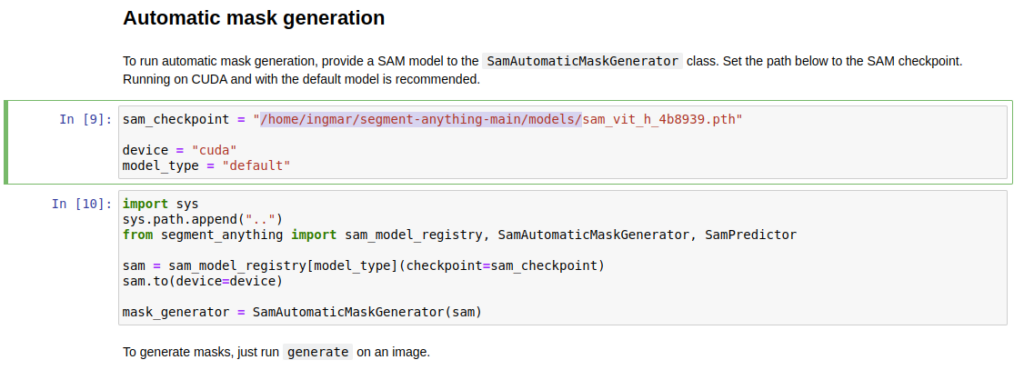
It is important that you specify the path to the neural network under which the network is stored on your computer.
Segment Aanything model path
Now just run the notebook as usual and wait a bit until the image is analyzed, i.e. the segmentation of the image is done. The result looked like this for me.
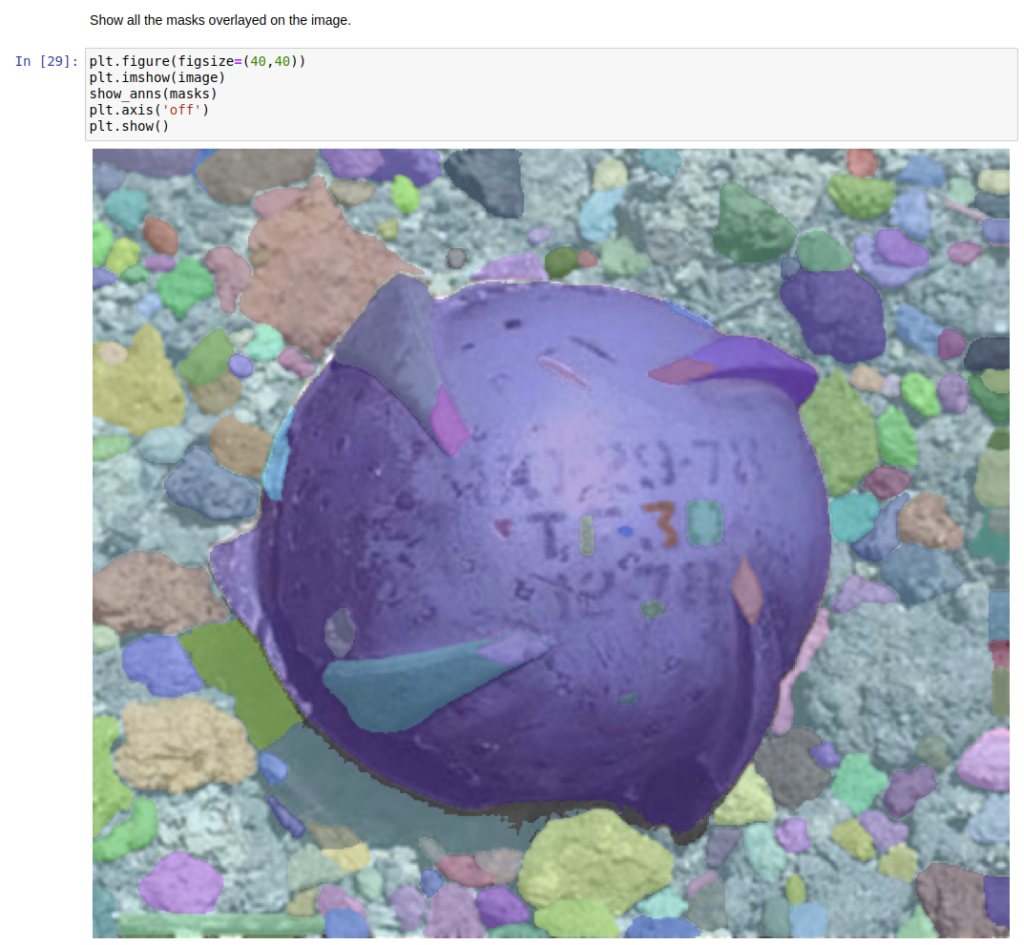
shoab picture 5.0 segmented
Summary
I am impressed by the publication of this neural network and am very happy that META has made it available to all of us. It will certainly find application and perhaps special nets based on it will reappear that can segment certain classes of objects very well. There will certainly be some nice applications based on the Segment Anything mesh in the future. When I think about everything that has happened in the last weeks and months, then I would speak of the following when I think about the names of the different generations.
- Traditionalists (1922 – 1945)
- Baby Boomer (1946 – 1964)
- Generation X (1965 – 1979)
- Generation Y / Millennials (1980 – 1994)
- Generation Z (1995 – 2010)
- Generation Alpha (ab 2010)
- Generation AI (ab 2023)
- Generation AGI (ab 202X)


The tutorial offers a clear and practical guide for setting up and running the Tensorflow Object Detection Training Suite. Could…
This works using an very old laptop with old GPU >>> print(torch.cuda.is_available()) True >>> print(torch.version.cuda) 12.6 >>> print(torch.cuda.device_count()) 1 >>>…
Hello Valentin, I will not share anything related to my work on detecting mines or UXO's. Best regards, Maker
Hello, We are a group of students at ESILV working on a project that aim to prove the availability of…