

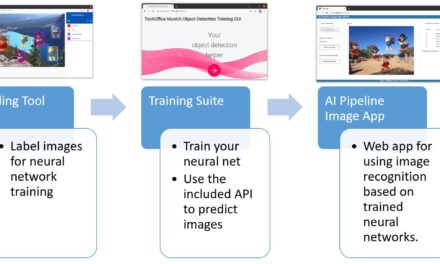
This article is about how to use the Labeltool Lite. In the previous article you have prepared the images and copied them into the working folder of the Labeltool Lite and defined the classes. Now it is mainly about which buttons are available and how to use the Labeltool Lite to add labels to the images as fast as possible. In this case we still proceed by hand. In a later article I will discuss how it is possible to use other tools of the TechOffice Munich of BMW AG to automatically create images with the appropriate labels.
Labeltool Lite – Usage
The operation of Labeltool Lite is very intuitive and quickly learned. Over time, even as a human being, you will find one or two shortcuts when setting the labels that can save a lot of time, i.e. clicks. If, for example, a class occurs several times in an image, for example, the same figure, then you provide this figure directly after each other with a label without changing the class. This saves a lot of clicks, mouse movements and time. The same applies if you want to label hundreds of images and a class occurs over and over again. So one uses the offered short keys and goes through all images for a class and sets the bounding boxes. If several employees help to set the labels, it is also possible to divide the classes among themselves. Then you start again at image 1 and set the labels for the next class and so on. So it is possible to speed up the process of setting the labels significantly, but for a human this is certainly not an attractive activity. But as already written on the automation I go later still in a separate contribution.
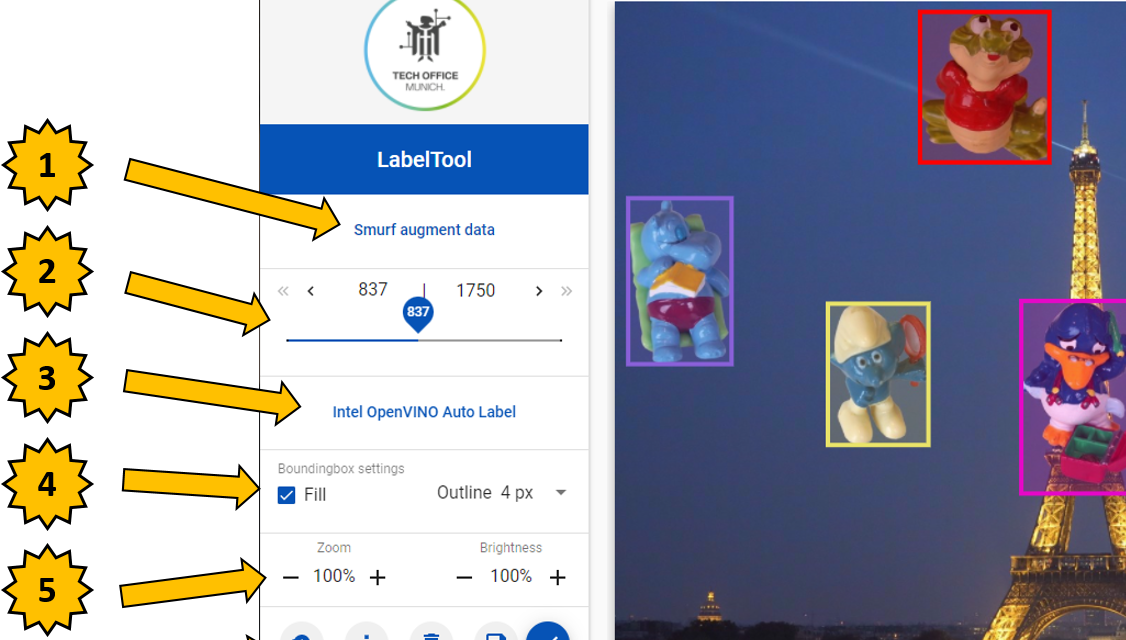
Explanation of the menus
But now the menu items from the following picture briefly and concisely explained.
- Here you can select the image dataset that you want to label.
- With the buttons images can be changed one after the other and with the slider you can quickly skip many images forward or backward.
- Here an Open Vino neural network can be deposited if this is already trained for the classes in the picture the labels automaisch set can. This way the human only has to do the quality assurance which saves a lot of time in the labeling process.
- Here the bounding box, which is opened with the left mouse button, can be adjusted in its appearance.
- Now and then, depending on the resolution and level of detail in the image, the zoom function is very helpful to place the bounding box around the part of the image that contains the information to be labeled.
- The buttons here are important to upload new images or to save the set labels.

No Code AI Pipeline Labeltool Lite
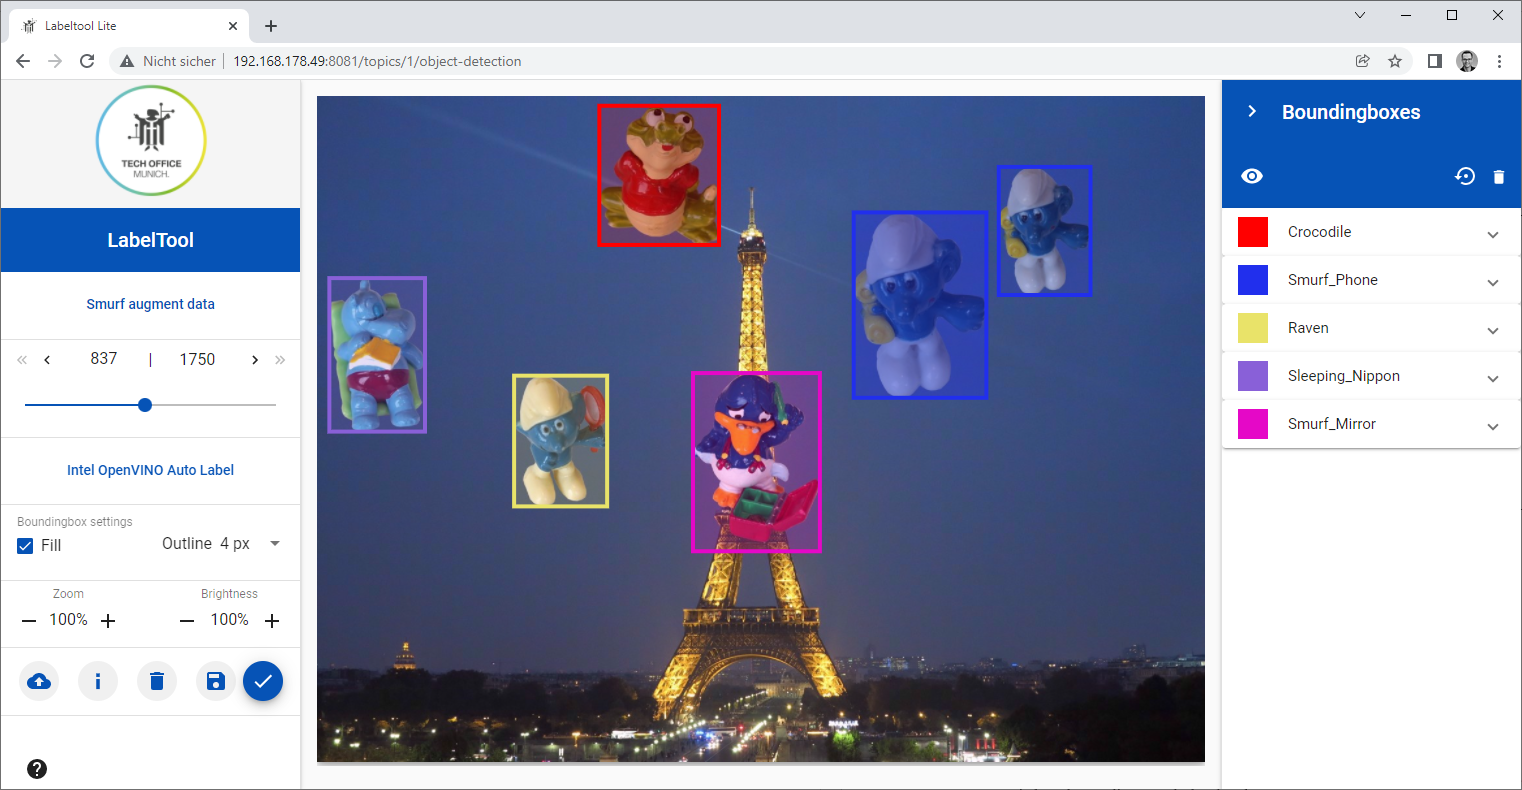
If the first bounding boxes are set, a menu can be seen on the right side of the image that offers further options for all bounding boxes in this image, such as deleting a specific bounding box or hiding the box.
An image complete with bounding boxes and the right menu of Labeltool Lite looks like shown in the following image.
No Code AI Pipeline Labeltool Lite
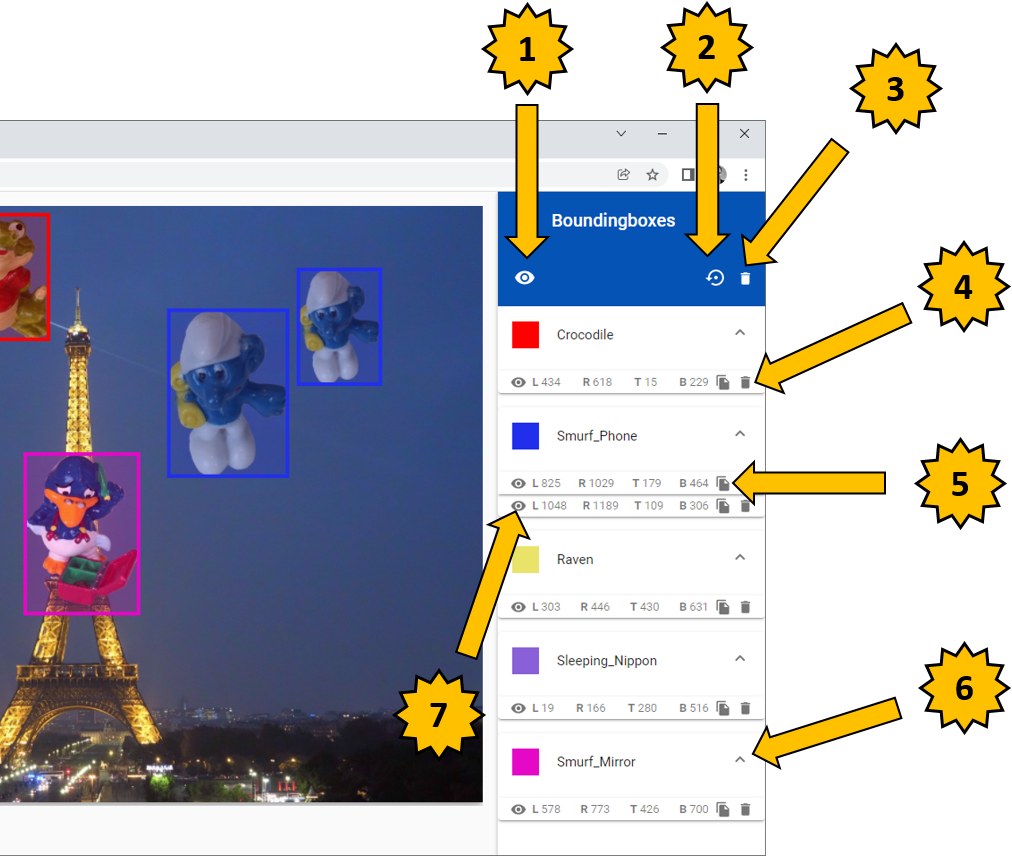
The right menu is explained in detail in the following image.
- With this eye symbol button, all existing bounding boxes can be hidden and displayed again.
- This button makes it possible to discard all adjustments made to the bounding boxes.
- If all bounding boxes of the image are to be deleted, this is possible with the trash can icon.
- With the single bypass symbol of a specific bounding box, only this label will be deleted.
- If there is a need to copy a bounding box, this can be done with the copy icon.
- If there are many bounding boxes on an image, the menu can be opened and closed to individual labels.
- Sometimes a bounding box interferes with setting a new label. Then boxes can be hidden individually with the eye symbol.
No Code AI Pipeline Labeltool Lite
In one of the previous images you can see a button with a question mark in the lower left corner. With this button you can display the short keys that make the work with the Labeltool Lite much easier. When all images are labeled, the training data is ready and can be used in the Training Suite to train a neural network.
Labeltool Lite – Autostart
In order for the Labeltool Lite to start automatically after each reboot of the computer, only a small adjustment must be made to the docker-compose.yml. To do this, the docker-compose.yml file only needs to be adjusted in three places. In the following image, the three adjusted places of the docker-compose.yml file are highlighted. In each case, the line “restart: always” has been added, which causes the Docker container to start automatically after a restart of the computer.
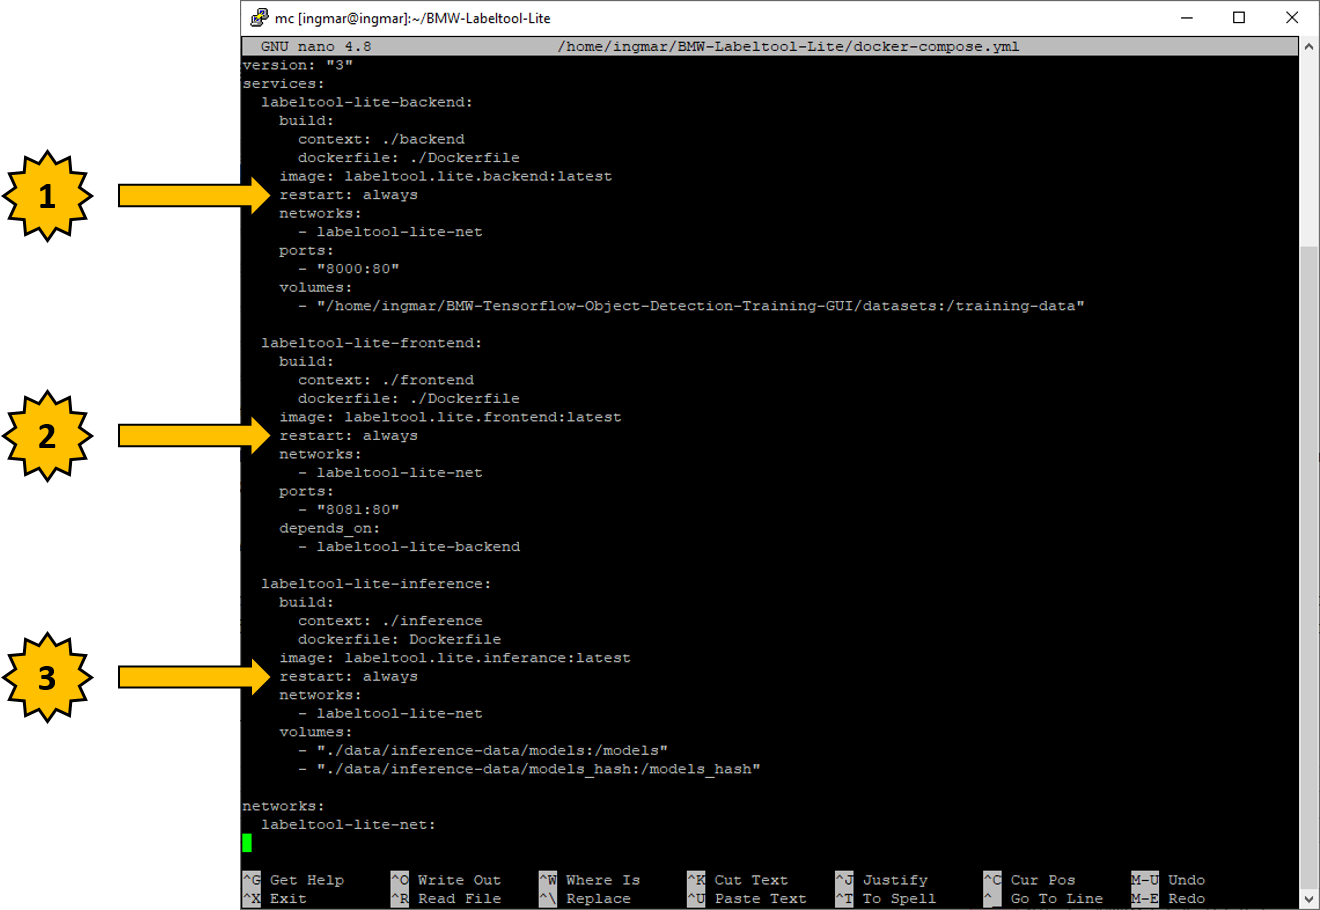
No Code AI Pipeline Labeltool Lite autostart
Now open the docker-compose.yml file with an editor and make the adjustments in the three places described. Simply add the entry “restart: always” and save the adjustments. For a test now start the Labeltool Lite as usual with the following command.
Command: sudo docker-compose up
If the Labeltool Lite starts and can be used as usual, it is now time to restart the computer to check whether the Labeltool Lite also starts automatically after a restart of the computer and can be called. If all this works then the autostart of Labeltool Lite is now configured.
In the next article we will install the Training Suite to use the images that have been labelled for the training of the first neural network.
Article Overview - How to set up the AI pipeline:
AI Pipeline - Introduction of the tutorialAI Pipeline - An Overview
AI Pipeline - The Three Components
AI Pipeline - Hardware Basics
AI Pipeline - Hardware Example Configurations
AI Pipeline - Software Installation of the No-Code AI Pipeline
AI Pipeline - Labeltool Lite - Installation
AI Pipeline - Labeltool Lite - Preparation
AI Pipeline - Labeltool Lite - Handling
AI Pipeline - Tensorflow Object Detection Training-GUI - Installation
AI Pipeline - Tensorflow Object Detection Training GUI - Run
AI Pipeline - Tensorflow Object Detection Training GUI - Usage
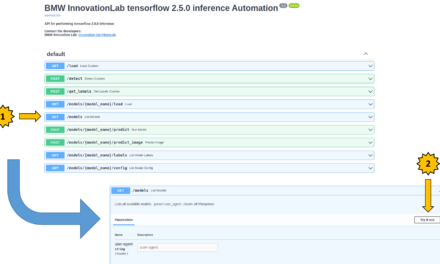
AI Pipeline - Tensorflow Object Detection Training GUI - SWAGGER API testing the neural network
AI Pipeline - AI Pipeline Image App Setup and Operation Part 1-2
AI Pipeline - AI Pipeline Image App Setup and Operation Part 2-2
AI Pipeline - Training Data Download
AI Pipeline - Anonymization-Api


The tutorial offers a clear and practical guide for setting up and running the Tensorflow Object Detection Training Suite. Could…
This works using an very old laptop with old GPU >>> print(torch.cuda.is_available()) True >>> print(torch.version.cuda) 12.6 >>> print(torch.cuda.device_count()) 1 >>>…
Hello Valentin, I will not share anything related to my work on detecting mines or UXO's. Best regards, Maker
Hello, We are a group of students at ESILV working on a project that aim to prove the availability of…