

Nous Research has given its open-source Hermes Agent something with the “Surface Release” (version 0.16.0, June 2026) that I had been waiting for a long time: a true native desktop app for macOS, Linux, and Windows. Until now, Hermes Agent was a command-line and gateway tool. But with the new release, there is now a fully-fledged graphical interface with a one-click installer and self-updating. Reason enough to install the app on my Windows machine and put a very concrete thesis from my upcoming book to a practical test.
The thesis I want to test
The desktop app can be used in two operating modes. Either it connects as a thin client to a Hermes Agent running centrally on a server, or you install it fully locally, so that the agent — together with its memory, skills, and configuration — runs in your own user context. My claim: for enterprise use, the full local installation with a connected central inference server is the cleanest approach from a governance perspective. The reason lies in the architecture of Hermes Agent: memory and user profile exist exactly once per instance. If several users share a common server instance, they inevitably also share the same long-term memory, the same learned skills, and the same stored credentials. With a full local installation, this problem disappears, because every user, by virtue of the operating system and its configuration, already has their own isolated user profile.
That is exactly what I want to demonstrate with this test, while also answering two open questions I could not answer for certain beforehand:
- Does the agent now really run natively on Windows, or does the app still pull in WSL2 in the background?
- Is the user data actually cleanly separated within the Windows user profile?
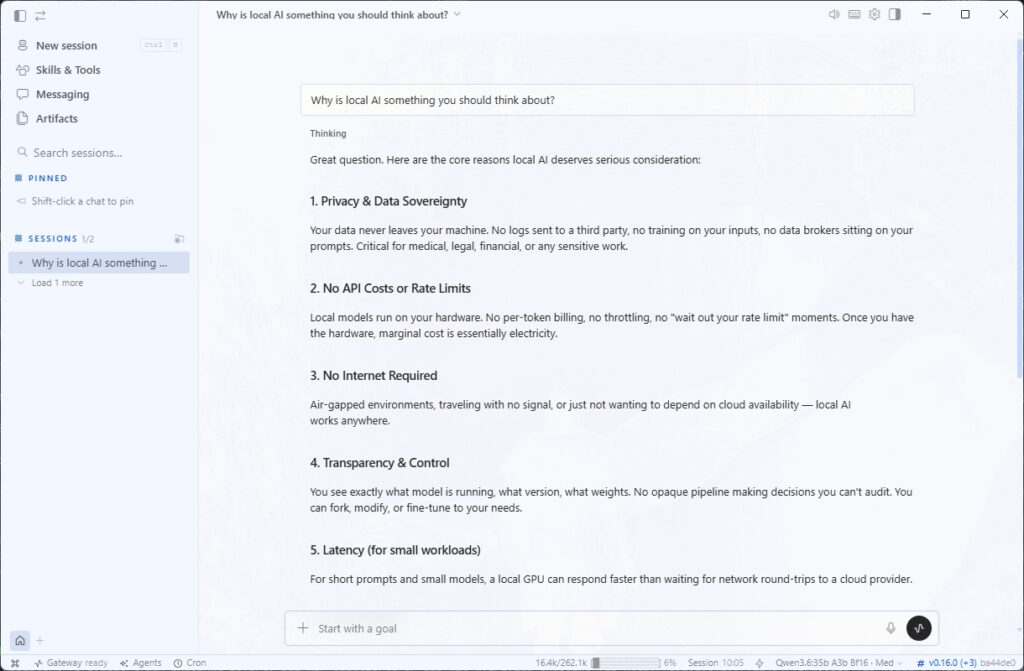
Hermes Agent Desktop App
Step 1: Installing the desktop app
You download the installer directly from the official project page. Please check there for the current version, as the download path may change over time:
Download: https://hermes-agent.nousresearch.com/desktop
On Windows, you then run the downloaded Hermes-Setup.exe and follow the installation wizard. The app installs like any other Windows program and later updates itself from within the application.
And with that, the first open question is already answered: the installation ran entirely natively on Windows. The installer sets up its own toolchain in 16 steps — uv as the package manager, Python 3.11, Git, Node.js, ripgrep, and ffmpeg — clones the Hermes repository, creates a Python virtual environment, and builds the desktop app from it. At no point was WSL2 needed or set up in the background. Unlike the previous command-line-only Hermes, the desktop app therefore runs natively on Windows.
Step 2: Connecting your own inference server
Now comes the decisive part for data sovereignty: the app does not compute anything itself but fetches the model power over the network from my own inference server. On that server, Ollama (or alternatively vLLM) provides the models via an OpenAI-compatible interface. The workstation itself does not need its own GPU.
In the app’s setup wizard, you select the “Local / custom endpoint (self-hosted)” tile among the providers and enter your server’s address — for an Ollama server, that is http://<Server-IP>:11434/v1. Nice to see: the local, sovereign path is a fully-fledged, equal provider tile here and not a hidden config hack. The option just isn’t listed as “RECOMMENDED” at the very top. Sovereignty is, after all, a deliberate choice.
The pitfall: an empty model list despite a connected endpoint
At this point I ran into a small problem that I want to spare you, because it otherwise costs unnecessary nerves. The app did report “Local / custom endpoint connected,” but at the same time demanded “Custom endpoint needs an API key – set it up to choose a model,” without offering a visible field for exactly that key. The result: the model list stayed empty, and the main model could not be set; instead, the last configured model from my Ollama inference server was loaded.
The background is quickly explained: Hermes talks to Ollama via the OpenAI-compatible interface, and that standard always formally requires an API key value, even when Ollama does not check any authentication. As long as the field stays empty, Hermes cannot retrieve the model list, and without a model list there is nothing to select. In the project’s issue tracker there are already related reports (such as issues #20815 and #16730) that describe exactly this confusion between a keyless local endpoint and a supposedly missing credential. The graphical setup path is therefore (as of v0.16.0) simply not quite perfect yet.
The solution: setting the model via PowerShell
The reliable way leads past the graphical interface, via the bundled command line. Conveniently, the CLI and the desktop app share the same configuration. Open a Windows PowerShell and start the model wizard:
Command: hermes model
In the provider list, you select the entry “Custom endpoint (enter URL manually)” (for me it was number 30). Be careful not to accidentally pick “Ollama Cloud” — that is the cloud-hosted service on ollama.com and not your own server. The wizard then guides you through the inputs:
- As the API base URL, you enter
http://<Server-IP>:11434/v1, in my casehttp://192.168.2.57:11434/v1. - For the API key, the placeholder
ollamais enough. Ollama does not check it, but the field wants a value. This placeholder is not a breach of sovereignty; it is never validated and does not leave your network. - As the API compatibility mode, you choose “Chat Completions,” because Ollama serves the endpoint
/v1/chat/completions. - After that, the wizard shows all models available on the server and you pick the one you want — in my case
qwen3.6:35b-a3b-bf16.
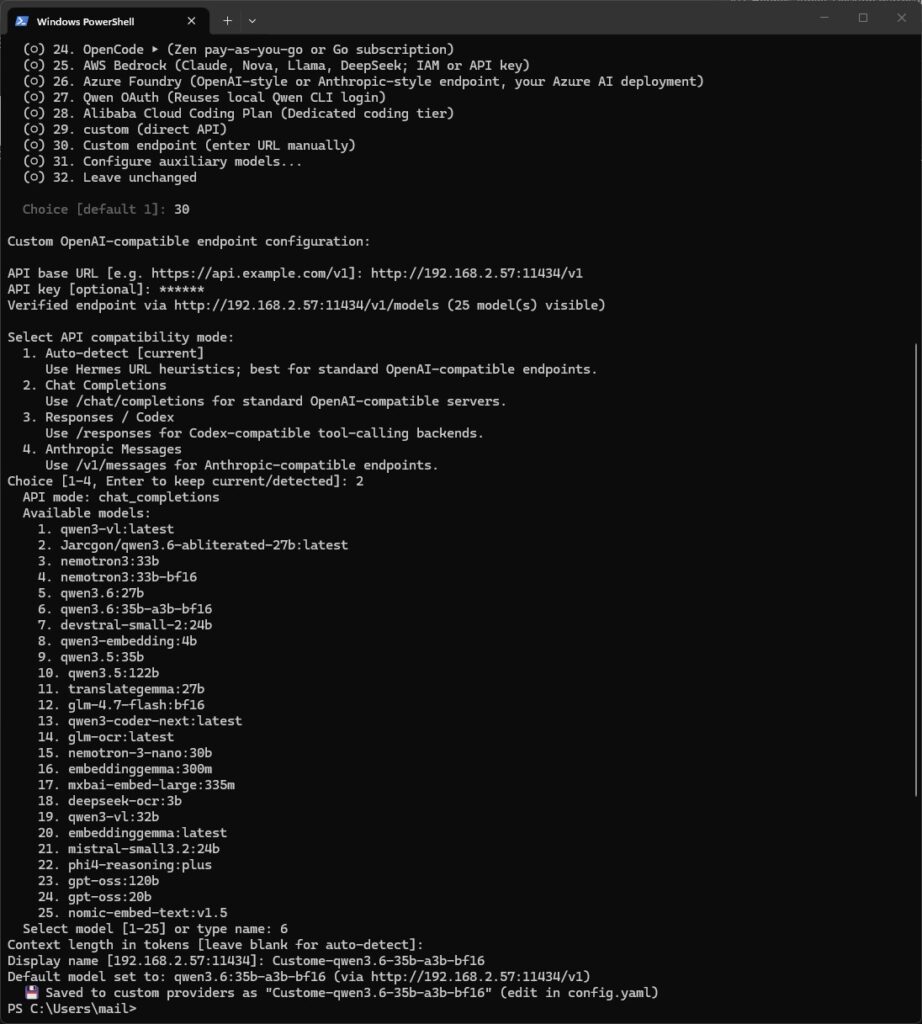
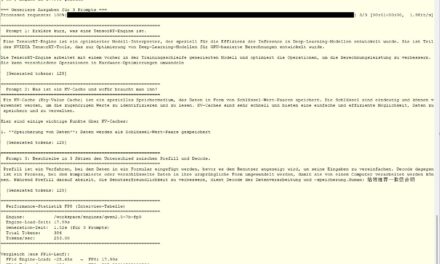
Hermes Agent Desktop App – PowerShell
The wizard verifies the endpoint immediately. For me it acknowledged this with “Verified endpoint via http://192.168.2.57:11434/v1/models (25 model(s) visible)” and saved a complete custom-provider entry into the config.yaml. To double-check, you verify the endpoint, credentials, and model in one go with another command:
Command: hermes doctor
After restarting the desktop app, the block is gone: the model appears in the status bar, can be switched there, and the agent answers via my own server. This little detour via PowerShell is currently the decisive trick at which the purely graphical setup still fails.
Why this setup is the best from a governance perspective
With this setup you get two things at once: strict separation of user contexts and central, GPU-backed model provisioning. The memory remains the model of exactly one person, the skills and conversations of different users do not mix, and each user’s API keys live exclusively in their own user context. You typically find these in the Windows user profile under C:\Users\<YourName>\.hermes. Isolation is therefore the default state and does not first have to be created via separate profiles or containers per employee.
Over the network, only the inference requests travel to my own Ollama or vLLM endpoint – that is, to infrastructure I fully control. Neither prompts nor conversation contents nor the memory leave my network in the direction of a commercial AI provider. Responsibility is also cleanly assigned: each user’s agent data is subject to the same policies as the rest of their user account, so that disk encryption, backup, and offboarding when an employee leaves automatically apply as well.
For context on the other direction: as soon as several users share the same Hermes Agent on one server, the separation of their data blurs at the profile level, because memory, skills, and credentials belong to the instance, not to the individual connected user. Anyone who deliberately wants a “team memory” shared across all users is well served by the server instance – but with the clear knowledge that there is no separation of user data there.
And one more practical note from experience: when many locally installed agents access a central inference server at the same time, true parallel operation arises. This is exactly where Ollama is not in its element – for many concurrent sessions, vLLM is the considerably more powerful choice on the central endpoint.
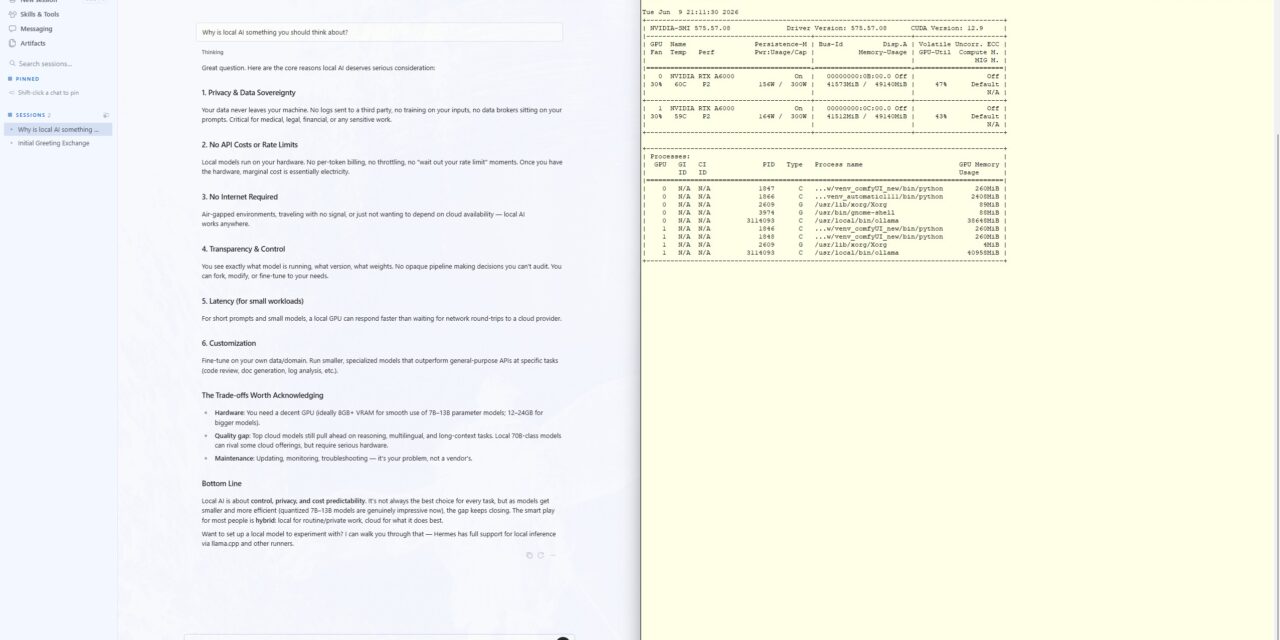
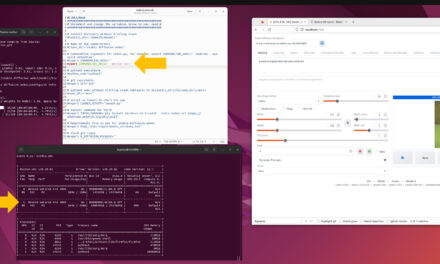
The result
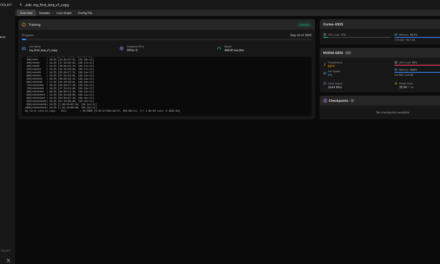
On the left, the native Hermes desktop app on Windows answering via my local model; on the right, nvidia-smi on the A6000 server shows the running Ollama processes with occupied VRAM.

Hermes Agent Desktop App – Local Inference
C:\Users\<YourName>\.hermes, and the agent answers via my local model qwen3.6:35b-a3b-bf16. That the inference actually takes place on my own server is proven by a glance at the two RTX A6000s: while the agent answers, the Ollama processes are running there and occupying the VRAM – not a single byte goes to a cloud provider. The only downside was the graphical setup of the local model, which could only be solved via the PowerShell detour shown above.Conclusion
The new desktop app makes Hermes Agent considerably more accessible for everyday use without giving up sovereignty – provided you keep the architecture in mind. The test confirms my thesis: full local installation per workstation, inference centrally on your own server. That is the clean combination of convenience, data separation, and control. The only stumbling block, the graphical model selection, you currently bypass reliably via PowerShell. How do you handle the separation of user contexts with your local agents? Let me know in the comments.


The tutorial offers a clear and practical guide for setting up and running the Tensorflow Object Detection Training Suite. Could…
This works using an very old laptop with old GPU >>> print(torch.cuda.is_available()) True >>> print(torch.version.cuda) 12.6 >>> print(torch.cuda.device_count()) 1 >>>…
Hello Valentin, I will not share anything related to my work on detecting mines or UXO's. Best regards, Maker
Hello, We are a group of students at ESILV working on a project that aim to prove the availability of…