

Anyone working with Large Language Models who also needs to analyze large volumes of documents knows the problem: simple chat interfaces are not enough when it comes to extracting and understanding specific information from PDFs, Word documents, or other file formats. For me, the solution was clear: I use RAGFlow on my X86 Ubuntu Server with two NVIDIA RTX A6000 GPUs as a professional RAG system (Retrieval-Augmented Generation) for intelligent document analysis and knowledge processing.
In this post, I will show you how I installed and configured RAGFlow on my Ubuntu Server to set up a complete RAG system for analyzing documents, PDFs, Word files, and other formats. RAGFlow combines modern RAG technology with agent capabilities and offers a professional solution for businesses of any size. The best part: the installation is done entirely via Docker and is completed in about 30-45 minutes.
The Basic Idea: Professional RAG System for Intelligent Document Analysis
Before I dive into the technical details, an important point: RAGFlow is a leading open-source RAG engine (Retrieval-Augmented Generation) that combines state-of-the-art RAG technology with agent functions to create a superior context layer for LLMs. Unlike simple chat interfaces, RAGFlow can understand complex documents, extract information, and prepare it intelligently for LLM queries. My experience shows that RAGFlow excels particularly in analyzing PDFs, Word documents, Excel files, and even scanned documents.
What makes it special: RAGFlow offers a template-based chunking method that allows documents to be segmented intelligently while preserving semantic meaning. Furthermore, RAGFlow supports grounded citations with reduced hallucinations – meaning every answer is provided with concrete source references, so you know exactly which document and section the information comes from. Installation is done via Docker Compose with pre-built containers that already include all necessary components such as Elasticsearch, MySQL, Redis, and MinIO.
What you need:
-
An X86 Ubuntu Server (20.04 or newer) with at least 4 CPU cores
-
At least 16 GB RAM (recommended: 32 GB or more for larger document collections)
-
At least 50 GB free disk space (recommended: 100 GB+ for documents and indices)
-
Two NVIDIA RTX A6000 GPUs (or other CUDA-capable GPUs) for GPU-accelerated document processing
-
Docker >= 24.0.0 installed and configured for GPU access
-
Docker Compose >= v2.26.1 installed
-
NVIDIA Container Toolkit installed
-
Basic knowledge of terminal commands, Docker, and REST APIs
-
Optional: gVisor installed if you want to use the Code Executor function (sandbox)
-
An LLM API key (OpenAI, Anthropic, or other supported LLM providers)
Phase 1: Check System Requirements
For the rest of this guide, I am assuming that you are sitting directly in front of the server or have SSH access. First, I check if all necessary system requirements are met. To do this, I open a terminal on my Ubuntu Server and run the following commands.
The following command shows you if Docker is installed:
Command: docker --version
You should see Docker 24.0.0 or newer. Next, I check Docker Compose:
Command: docker compose version
You should see Docker Compose v2.26.1 or newer.
Note: If Docker or Docker Compose is not installed, you can install Docker as follows:
First, I add the Docker GPG key:
Command: sudo apt-get update
Command: sudo apt-get install ca-certificates curl gnupg
Command: sudo install -m 0755 -d /etc/apt/keyrings
Command: curl -fsSL https://download.docker.com/linux/ubuntu/gpg | sudo gpg --dearmor -o /etc/apt/keyrings/docker.gpg
Command: sudo chmod a+r /etc/apt/keyrings/docker.gpg
Now I add the Docker repository to the Apt sources:
Command: echo "deb [arch=$(dpkg --print-architecture) signed-by=/etc/apt/keyrings/docker.gpg] https://download.docker.com/linux/ubuntu $(. /etc/os-release && echo "$VERSION_CODENAME") stable" | sudo tee /etc/apt/sources.list.d/docker.list > /dev/null
Now I install Docker Engine, Docker CLI, and Docker Compose:
Command: sudo apt-get update
Command: sudo apt-get install docker-ce docker-ce-cli containerd.io docker-buildx-plugin docker-compose-plugin
Now I enable the Docker service and add my user to the Docker group:
Command: sudo systemctl enable --now docker
Command: sudo usermod -aG docker $USER
Important: After adding yourself to the Docker group, you must log out and back in or open a new terminal for the change to take effect.
Now I check if the GPUs are recognized:
Command: nvidia-smi
You should now see both RTX A6000 GPUs. If this command fails, you must install the NVIDIA drivers first.
An important step: For Docker to access the GPUs, the NVIDIA Container Toolkit must be installed. If the following test command fails, install the toolkit as described below:
Command: docker run --rm --gpus all nvidia/cuda:12.0-base-ubuntu22.04 nvidia-smi
If this command returns an error like could not select device driver "" with capabilities: [[gpu]], you need to install the NVIDIA Container Toolkit. I use a robust method here that also works if automatic distribution detection causes problems:
First, I add the GPG key:
Command: curl -fsSL https://nvidia.github.io/libnvidia-container/gpgkey | sudo gpg --dearmor -o /usr/share/keyrings/nvidia-container-toolkit-keyring.gpg
Now I add the repository. I use the stable method provided directly by NVIDIA, which also works with Ubuntu 24.04:
Command: curl -fsSL https://nvidia.github.io/libnvidia-container/stable/deb/nvidia-container-toolkit.list | sed 's#deb https://#deb [signed-by=/usr/share/keyrings/nvidia-container-toolkit-keyring.gpg] https://#g' | sudo tee /etc/apt/sources.list.d/nvidia-container-toolkit.list
Note: If you already have a corrupted file (e.g., with HTML content instead of the package list), you can delete it first: sudo rm /etc/apt/sources.list.d/nvidia-container-toolkit.list and then run the command above again.
Now I update the package list and install the toolkit:
Command: sudo apt-get update
Command: sudo apt-get install -y nvidia-container-toolkit
After installation, I configure Docker for GPU support. I use the recommended setup command here:
Command: sudo nvidia-container-toolkit q --setup
Now I restart the Docker daemon:
Command: sudo systemctl restart docker
Now the GPU test should work:
Command: docker run --rm --gpus all nvidia/cuda:12.0-base-ubuntu22.04 nvidia-smi
This command should now show both RTX A6000 GPUs. If it still doesn’t work, check the troubleshooting section further down.
An important step for RAGFlow: I check the value of vm.max_map_count, which is important for Elasticsearch:
Command: sysctl vm.max_map_count
The value should be at least 262144. If not, I set it as follows:
Command: sudo sysctl -w vm.max_map_count=262144
To make this setting permanent, I add it to /etc/sysctl.conf:
Command: echo "vm.max_map_count=262144" | sudo tee -a /etc/sysctl.conf

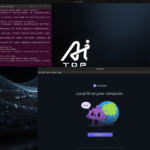
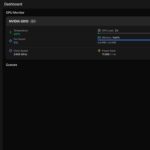
Ubuntu Server – NVIDIA-SMI RTX A6000
Phase 2: Clone RAGFlow Repository
RAGFlow runs in Docker containers that already include all necessary components. This makes installation much easier, as we don’t have to worry about Python dependencies or build processes. I simply clone the RAGFlow repository from GitHub:
Command: git clone https://github.com/infiniflow/ragflow.git
After cloning, I change into the directory:
Command: cd ragflow
Optional: If you want to use a specific version, you can switch to a stable tag:
Command: git checkout v0.23.1
This step ensures that the entrypoint.sh file in the code matches the Docker image version. For the latest version, you can skip this step.
Note: RAGFlow Docker images are built for x86 platforms. If you are working on an ARM64 platform, you must build the image yourself – for my X86 server, this is not necessary.
Phase 3: Start RAGFlow Server (Simple)
Now I start RAGFlow with the default settings to verify basic functionality. I first change to the docker directory:
Command: cd docker
By default, RAGFlow uses the CPU for DeepDoc tasks (document processing). For my server with two RTX A6000 GPUs, I want to enable GPU acceleration. To do this, I add the GPU configuration to the .env file:
Command: echo "DEVICE=gpu" | sudo tee -a .env
Now I start RAGFlow with Docker Compose:
Command: docker compose -f docker-compose.yml up -d
This command downloads all necessary container images and starts them in the background. Depending on your internet speed, the download may take a few minutes. RAGFlow uses several containers:
-
RAGFlow Main Container (with web interface and API)
-
Elasticsearch (for full-text and vector search)
-
MySQL (for metadata)
-
Redis (for caching)
-
MinIO (for object storage)
I check the status of the containers:
Command: docker compose ps
All containers should have the status “running”. To see the logs of the RAGFlow main container:
Command: docker logs -f docker-ragflow-cpu-1
You should see an output containing the following information:
        ____   ___    ______ ______ __
       / __ \ /   |  / ____// ____// /____  _      __
      / /_/ // /| | / / __ / /_   / // __ \| | /| / /
     / _, _// ___ |/ /_/ // __/  / // /_/ /| |/ |/ /
    /_/ |_|/_/  |_|\____//_/    /_/ \____/ |__/|__/

 * Running on all addresses (0.0.0.0)
Important Note: If you don’t see this confirmation and try to access RAGFlow directly, your browser might show a “network abnormal” error because RAGFlow might not be fully initialized at that point. Therefore, wait until the above output appears.
Now I can open RAGFlow in the browser. With default settings, RAGFlow is available on port 80:
URL: http://<IP-Address-Server>
Replace <IP-Address-Server> with the IP address of your server. You can find out the IP address with the following command:
Command: hostname -I
Phase 4: Configure LLM API Key
RAGFlow requires an LLM service like Ollama locally or an LLM API key from a service provider like Google or OpenAI to communicate with language models. By default, RAGFlow supports various LLM providers such as OpenAI, Anthropic, Gemini, and many more, but also classic open-source frameworks like vLLM or Ollama. I am configuring Ollama because I have it running and operate my LLMs and embedding models locally.
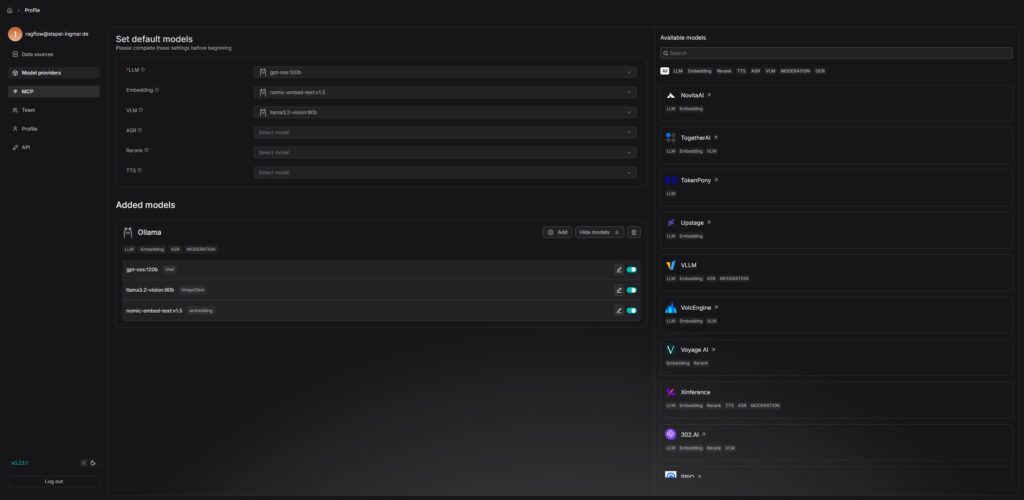
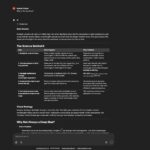
RAGFlow LLM Service setup
Note: RAGFlow also supports local LLMs via Ollama or vLLM. If you are using a local LLM server, you must adjust the corresponding configuration in the service_conf.yaml.template. You can find more information in the official RAGFlow documentation.
Phase 5: Configure RAGFlow for Production Deployment (Complex)
For production use, I want to adjust some important configurations. First, I check the .env file in the docker directory:
Command: cat docker/.env
Here you can configure important settings such as the HTTP port, MySQL passwords, and MinIO passwords. By default, RAGFlow runs on port 80. If you want to use a different port, you can edit the docker-compose.yml file:
Command: nano docker/docker-compose.yml
Look for the line 80:80 and change it to <YOUR_PORT>:80, e.g., 8080:80 for port 8080.
Another important point: RAGFlow uses Elasticsearch as the document engine by default. If you want to use Infinity instead (a faster alternative), you must first stop all containers:
Command: docker compose -f docker-compose.yml down -v
Warning: The -v parameter deletes the Docker container volumes, and all existing data will be lost. Make sure you really want to delete all data before running this command.
Then set it in the .env file:
Command: echo "DOC_ENGINE=infinity" | sudo tee -a docker/.env
And restart the containers:
Command: docker compose -f docker-compose.yml up -d
For my two RTX A6000 GPUs, I already enabled GPU acceleration in Phase 3. If you haven’t done that yet, you can do it now:
Command: echo "DEVICE=gpu" | sudo tee -a docker/.env
And restart the containers:
Command: docker compose -f docker-compose.yml restart
Phase 6: Upload and Analyze First Documents
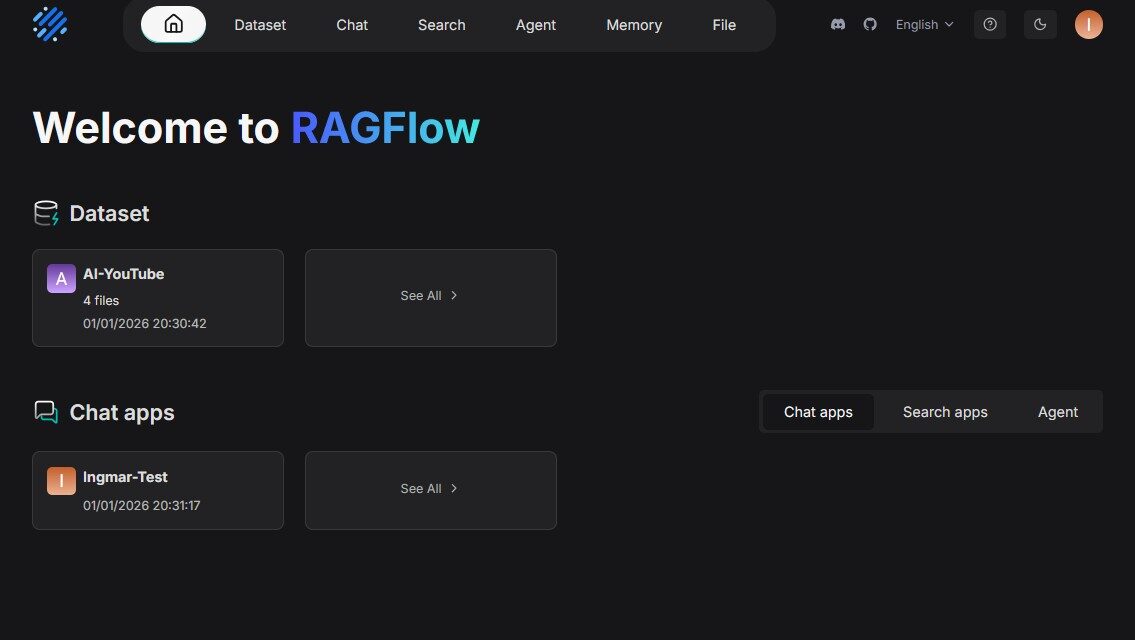
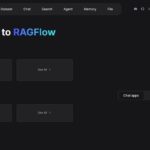
After RAGFlow has been successfully started, I can now upload and analyze the first documents. I open RAGFlow in the browser and log in (you have to create an account on the first start).
The RAGFlow user interface is very intuitive:
-
Knowledge Bases: Here you create knowledge bases for your documents
-
Upload Documents: Here you can upload PDFs, Word files, Excel files, images, and more
-
Chat: Here you can ask questions about your documents
-
Settings: Here you configure LLM settings, chunking templates, and more
For a first test, I create a new knowledge base and upload a PDF document. RAGFlow processes the document automatically, creates chunks, and indexes the content. After processing, I can ask questions about the document and receive answers with source citations.
Tip: RAGFlow supports different chunking templates that you can select depending on the document type. For technical documents, I recommend the “Technical Document” template; for general texts, the “General” template.
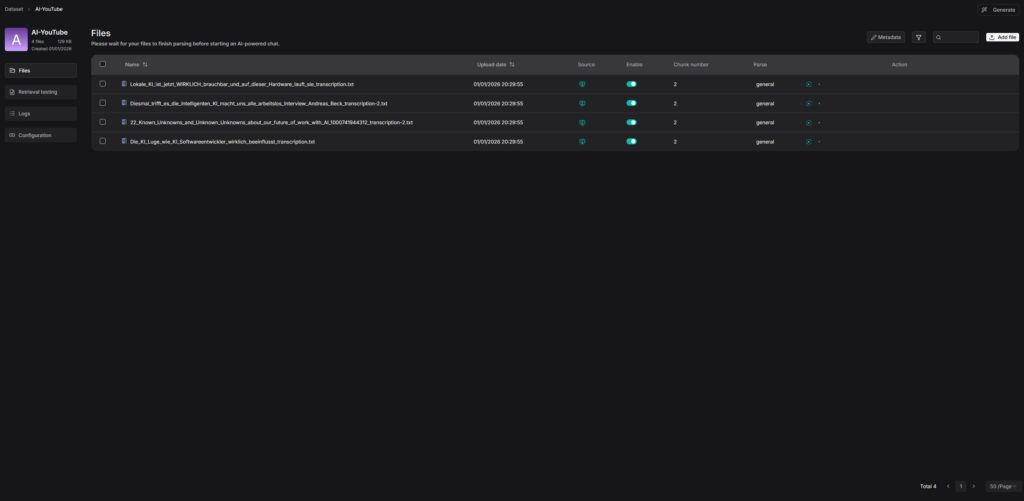
RAGFlow – dataset documents
Troubleshooting: Common Problems and Solutions
During my time with RAGFlow on the Ubuntu Server, I have encountered some typical problems. Here are the most common ones and how I solved them:
-
“vm.max_map_count” Error: Elasticsearch requires an increased value for
vm.max_map_count. Set it to at least 262144 withsudo sysctl -w vm.max_map_count=262144and add it to/etc/sysctl.confso the setting persists after a restart. -
Containers do not start: Check the logs with
docker compose logs. Often the problem is due to missing environment variables or port conflicts. Also check if port 80 is already being used by another service. -
GPU is not recognized: If the command
docker run --rm --gpus all nvidia/cuda:12.0-base-ubuntu22.04 nvidia-smireturns an error likecould not select device driver "" with capabilities: [[gpu]], even thoughnvidia-smiworks on the host, the NVIDIA Container Toolkit is missing. Install it using the commands from Phase 1 and then runsudo nvidia-container-toolkit q --setupandsudo systemctl restart docker. Important: After restarting Docker, you may need to log out and back in or open a new terminal. -
Error during apt-get update after NVIDIA Container Toolkit installation: If
apt-get updateshows errors like “404 Not Found” or HTML content in the error message, the repository list was not created correctly. This often happens if the distribution variable was not set correctly. Solution: Delete the faulty file withsudo rm /etc/apt/sources.list.d/nvidia-container-toolkit.listand then use the stable path from Phase 1:curl -fsSL https://nvidia.github.io/libnvidia-container/stable/deb/nvidia-container-toolkit.list | sed 's#deb https://#deb [signed-by=/usr/share/keyrings/nvidia-container-toolkit-keyring.gpg] https://#g' | sudo tee /etc/apt/sources.list.d/nvidia-container-toolkit.list. After that,sudo apt-get updateshould work again. -
LLM API Key Error: Check the
service_conf.yaml.templatefile and ensure the API key is entered correctly. After making changes, you must restart the containers. -
Memory Problems: RAGFlow requires enough RAM for Elasticsearch. For larger document collections, I recommend at least 32 GB RAM. Check memory usage with
docker stats. -
Documents are not processed: Check the logs of the RAGFlow container with
docker logs -f docker-ragflow-cpu-1. Often the problem is due to missing LLM API keys or network problems when accessing external LLM services. -
Firewall blocks access: If a firewall is active, you must open port 80 (or your configured port):
sudo ufw allow 80or corresponding iptables rules.
Managing Containers
To check the status of all containers:
Command: docker compose ps
To stop all containers (without deleting them):
Command: docker compose -f docker-compose.yml stop
To start all containers:
Command: docker compose -f docker-compose.yml start
To remove all containers (but keep volumes):
Command: docker compose -f docker-compose.yml down
To remove all containers and volumes (deletes all data):
Command: docker compose -f docker-compose.yml down -v
To show the logs of a specific container:
Command: docker logs -f docker-ragflow-cpu-1
To see the resource usage of all containers:
Command: docker stats
Rollback: Removing RAGFlow again
If you want to completely remove RAGFlow from the server, run the following commands on the system:
First, stop all containers:
Command: cd ragflow/docker
Command: docker compose -f docker-compose.yml down -v
If you also want to remove the container images:
Command: docker images | grep ragflow
Command: docker rmi <IMAGE_ID>
To also remove unused Docker containers and images:
Command: docker system prune -a
If you also want to remove the cloned repository:
Command: cd ~
Command: rm -rf ragflow
Important Note: These commands remove all RAGFlow containers, images, and data. Make sure you really want to remove everything and have backed up important data before running these commands.
Summary & Conclusion
Installing RAGFlow on my Ubuntu Server with two NVIDIA RTX A6000 GPUs is surprisingly straightforward. In about 30-45 minutes, I set up a complete RAG system that can analyze complex documents and answer intelligent questions.
What excites me in particular: The performance of the two RTX A6000 GPUs is fully utilized, and the Docker-based installation makes the setup much easier than a manual installation. RAGFlow offers a professional solution for document analysis suitable for both small teams and larger enterprises.
I also find it particularly practical that RAGFlow works with template-based chunking, which significantly improves the quality of document processing and allows companies to establish a kind of standard for themselves via these templates. The grounded citations with source references make it easy to trace back which document and section the information came from – this is especially important for trustworthy AI applications.
For teams or developers who need a professional RAG system, RAGFlow is a perfect solution: a central server with full GPU power where documents can be intelligently analyzed and searched. The intuitive web interface makes it easy to upload documents and ask questions, while the API allows for seamless integration into existing applications.
If you have questions or encounter problems, feel free to check the official RAGFlow documentation or the RAGFlow GitHub repository. The community is very helpful, and most problems can be solved quickly.
Next Step: Advanced Configuration and Integration
You have now successfully installed RAGFlow and analyzed your first documents. The basic installation works, but that’s just the beginning. The next step is configuration for your specific requirements.
RAGFlow offers many configuration options for production use: creating custom chunking templates, configuring various LLM providers locally or publicly, setting up API integrations, or managing multiple knowledge bases for different projects. The documentation shows you how to optimize these settings for your workloads.
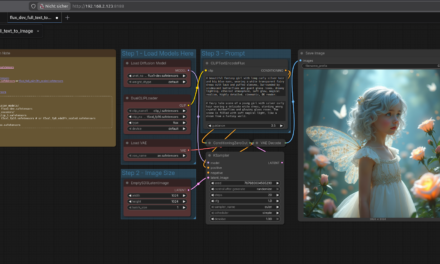
I also find the agent functions of RAGFlow particularly interesting, which allow for creating complex workflows and processing documents automatically. With support for Confluence, S3, Notion, Discord, and Google Drive, RAGFlow can also be connected directly to existing data sources.
Good luck experimenting with RAGFlow on your Ubuntu Server. I’m excited to see what applications you develop with it! Let me and my readers know here in the comments.

The tutorial offers a clear and practical guide for setting up and running the Tensorflow Object Detection Training Suite. Could…
This works using an very old laptop with old GPU >>> print(torch.cuda.is_available()) True >>> print(torch.version.cuda) 12.6 >>> print(torch.cuda.device_count()) 1 >>>…
Hello Valentin, I will not share anything related to my work on detecting mines or UXO's. Best regards, Maker
Hello, We are a group of students at ESILV working on a project that aim to prove the availability of…