

After showing you in the last post how to install Ollama on the Gigabyte AI TOP ATOM and configure it for network access, the next logical step follows: a user-friendly chat interface that everyone in the network can use. Open WebUI is exactly that – a self-hosted, extensible AI interface that works completely offline and integrates directly with Ollama.
In this post, I will show you how I installed Open WebUI on my Gigabyte AI TOP ATOM and configured it to be accessible throughout the entire network. Together with the already running Ollama server, you will then have a complete chat solution – similar to ChatGPT, but locally hosted and powered by your own GPU. Since the system is based on the same platform as the NVIDIA DGX Spark, the official NVIDIA playbooks work just as reliably here. For my reports here on my blog, I received the Gigabyte AI TOP ATOM from the Munich-based company MIFCOM.
The Basic Idea: A ChatGPT-like Interface for Your Own Network
Before I dive into the technical details, an important point: Open WebUI is a web application that runs via Docker and includes an integrated Ollama server. This means you can either use your already installed Ollama server or use the integrated Ollama. I am using the integrated Ollama here because it is easier to manage and everything runs in one container.
The installation is done via Docker, which means everything is cleanly isolated and easy to remove. Open WebUI then runs on port 8080 (or another port of your choice) and is accessible from any computer in the network via the browser. No complex configuration, no API calls via cURL – just open it in the browser and chat.
What you need for this:
-
A Gigabyte AI TOP ATOM (or NVIDIA DGX Spark) connected to the network
-
Docker installed and functional (standard in DGX OS)
-
Terminal access to the AI TOP ATOM (via SSH or directly)
-
A computer in the same network with a modern browser
-
Basic knowledge of Docker and terminal commands
-
Enough storage space for the container image and model downloads (recommended: at least 50 GB free)
Phase 1: Configure Docker Permissions
First, I ensure that I can execute Docker commands without sudo. This makes the work much easier. I open a terminal on my AI TOP ATOM and test Docker access:
Command: sudo docker ps
If you receive an error message like “permission denied while trying to connect to the Docker daemon socket” as seen in my image below, you must add your user to the Docker group:
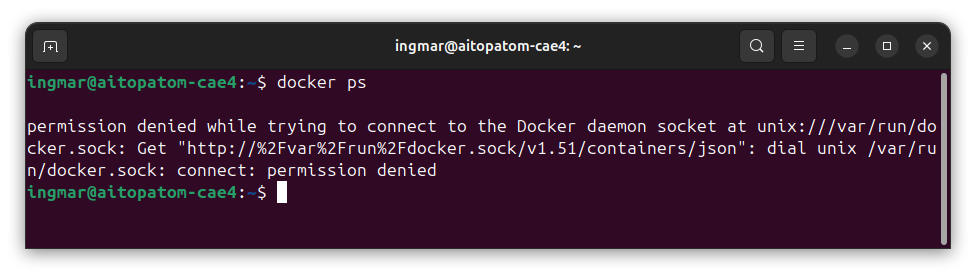
GIGABYTE AI TOP ATOM – docker
Command: sudo usermod -aG docker $USER
Command:newgrp docker
The command newgrp docker activates the new group membership immediately without you having to log in again. I test again with docker ps – it should now work without errors.
Phase 2: Download Open WebUI Container Image
Now I download the Open WebUI container image. I use the main version due to the fact that I have installed Ollama alreday, and I will use that installed version of Ollama for my setup:
Command: docker pull ghcr.io/open-webui/open-webui:main
Depending on the internet speed, the download can take a few minutes – the image is about 2-3 GB. I just let the download run and do something else in the meantime.
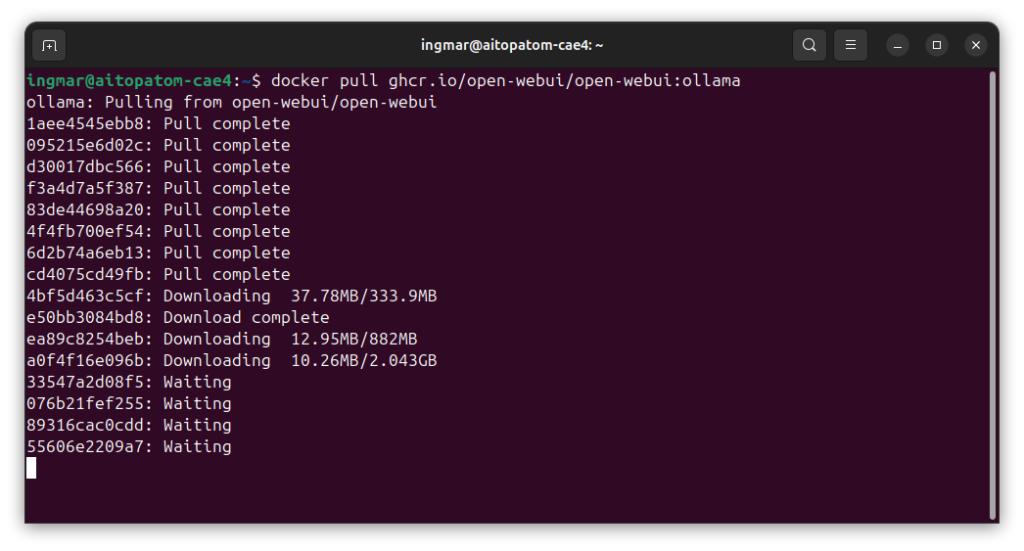
GIGABYTE AI TOP ATOM – Open-WebUI-docker
Note: I had many download interruptions with the following message:
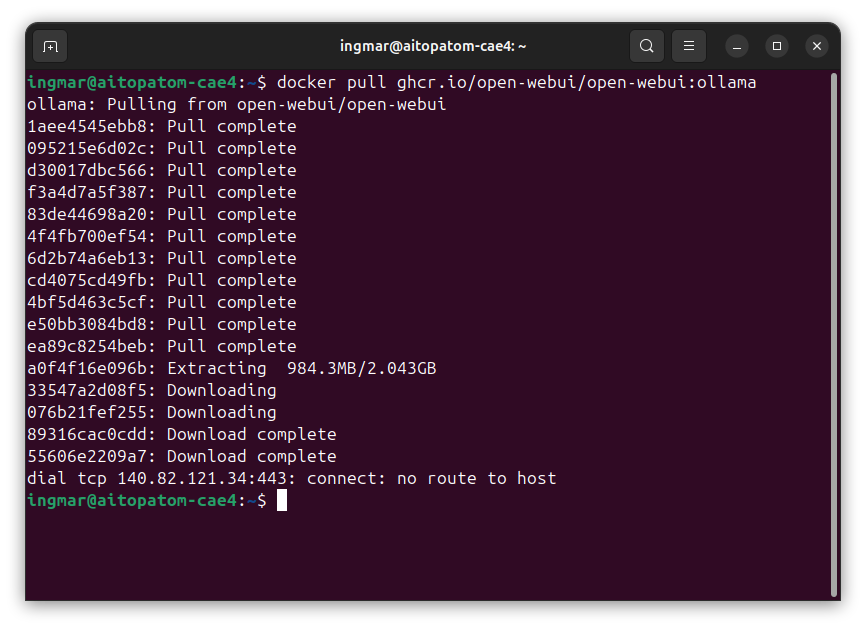
GIGABYTE AI TOP ATOM – Open-WebUI docker error
My solution attempt, which was successful, was to limit the maximum number of parallel downloads to 1 download. To do this, execute the following command:
Command: sudo nano /etc/docker/daemon.json
With this command, you create a new daemon.json file with the following content:
{
"max-concurrent-downloads":1
}
For the adjustment to take effect, restart the Docker service with the following command:
Command: sudo systemctl restart docker
Afterwards, I didn’t get the error anymore and was able to successfully download Open WebUI for Ollama.
When the download is complete, you will see a message like “Status: Downloaded newer image for ghcr.io/open-webui/open-webui:ollama”.
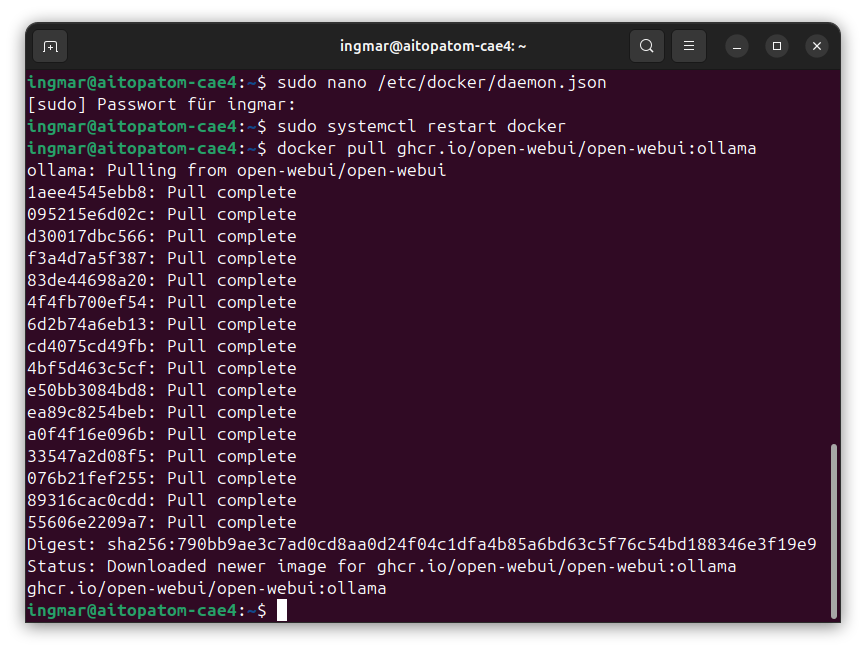
GIGABYTE AI TOP ATOM – Open-WebUI docker success
Phase 3: Start Open WebUI Container
Now I start the Open WebUI container. It is important here to configure the port so that it is accessible in the network. I use port 3000, but you can choose another port if this one is already occupied:
Command: docker run -d -p 0.0.0.0:3000:8080 --add-host=host.docker.internal:host-gateway -v open-webui:/app/backend/data --name open-webui --restart always ghcr.io/open-webui/open-webui:main
Let me explain the parameters:
-
-d: Container runs in the background (detached mode) -
-p 0.0.0.0:3000:8080: Port mapping – port 8080 of the container is mapped to port 8080 of the host and is accessible with 0.0.0.0 via the intranet from all computers. -
--add-hos: This parameter adds an entry to the internal/etc/hostsfile of the container. It tells the container: “When you call the addresshost.docker.internal, forward the request to the IP address of the host gateway (your DGX).” -
-v open-webui:/app/backend/data: Persistent volume for Open WebUI data (chats, settings) -
-v open-webui-ollama:/root/.ollama: Persistent volume for downloaded models --name open-webui: Name of the container for easy management
After starting, the container should be running. I check this with:
Command:docker ps
You should see the “open-webui” container in the list. If not, check the logs with docker logs open-webui to see what went wrong.
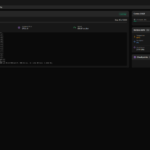
Check the logs of the container using the following command to see if the backend has actually started:
Command: docker logs -f open-webui
Phase 4: Configure Network Access (optional)
By default, Open WebUI should already be accessible in the network since we exposed port 8080. I had no problems, but here are some tips on what you can do. I first check the IP address of my AI TOP ATOM:
Command:hostname -I
I note the IP address (e.g., 192.168.1.100). If a firewall is active, I must open port 8080:
Command:sudo ufw allow 8080
Now I open a browser on another computer in the network and navigate to http://192.168.1.100:8080 (again with your IP address). The Open WebUI interface should open.
Important Note: During the first start, it can take a few minutes for the page to load. Open WebUI initializes and may download initial models. Simply wait and reload the page if necessary.
Phase 5: Create Administrator Account
Once the Open WebUI interface has loaded, you will see a welcome page. I click the “Get Started” button at the bottom of the screen.
Now I must create an administrator account. This is a local account that only applies to this Open WebUI installation – no connection to external services. I fill out the form:
-
Username (e.g., “admin” or your name)
-
Email address (optional, but recommended)
-
Password (choose a secure password, as the server is accessible in the network)
After clicking “Register” or “Create Account”, I should be redirected directly to the main interface. If you see error messages, check the container logs with docker logs open-webui.
Set Up Connection to Ollama
Now you need to establish the connection to your Ollama installation under the settings of Open WebUI. You do this as follows.
To do this, click on Settings -> Administration and open the Connections entry. I then entered the IP address of my AI TOP ATOM followed by the port as seen in the following image. After restarting the computer, everything worked perfectly.
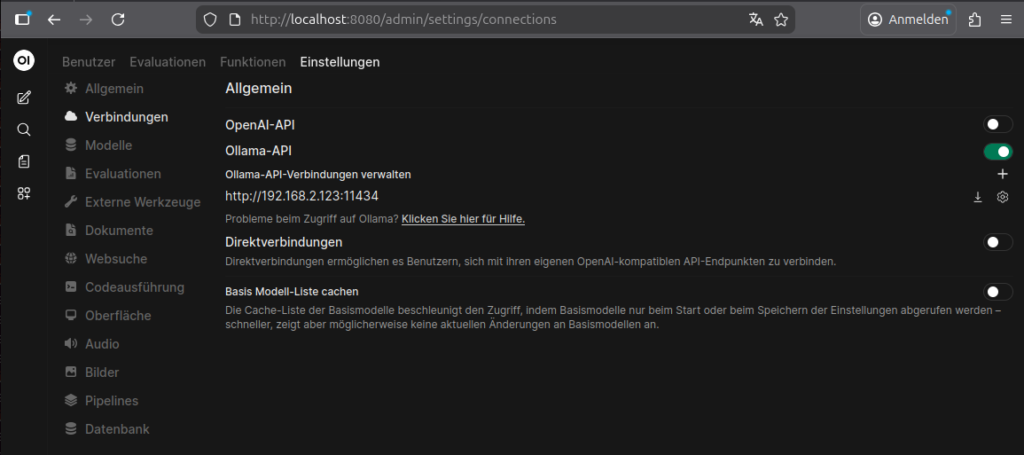
GIGABYTE AI TOP ATOM – Open-WebUI ollama connection
Phase 6: Test Your First Chat Message
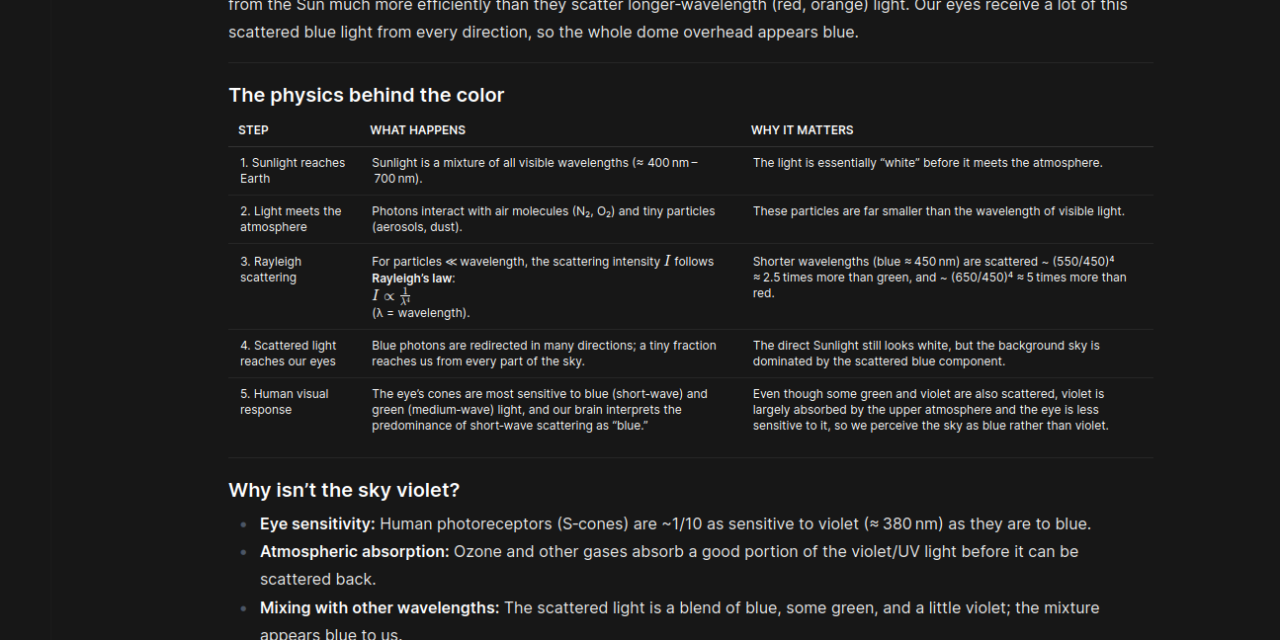
Now I can finally chat! I type into the chat input field at the bottom of the interface: “Why is the sky blue?” and press Enter. At the top left, a language model that you have already downloaded with Ollama should already be selected.
The model should now generate an answer. You see the answer in real-time as it is written – just like with ChatGPT. The GPU of the AI TOP ATOM works in the background and calculates the answer. Depending on the model size and complexity of the request, this may take a few seconds.
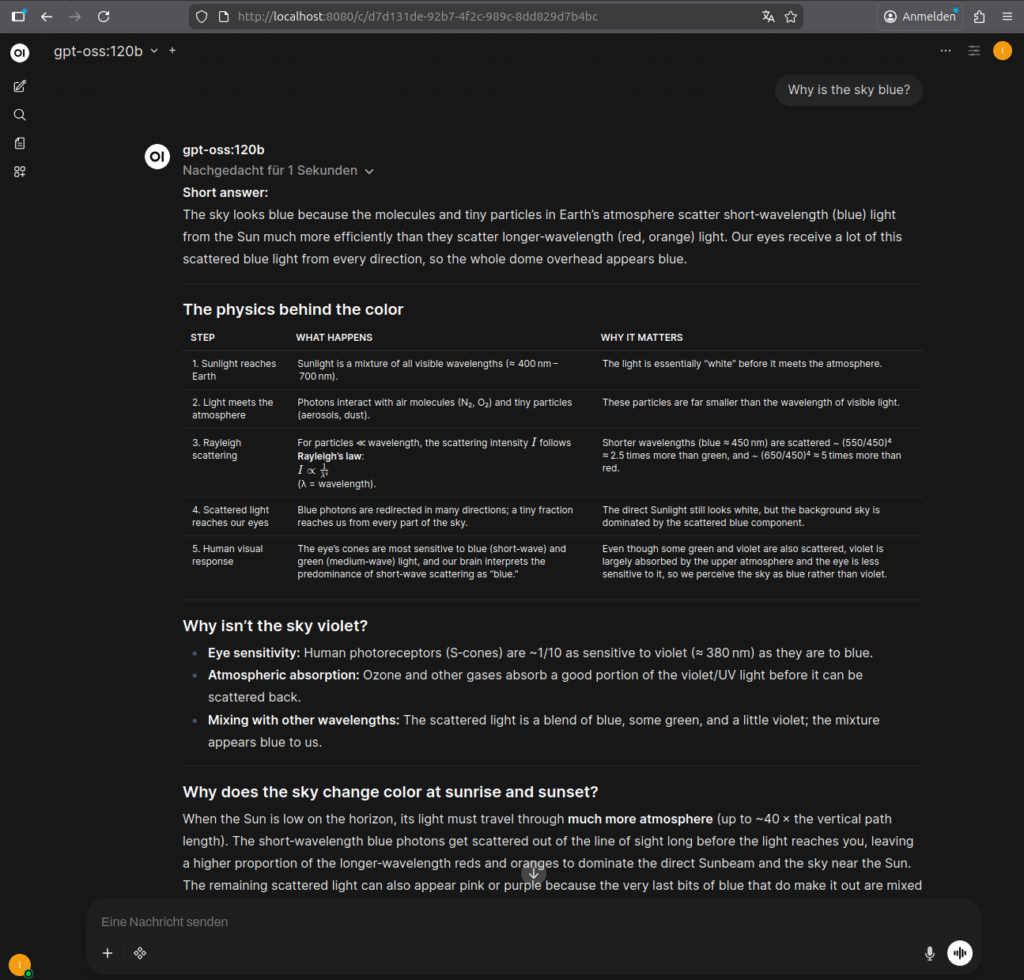
GIGABYTE AI TOP ATOM – Open-WebUI Interface
If everything works, you now have a complete chat solution that can be used by any computer in the network. Just open the IP address of the AI TOP ATOM in the browser and get started!
Trying Out More Models
The beauty of Open WebUI is the wide selection of available models. Via the model dropdown, you can download more models from the Ollama Library. For example, I have also tested the following models:
-
llama3.1:8b – Very versatile and fast
-
codellama:13b – Excels at code generation
-
qwen2.5:32b – Optimized for Blackwell GPUs, very powerful
-
phi3.5:3.8b – Compact and fast, perfect for simpler tasks
Each model has its strengths. Just try out which one best fits your requirements. The models are stored in the persistent volume, so you don’t have to download them again every time the container restarts.
Container Management: Start, Stop, Restart
If you want to stop the container (e.g., to free up resources), use:
Command:docker stop open-webui
To start it again:
Command:docker start open-webui
To restart the container:
Command:docker restart open-webui
To check the status:
Command:docker ps -a | grep open-webui
The persistent volumes remain intact even if the container is stopped. All chats, settings, and downloaded models are preserved.
Troubleshooting: Common Problems and Solutions
During my time with Open WebUI on the AI TOP ATOM, I encountered some typical problems. Here are the most common ones and how I solved them:
-
“Permission denied” with Docker commands: The user is not in the Docker group. Execute
sudo usermod -aG docker $USERand restart the terminal session. -
Page does not load in browser: Check if the container is running with
docker ps. During the first start, it can take a few minutes. Also check the logs withdocker logs open-webui. -
Model download fails: Check the internet connection and available storage space. You can check the storage space with
df -h. - Port 8080 already occupied: Use a different port, e.g.,
-p 8081:8080in the docker run command. Then Open WebUI is accessible under port 8081. -
Slow inference: The model might be too large for the available GPU memory. Try a smaller model or check the GPU usage with
nvidia-smi. -
Access from the network does not work: Check the firewall settings and ensure that the port is open. Also check if both computers are in the same network.
Updating the Container
If Open WebUI displays an update notification or you want to use the latest version, update the container as follows:
Command:
docker stop open-webui
docker rm open-webui
docker pull ghcr.io/open-webui/open-webui:ollama
docker run -d -p 0.0.0.0:8080:8080 -v open-webui:/app/backend/data -v open-webui-ollama:/root/.ollama --name open-webui ghcr.io/open-webui/open-webui:ollama
The persistent volumes remain intact, so all your data, chats, and models are available even after the update.
Rollback: Removing Everything Again
If you want to completely remove Open WebUI, execute the following commands:
Command:docker stop open-webui
Command:docker rm open-webui
To also remove the container image:
Command: docker rmi ghcr.io/open-webui/open-webui:ollama
To also remove the persistent volumes (Attention: All chats, settings, and models will be lost!):
Command: docker volume rm open-webui open-webui-ollama
Important Note: Removing the volumes deletes all your data, chats, and downloaded models. Make sure you really want to remove everything before executing these commands.
Summary & Conclusion
Installing Open WebUI on the Gigabyte AI TOP ATOM is surprisingly straightforward thanks to Docker. In less than 20 minutes, I had a complete chat solution running that can be used by any computer in the network. I spent the most time figuring out that on the DGX Spark platform, apparently only one download is allowed to run during a docker pull, and not 3 in parallel as set by default. After this adjustment as described above, everything ran without problems.
What particularly excites me: The combination of Open WebUI and the integrated Ollama works together seamlessly. No complex configuration, no API calls – just open it in the browser and chat. The GPU performance of the Blackwell architecture is fully utilized, and the answers come quickly and precisely.
I also find the persistent volumes particularly practical: all chats, settings, and models are preserved even when the container is restarted. This makes management much easier than with a manual installation.
For teams or families, this is a perfect solution: a central server with full GPU power that everyone can access via the browser. No local installations needed, no complex configurations – just open the IP address in the browser and get started.
If you have questions or encounter problems, feel free to check the official NVIDIA DGX Spark documentation, the Open WebUI documentation, or the Ollama documentation. The community is very helpful, and most problems can be solved quickly.
Good luck experimenting with Open WebUI on your Gigabyte AI TOP ATOM – I’m excited to see what interesting chats and applications you develop with it!


The tutorial offers a clear and practical guide for setting up and running the Tensorflow Object Detection Training Suite. Could…
This works using an very old laptop with old GPU >>> print(torch.cuda.is_available()) True >>> print(torch.version.cuda) 12.6 >>> print(torch.cuda.device_count()) 1 >>>…
Hello Valentin, I will not share anything related to my work on detecting mines or UXO's. Best regards, Maker
Hello, We are a group of students at ESILV working on a project that aim to prove the availability of…