

Anyone experimenting with Large Language Models knows the problem: local hardware is often insufficient to run larger models smoothly. For me, the solution was clear: I use a Gigabyte AI TOP ATOM with its powerful Blackwell GPU as a dedicated Ollama server in the network. This allows all computers in my local network to access the Ollama API and use the full GPU power without each individual machine having to install the models locally. For my experience report here on my blog, I was loaned the Gigabyte AI TOP ATOM by the company MIFCOM.
In this post, I will show you how I installed Ollama on my Gigabyte AI TOP ATOM and configured it so that Ollama is accessible throughout the entire network. Since the system is based on the same platform as the NVIDIA DGX Spark, the official NVIDIA playbooks work just as reliably here. The best part: the installation is done in 10-15 minutes and is completely usable in the network.
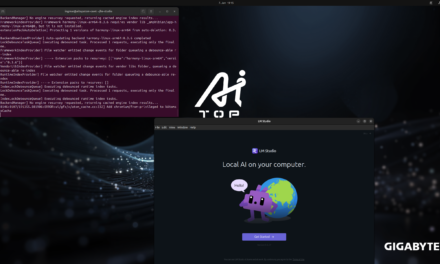
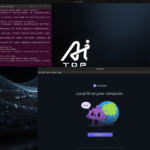
GIGABYTE AI TOP ATOM – OLLAMA logo
The Basic Idea: Central Ollama Server for the Entire Network
Before I dive into the technical details, an important point: with this configuration, Ollama runs directly on the Gigabyte AI TOP ATOM and utilizes the full GPU performance of the Blackwell architecture. I configure Ollama to listen on all network interfaces and expose port 11434 in the local network. This way, all computers in my network – whether laptop, desktop, or other devices – can directly access the Ollama API and use the models without each computer needing to install them locally, which is often not possible due to the hardware requirements of such open-source LLMs.
This is particularly practical for teams or if you have several PCs in use in your household or small company. The goal is to set up a central server with full GPU power that everyone in your own network can access. Since I personally see the greatest benefit in locally operated LLMs, I’m starting with this first. Of course, with this setup, you should ensure that your network is trustworthy, as the Ollama API is accessible without authentication. For a private home network or a small protected company network, however, this is still a perfect solution to get started.
What you need:
-
A Gigabyte AI TOP ATOM, ASUS Ascent, MSI EdgeXpert (or NVIDIA DGX Spark) connected to the network
-
A connected monitor or terminal access to the AI TOP ATOM
-
A computer on the same network for API testing
-
Basic knowledge of terminal commands and cURL (for API testing)
-
The IP address of your AI TOP ATOM in the network (found with
ip addrorhostname -I)
Phase 1: Installing Ollama on the Gigabyte AI TOP ATOM
For the rest of this guide, I’m assuming you’re sitting directly in front of the AI TOP ATOM with a monitor, keyboard, and mouse connected. First, I check if CUDA and possibly Ollama are already installed. To do this, I open a terminal on my AI TOP ATOM and execute the following two commands once.
The following command shows you if the CUDA Toolkit is already installed.
Command: nvidia-smi
You should now see the following view in the terminal window.
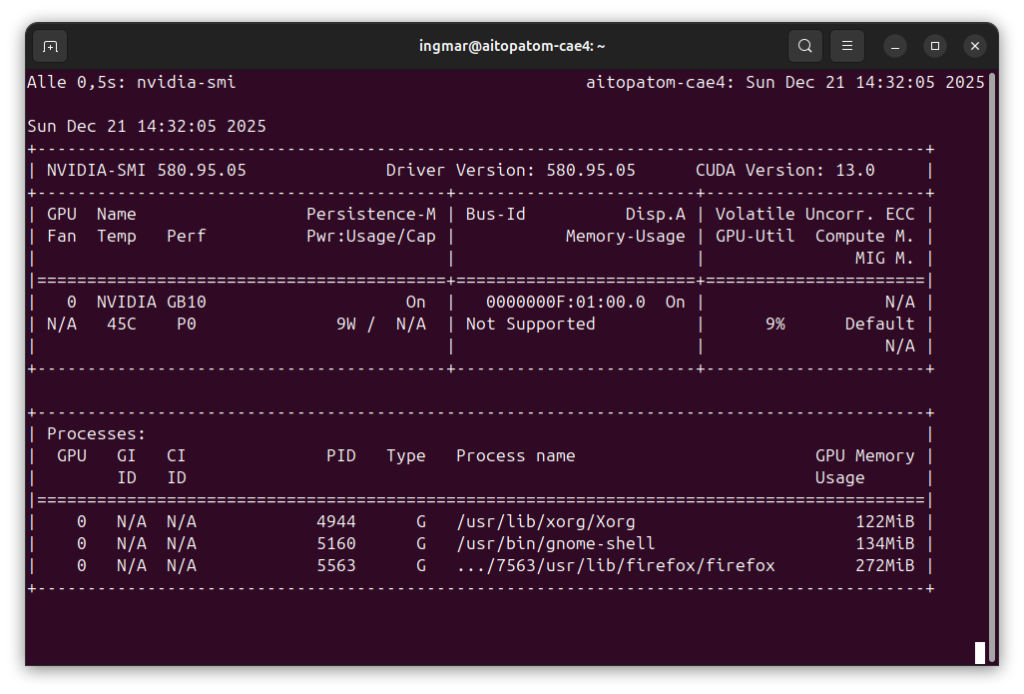
GIGABYTE AI TOP ATOM – NVIDIA-SMI
With this command, you can check if ollama might already be installed.
Command: ollama --version
If you see a version number with the Ollama command, you can jump directly to Phase 3. If the command returns “command not found,” you first need to install Ollama on your system.
The installation is very simple. I use the official Ollama installation script:
Command: curl -fsSL https://ollama.com/install.sh | sh
The script downloads the latest version and installs both the Ollama binary and the service components. The beauty here is that Ollama was provided specifically for the NVIDIA platform. So the command is the same for both the x86 world and the ARM world. I simply wait until the installation is complete – it usually only takes a few minutes. The output will then show you that everything was successfully installed.
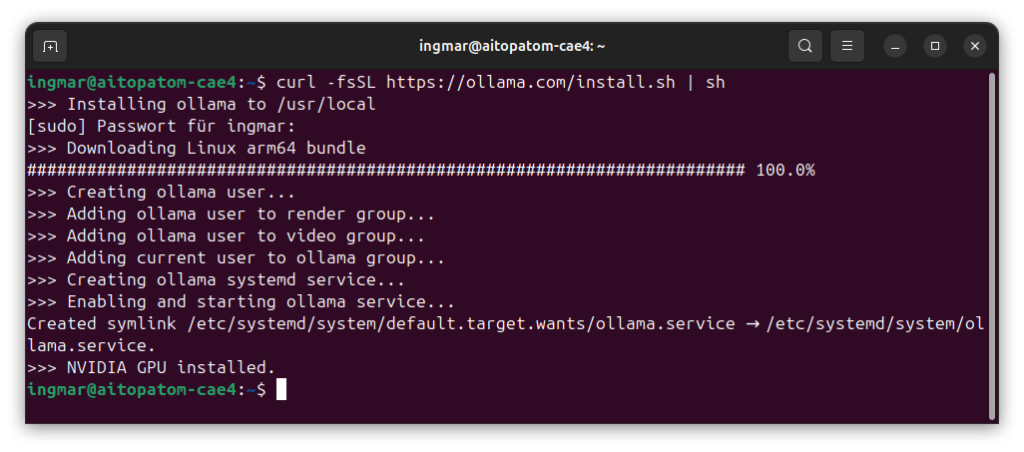
GIGABYTE AI TOP ATOM – Ollama installation
Phase 2: Downloading the first Language Model
After the installation, I download a language model. For the Blackwell GPU on the AI TOP ATOM, I recommend Qwen2.5 32B, as this model is specifically optimized for the Blackwell architecture and fully utilizes the GPU performance. The following command downloads the model and then makes it available in Ollama itself.
Command: ollama pull qwen2.5:32b
You should also install the following three models as I find them very good.
Command: ollama pull nemotron-3-nano
Command: ollama pull qwen3-vl
Command: ollama pull gpt-oss:120b
Depending on your internet speed, the download of the models may take a few minutes. The models vary in size and took up approx. XXX GB of storage for me. You will see a progress bar during the download. If everything was successful, the output should look something like this:

GIGABYTE AI TOP ATOM – Ollama pull qwen 2.5
Important Note: Make sure there is enough storage space available on your AI TOP ATOM. If the download fails with a storage error, you can also use smaller models like qwen2.5:7b, which require significantly less space.
To list all downloaded models, the following command is available to you:
Command: ollama list
Here is how the overview of the language models provided by Ollama looks for me now.
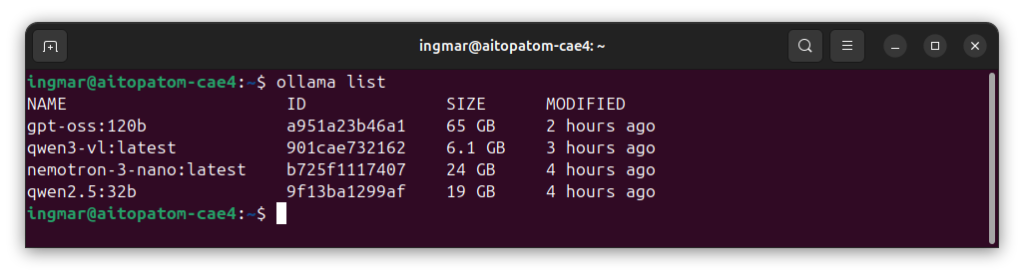
GIGABYTE AI TOP ATOM – Ollama list
Phase 3: Configuring Ollama for Network Access
Now comes the crucial step: I configure Ollama so that it is accessible throughout the network. By default, Ollama only listens on localhost, which means only requests from the AI TOP ATOM itself, i.e., the IP address 127.0.0.1, are accepted. To allow access from the entire network, including from other IP addresses, the environment variable OLLAMA_HOST must be set.
First, I check the current IP address of my AI TOP ATOM in the network:
Command: hostname -I
Or alternatively:
Command: ip addr show | grep "inet "
I note down the IP address (e.g., 192.168.2.100). Now I configure Ollama so that it listens on all network interfaces of the machine. To do this, I edit the systemd service file:
Command: sudo systemctl edit ollama
This command opens an editor. I insert the following configuration:
[Service]
Environment="OLLAMA_HOST=0.0.0.0:11434"
 The configuration should now look as shown in the following image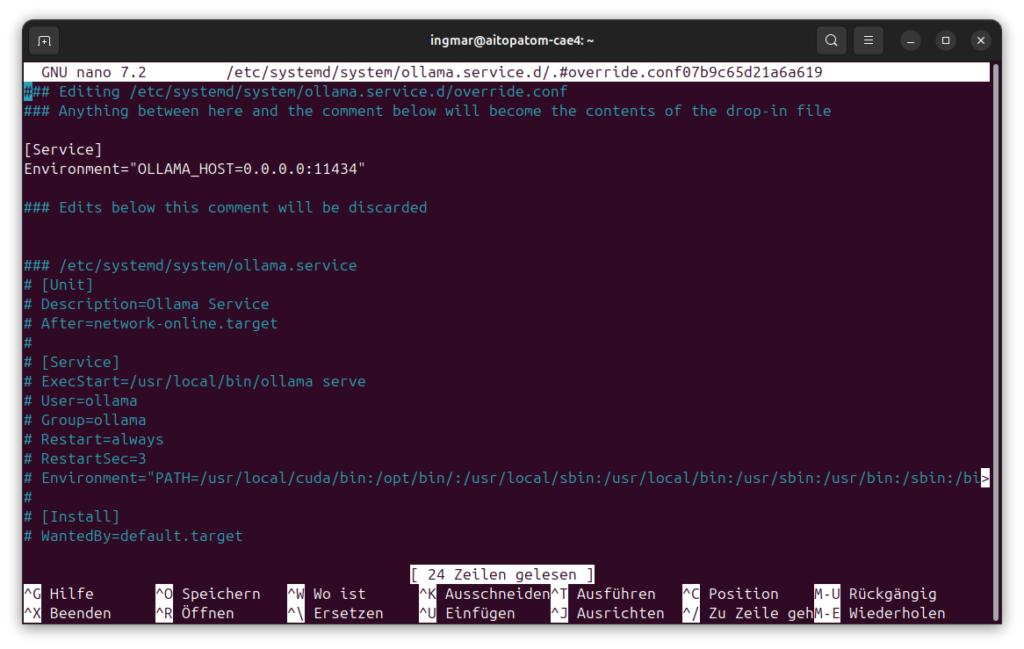
GIGABYTE AI TOP ATOM – Ollama network-access
The configuration OLLAMA_HOST=0.0.0.0:11434 means that Ollama listens on all network interfaces on port 11434. I save the file and restart the Ollama service:
Command: sudo systemctl daemon-reload
Command: sudo systemctl restart ollama
To check if Ollama is now accessible in the network, I test the following URL in the browser from another computer in the network:
Command: http://<IP-Address-AI-TOP-ATOM>:11434/api/tags
Replace <IP-Address-AI-TOP-ATOM> with the IP address of your AI TOP ATOM. If you get back a list of available models, the network configuration is working correctly.
Phase 4: Testing API Access from the Network
Now I can access the Ollama API from any computer in my network. To test if everything works, I execute the following command from another machine in the network (again using your IP address of the machine on which Ollama is running):
curl http://192.168.2.100:11434/api/chat -d '{
  "model": "qwen2.5:32b",
  "messages": [{
    "role": "user",
    "content": "Write me a haiku about GPUs and AI."
  }],
  "stream": false
}'
If everything is configured correctly, I should get back a JSON response that looks something like this:
curl http://192.168.2.100:11434/api/chat -d '{
  "model": "qwen2.5:32b",
  "created_at": "2024-01-15T12:30:45.123Z",
  "message": {
    "role": "assistant",
    "content": "Silicon flows through circuits\nDreams become reality\nAI comes to life"
  },
  "done": true
}'
If you get an error message like “Connection refused”, check the following:
-
Is the IP address correct? Check with
hostname -Ion the AI TOP ATOM -
Is Ollama running? Check with
sudo systemctl status ollama -
Is the firewall active? If so, you need to open port 11434:
sudo ufw allow 11434 -
Are both computers on the same network?
Phase 5: Testing further API Endpoints
To ensure everything is fully working, I test further API functions. First, I list all available models (again with your IP address):
Command: curl http://192.168.2.100:11434/api/tags
This should show me all downloaded models. Then I test streaming, which is particularly useful for longer responses:
curl -N http://192.168.1.100:11434/api/chat -d '{
  "model": "qwen2.5:32b",
  "messages": [{"role": "user", "content": "Why does the sky look blue when no clouds are visible?"}],
  "stream": true
}'
With stream: true you see the answer in real-time as it is generated. This is particularly practical when you generate longer texts and don’t want to wait until everything is finished.
Trying out other Models
The great thing about Ollama is the large selection of available models. After successful installation, you can download more models from the Ollama Library. For example, I have also tested the following models:
Command:ollama pull llama3.1:8b
Command:ollama pull codellama:13b
Command:ollama pull phi3.5:3.8b
Each model has its strengths: Llama3.1 is very versatile, CodeLlama shines at code generation, and Phi3.5 is compact and fast. Just try out which model best suits your requirements. That’s exactly the beauty of this setup.
Troubleshooting: Common Problems and Solutions
In my time with Ollama on the AI TOP ATOM, I have encountered some typical problems. Here are the most common ones and how I solved them:
-
“Connection refused” when accessing from the network: Check if Ollama is listening on all interfaces (
sudo systemctl status ollamashows the environment variables). If not, check the service configuration and restart Ollama. -
Firewall blocking access: Port 11434 must be open in the firewall. Open with
sudo ufw allow 11434or corresponding iptables rules. -
Model download fails with storage error: Not enough storage space on the AI TOP ATOM. Either free up space or use a smaller model like
qwen2.5:7b. -
Ollama command not found after installation: The installation path is not in the PATH. Restart the terminal session or run
source ~/.bashrcor restart the computer. -
API returns “model not found” error: The model was not downloaded or the name is incorrect. Use
ollama listto see all available models. -
Slow inference on the AI TOP ATOM: The model is too large for the GPU memory. Either use a smaller model or check the GPU memory with
nvidia-smi.
Rollback: Deactivating Network Access again
If you want to make Ollama available only locally again (only from localhost), remove the service override file:
Command: sudo rm /etc/systemd/system/ollama.service.d/override.conf
Command: sudo systemctl daemon-reload
Command: sudo systemctl restart ollama
Ollama will then run only on localhost again and will no longer be accessible from the network.
Rollback: Deleting Ollama again
If you want to completely uninstall Ollama from the AI TOP ATOM, execute the following commands on the system:
Command: sudo systemctl stop ollama
Command:sudo systemctl disable ollama
Command:sudo rm /usr/local/bin/ollama
Command:sudo rm -rf /usr/share/ollama
Command:sudo userdel ollama
Important Note: These commands remove all Ollama files and also all downloaded models. Make sure you really want to remove everything before executing these commands.
Summary & Conclusion
Installing Ollama on the Gigabyte AI TOP ATOM is surprisingly straightforward thanks to compatibility with NVIDIA DGX Spark playbooks. In less than 15 minutes, I have a fully functional Ollama server running that is accessible throughout the network.
What particularly excites me: The performance of the Blackwell GPU is fully utilized, and all computers in my network can now access the same GPU power. This is particularly practical for teams or if you have multiple devices – everyone can use the models without having to install them locally.
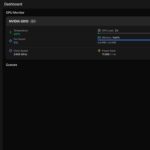
I also find it particularly practical that I can monitor the GPU and system utilization during inference via the DGX Dashboard. This way, I see exactly how resources are being used when multiple clients access the server simultaneously.
For everyone who wants to dive deeper: The Ollama API can be easily integrated into your own applications. Whether Python, JavaScript, or another language – the REST API is universally applicable. I use it, for example, for automated text generation, code assistance, and even for chatbots.
If you have any questions or encounter problems, feel free to check the official NVIDIA DGX Spark documentation or the Ollama documentation. The community is very helpful, and most problems can be solved quickly.
Next Step: Open WebUI for a user-friendly Chat Interface
You have now successfully installed Ollama and exposed it in the network. The API works, but for many users, a graphical user interface is much more practical than API calls via cURL. In the next blog post, I will show you how to install and configure Open WebUI on your Gigabyte AI TOP ATOM.
Open WebUI is a self-hosted, extensible AI interface that works completely offline. Together with Ollama, you will then have a complete chat solution for your network similar to ChatGPT, but locally hosted and with your own GPU power. The installation is done via Docker and is, I hope, just as straightforward as the Ollama installation. You can then access a nice chat interface from any computer in the network via the browser, select models, and chat directly with the LLMs. The great thing about it is that Open WebUI has user management. This way, the chat histories of individual users are separated from each other and, if I remember correctly, you can also create teams to access the same chat histories and uploaded documents in groups again.
Stay tuned for the next post – in this one too, I’ll show you step-by-step how to set up Open WebUI and connect it to your already running Ollama server!
Good luck experimenting with Ollama on your Gigabyte AI TOP ATOM. I’m excited to see what applications you develop with it! Let me and my readers know here in the comments.


The tutorial offers a clear and practical guide for setting up and running the Tensorflow Object Detection Training Suite. Could…
This works using an very old laptop with old GPU >>> print(torch.cuda.is_available()) True >>> print(torch.version.cuda) 12.6 >>> print(torch.cuda.device_count()) 1 >>>…
Hello Valentin, I will not share anything related to my work on detecting mines or UXO's. Best regards, Maker
Hello, We are a group of students at ESILV working on a project that aim to prove the availability of…