

In my four-part TensorRT-LLM series I showed how I optimize inference performance on the RTX A6000 Ada — 251 tokens/sec with Qwen-2.5-7B in FP8, deployable .engine files, all cleanly reproducible. But in doing so, I had only built one part of the stack: the inference layer.
Inspired by the ever-present GenAI agent publications, it became clear to me: a production AI stack consists of multiple layers. Inference is only one of them. Above it sits the orchestrator — the layer that decides which tool gets called when, that does multi-step reasoning, that produces the actual agent behavior.
NVIDIA has released the NeMo Agent Toolkit (NAT) as an open-source library for exactly this. In this post I’ll show you how I installed NAT on my Ubuntu 24.04 server — cleanly isolated in a Python venv, with my existing Ollama setup as the backend — and how I got my first ReAct agent up and running. Including two non-trivial pitfalls that I’d rather spare you.
Here’s the link to the NeMo Agent Toolkit: https://github.com/NVIDIA/NeMo-Agent-Toolkit
What is this actually about?
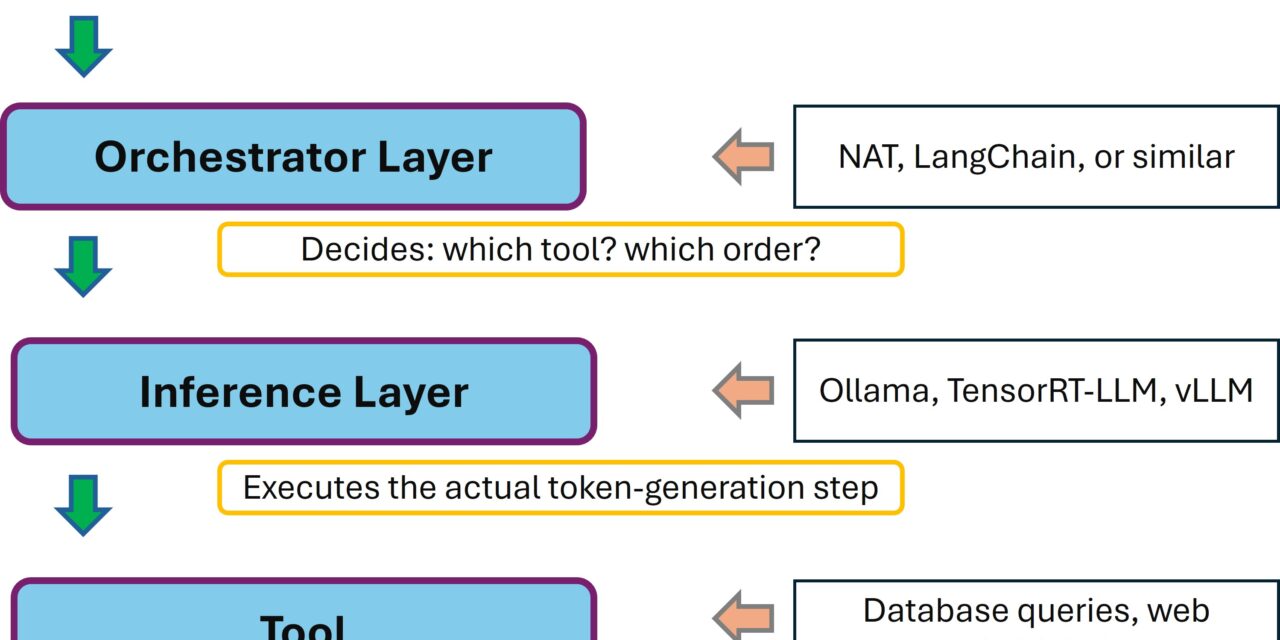
An agent in the modern LLM context is more than a chatbot. A chatbot gets a question and answers it. An agent gets a task and decides on its own which tools to call, in which order, and when it has enough information for a final answer. The classic pattern is called ReAct (Reason + Act): the model thinks, picks an action (tool call), observes the result, thinks again — until it has a finished answer.
At the architectural level, it looks like this:
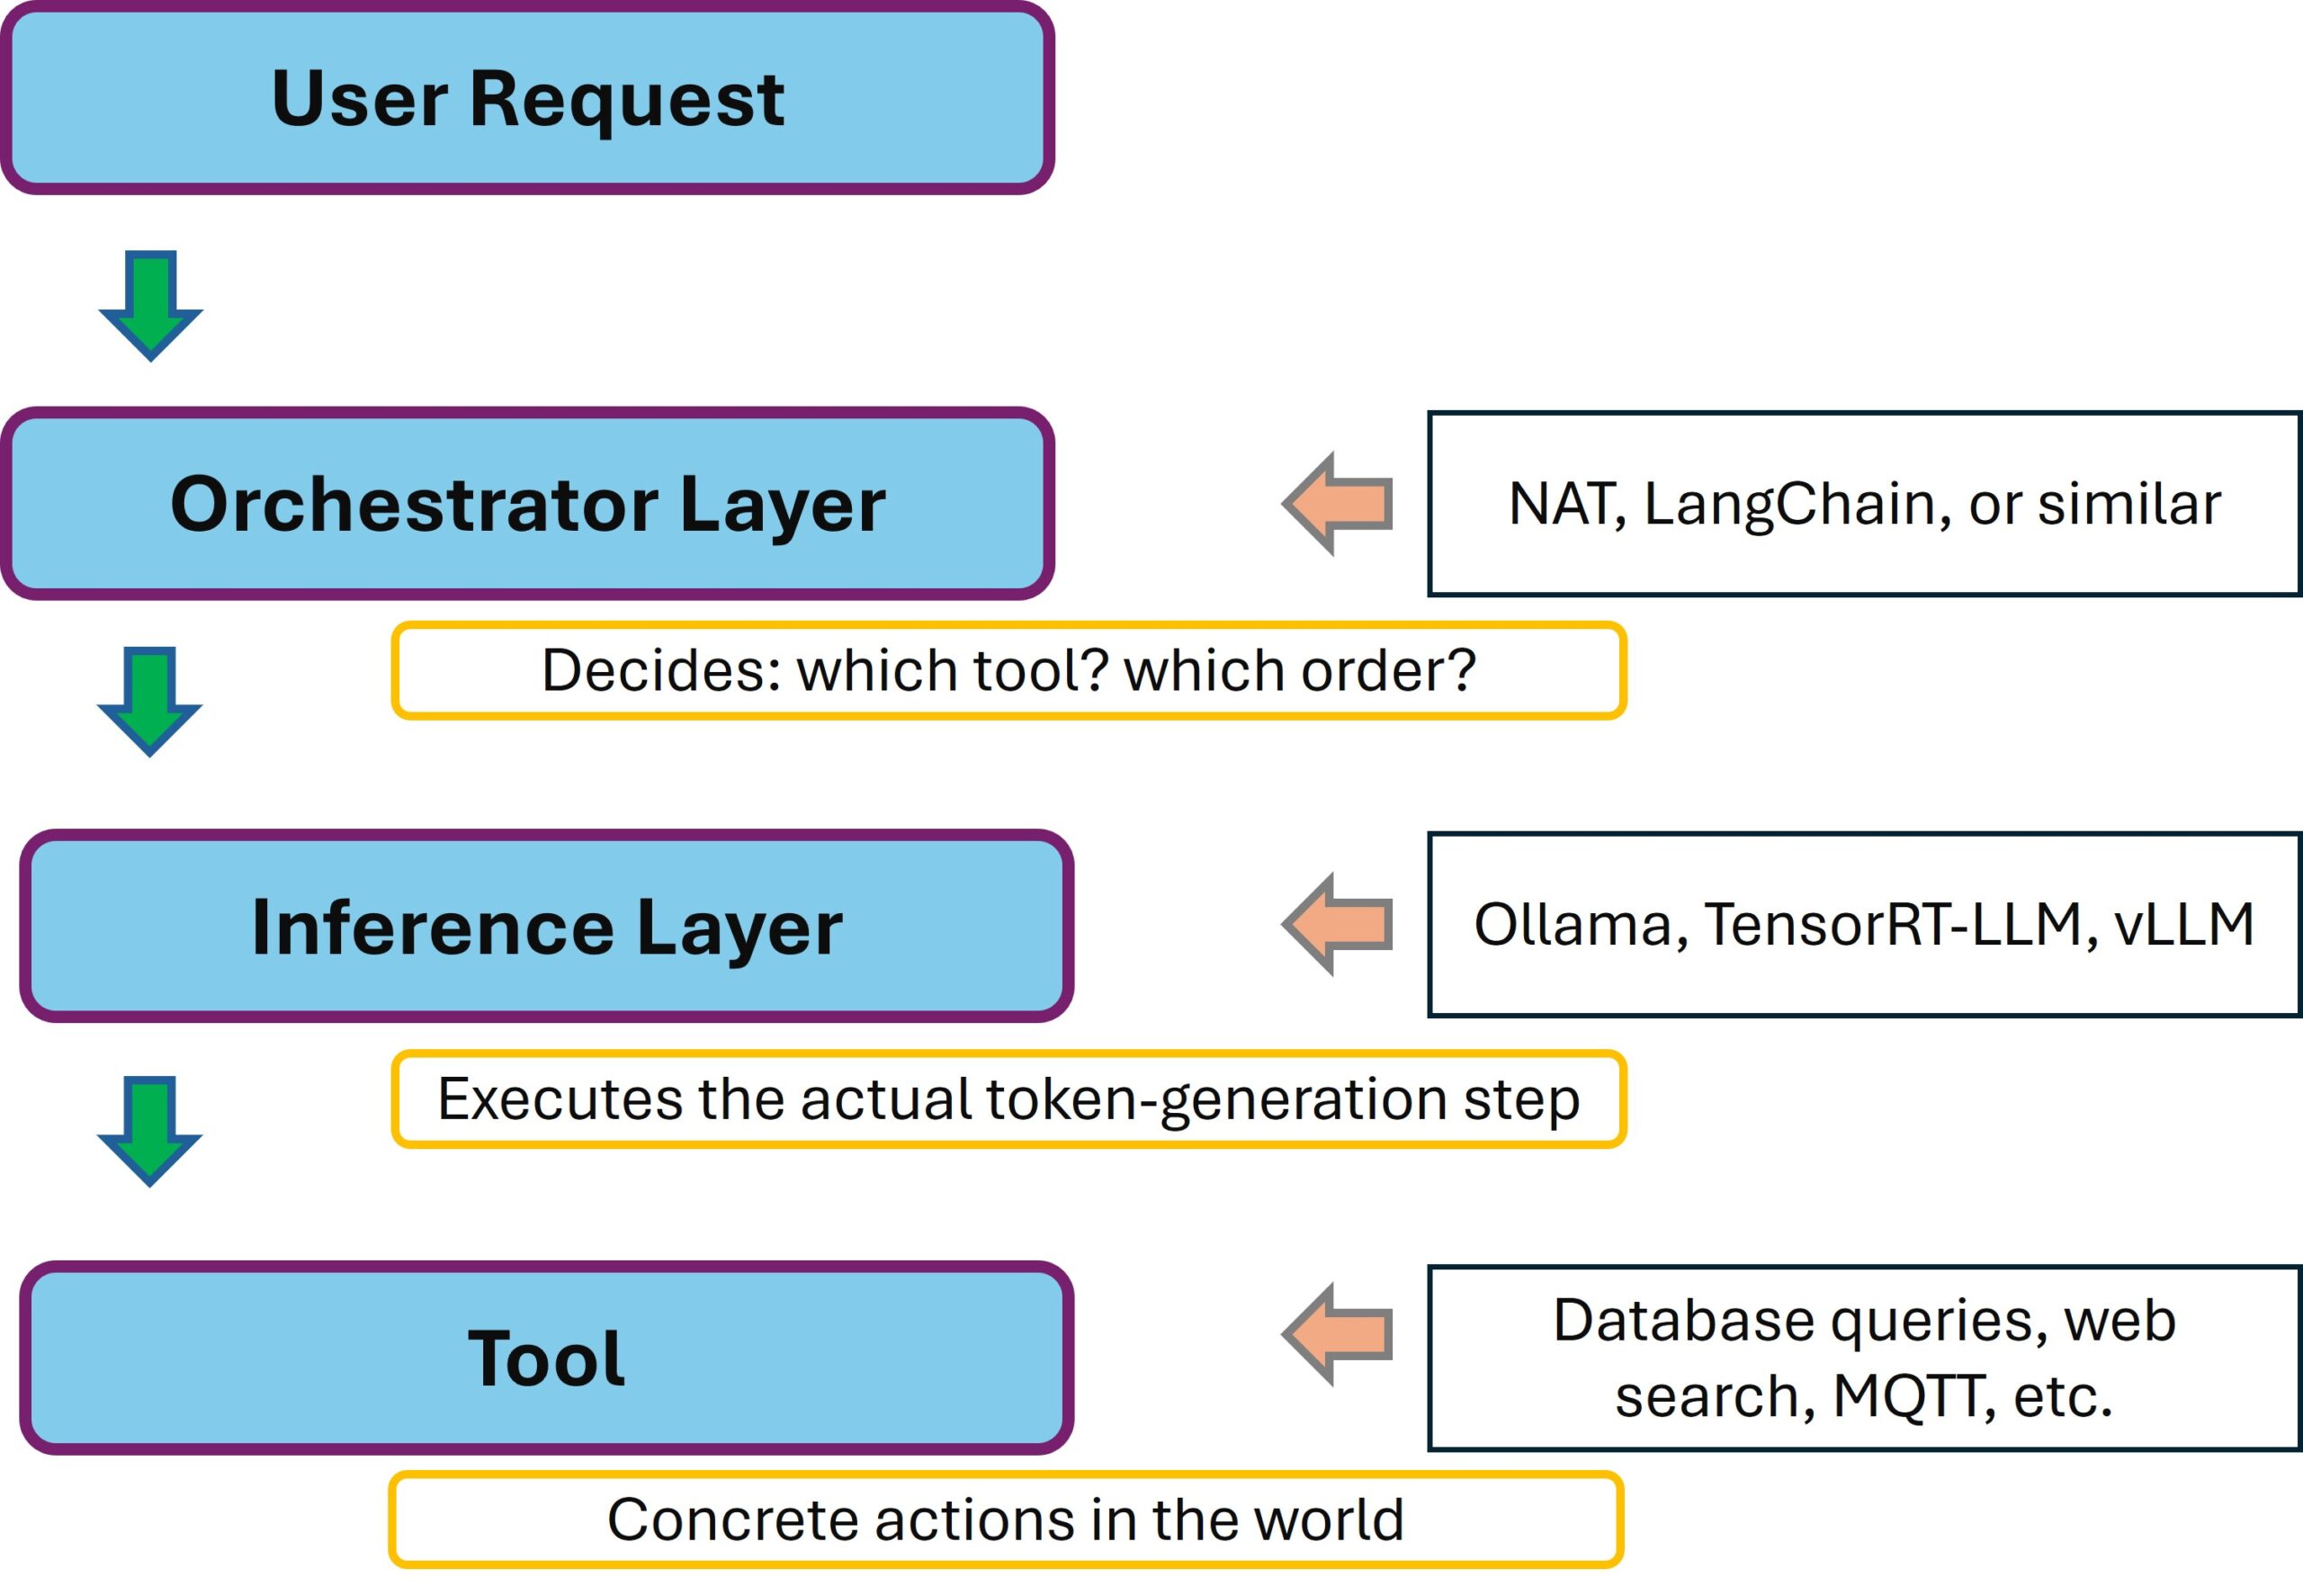
NVIDIA NeMo Agent Toolkit – Architecture
NAT is explicitly built to be framework-agnostic: you can hang LangChain, LlamaIndex, CrewAI or even custom frameworks behind it. And the inference layer is decoupled via the OpenAI-compatible API. That’s a very flexible architecture — what’s hanging underneath doesn’t matter to NAT at all. Ollama, vLLM, TensorRT-LLM, or an NVIDIA NIM — as long as it speaks OpenAI format, it works.
Prerequisites
This guide assumes that your server is already fundamentally prepared for AI inference. If not, work through my foundation post first: Preparing an Ubuntu 24.04 server for AI inference.
Specifically you need:
- Ubuntu 24.04 LTS
- An NVIDIA GPU (I use the RTX A6000 Ada — for 7B models in 4-bit quantization any card with at least 8 GB VRAM will do)
- Ollama already running with
qwen2.5:7b-instructin the model cache (or any other model of your choice) - Python 3.11, 3.12 or 3.13 on the host — system Python on Ubuntu 24.04 is Python 3.12, which is fine
- Internet connection for the initial package downloads (about 1.5 GB)
Architecture overview: what runs where?
Before we get started, a quick look at the clean separation of components. On my server, multiple layers coexist with different isolation mechanisms:
| Component | Where it runs | Why there |
|---|---|---|
| NVIDIA drivers, CUDA, Docker | System-wide | Needed by all applications, no isolation required |
| Ollama | System service (systemctl) | Daemon character, listens on port 11434 |
| TensorRT-LLM | Docker container (NGC image) | Complex dependency stack → container isolates it |
| NeMo Agent Toolkit (NAT) | Python venv on the host | Medium complexity — venv is sufficient |
| Custom tools (Python) | In the same venv as NAT | Direct access to NAT API |
The key point: NAT doesn’t need a container because it’s a pure Python library. But it absolutely needs its own Python environment because its roughly 80 to 120 dependencies would otherwise collide with other Python projects or system tools. The NAT documentation explicitly warns against conda, by the way. So I use vanilla venv.
Step 1: Install uv
uv is a modern Python package manager that is about 10-100x faster than pip. The NVIDIA documentation explicitly recommends it as the preferred option for the NAT installation. A series of commands now needs to be executed. Step by step.
Command: curl -LsSf https://astral.sh/uv/install.sh | sh
Command: source ~/.bashrc
Command: uv --version
On my system uv ends up at ~/.local/bin/uv, and the version line looks something like: uv 0.x.x. If the verification fails, the installer typically ended up in the wrong place — a source ~/.profile or a fresh terminal helps.
Step 2: Create the directory structure
I create my own project directory for NAT, separate from my other AI projects. The advantage: I can later have any number of agent projects running in parallel without their dependencies getting in each other’s way.
Command: mkdir -p ~/nat-playground/configs
Command: mkdir -p ~/nat-playground/tools
Command: cd ~/nat-playground
The eventual directory structure looks like this:
~/nat-playground/
├── .venv/                     # Own Python environment (Step 3)
├── configs/                   # YAML workflow configurations
└── tools/                     # Custom tools (Python modules)
Step 3: Create a Python venv for NAT
Now we create the virtual Python environment. With uv this happens in a single step, and I’m still amazed how easy it is:
Command: uv venv --python 3.12 --seed .venv
Command: source .venv/bin/activate
The --seed flag ensures that pip is installed inside the venv as well, which simplifies plugin installations. You can tell the venv is active by the (.venv) in the shell prompt.
What happens here? A venv is basically just a directory with its own python binary (often a symlink to the system Python), its own site-packages folder, and an activation script. When activated, the shell PATH is manipulated so that when python or pip is called, the venv binaries are found first. These install packages into the venv-owned site-packages folder — completely isolated from the system, which is exactly what we want.
Advantage: if I break the installation, I just delete .venv/ and start over. The system Python remains untouched.
Step 4: Install the NeMo Agent Toolkit
With the venv active, I install NAT with the LangChain plugin. LangChain is the standard framework bridge and is needed for the ReAct agent:
Command: uv pip install "nvidia-nat[langchain]"
The command pulls about 80-120 packages — LangChain, Pydantic, httpx, openai client and quite a bit more. With uv the installation took about 5-10 minutes for me.
Now let’s check whether NAT has actually been installed.
Command: nat --version
Command: nat info components -t llm_provider
The second command lists the available LLM providers. You should see at least openai and nim in the list. The openai provider is the one we’ll use for Ollama. It works with any OpenAI-compatible endpoint.
Step 5: Verify the Ollama OpenAI API
Since version 0.1.24, Ollama provides an OpenAI-compatible endpoint at /v1. A quick function test before we connect NAT to it. It’s important that your Ollama inference server is running and reachable:
Command: curl http://localhost:11434/v1/chat/completions -H "Content-Type: application/json" -d '{
"model": "qwen2.5:7b-instruct",
"messages": [{"role":"user","content":"Answer with OK."}],
"max_tokens": 10
}'
If you get back a JSON response with "OK" in the content field, everything is ready.
Note: If NAT is supposed to run on a different machine than Ollama, Ollama must listen on all interfaces.
Step 6: First agent workflow configuration
NAT workflows are defined in YAML files. We start with a minimal workflow that uses a single tool only. It should return the current time. The workflow is stored in a *.yml file. I created the following file in the configs folder using nano.
Command: ~/nat-playground/configs
Command: nano ollama_agent.yml
Into this file you paste the following content describing the workflow.
llms:
  ollama_llm:
    _type: openai
    api_key: "EMPTY"
    base_url: "http://localhost:11434/v1"
    model_name: "qwen2.5:7b-instruct"
    temperature: 0.0
    max_retries: 3

functions:
  current_datetime:
    _type: current_datetime

workflow:
  _type: react_agent
  tool_names: [current_datetime]
  llm_name: ollama_llm
  verbose: true
  parse_agent_response_max_retries: 3
With CTRL + X followed by Y, you save the change.
Three main blocks:
llms:Defines the available LLM backends._type: openaimakes Ollama usable as a generic OpenAI endpoint. Theapi_key: "EMPTY"is mandatory — even though Ollama doesn’t check it, the field has to be set, otherwise you’ll get a validation error.functions:Defines the tools the agent is allowed to call.current_datetimeis a built-in of NAT.workflow:Defines the agent pattern.react_agentis the classic Reason+Act pattern.
Step 7: Run the agent
When you now want to execute the agent workflow, it’s important that you’re in the active .venv. Now execute the following commands.
Command: cd ~/nat-playground
Command: nat run --config_file configs/ollama_agent.yml --input "What time is it now and what can I derive from that for my workday?"
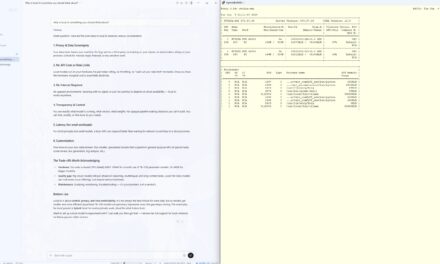
If everything works, you’ll see a ReAct trace in the terminal that might look like this. In my case, there were still a lot of Chinese characters in between.
Thought: I need to find out the current time.
Action: current_datetime
Action Input: {}
Observation: 2026-05-16 16:56:52 +0000
Thought: It's Saturday evening, 18:56 Munich time. From this I can derive...
Final Answer: It is currently 18:56 on May 16, 2026...
With this, you have cleanly coupled the inference layer (Ollama) and the orchestrator layer (NAT). Exactly the architectural separation we want to achieve. In this case with Ollama instead of TensorRT-LLM.
The Qwen trap: when the agent suddenly speaks Chinese
This is where it gets interesting. On my first run, I got the following trace:
Thought: 为了回答这个问题,我需要获取当前的时间和日期信息...
Action: current_datetime
Action Input: {"unused": "2023-11-29T15:48:00Z"}
...
Final Answer: 当前时间为2026年5月16日下午4点56分52秒...
The agent called the tool correctly, received the right time — but the entire response came back in Chinese. That’s a well-known quirk of the Qwen 2.5 family: the model originates from Alibaba and regularly falls back into its main training language under structured reasoning. Especially pronounced in models below 14B parameters.
The solution: an explicit system prompt that enforces the language. But watch out — NAT’s react_agent is template-based. If you set your own system prompt, you must include the placeholders {tools} and {tool_names} yourself, otherwise the agent doesn’t know which tools are available. That cost me a few minutes on my first attempt because I hadn’t done it.
The correct solution with a system prompt that enforces English looks like this. Just create a new workflow.
Command: ~/nat-playground/configs
Command: nano ollama_agent_system_prompt.yml
llms:
  ollama_llm:
    _type: openai
    api_key: "EMPTY"
    base_url: "http://localhost:11434/v1"
    model_name: "qwen2.5:7b-instruct"
    temperature: 0.0
    max_retries: 3
workflow:
  _type: react_agent
  tool_names: [current_datetime]
  llm_name: ollama_llm
  system_prompt: |
    You are a helpful English-speaking assistant.
    IMPORTANT: Answer EXCLUSIVELY in English. Your thoughts must also be in English.
    NEVER use Chinese or any other language.
    You have access to the following tools:
    {tools}
    Use the following format for your answer:
    Question: the input question you must answer
    Thought: reason in English about what to do next
    Action: the action to take — must be one of: [{tool_names}]
    Action Input: the input to the action
    Observation: the result of the action
    ... (this cycle can repeat)
    Thought: I now know the final answer
    Final Answer: the final answer — in English
    Begin!
  verbose: true
  parse_agent_response_max_retries: 3
The two curly braces {tools} and {tool_names} are template variables that NAT replaces at runtime:
{tools}becomes the detailed description of all tools (name, description, parameters){tool_names}becomes the comma-separated list of tool names
With NAT’s default prompt (i.e. if you omit system_prompt), NAT does this automatically — but then the prompt is in English by default, which is fine for English output but doesn’t help if you want to enforce a different language.
Step 8: Tool extension with Wikipedia search
The current_datetime test we first tried is trivial. Things get more interesting with real tools. NAT has wiki_search as a built-in. Now extend the config with the Wiki search as shown briefly below:
functions:
  current_datetime:
    _type: current_datetime

  wikipedia_search:
    _type: wiki_search
    max_results: 3

workflow:
  _type: react_agent
  tool_names: [current_datetime, wikipedia_search]
  llm_name: ollama_llm
  system_prompt: |
    ...as above...
  verbose: true
  parse_agent_response_max_retries: 3
Now you can run the workflows as already shown. Be sure to use the correct names matching what you named your *.yml files.
Command: nat run --config_file configs/ollama_agent.yml --input "Who was Nikola Tesla and in what year did he die?"
The agent should now independently select wikipedia_search, interpret the result and return a summarized answer — this time, ideally, in English.
Pitfalls you’ll probably hit
1. Qwen-7B doesn’t always do ReAct cleanly
Even with a system prompt: smaller models (7B class) don’t always stick perfectly to the ReAct format. You’ll occasionally see output where action and final answer are mixed together. That’s the reason for parse_agent_response_max_retries: 3 in the config — NAT attempts the re-parsing automatically.
If it fails persistently: switch to a larger model that you can still run. Larger models are significantly more reliable at ReAct reasoning.
2. Custom system prompt needs template variables
If you set system_prompt, then {tools} and {tool_names} must be in it. Otherwise you’ll get the ugly ValueError: Invalid system_prompt.
3. Connection error to Ollama
If you see Connection refused, check in order:
- Is Ollama running?
systemctl status ollama - Is
base_urlcorrect? Watch out: NAT needs/v1at the end - If Ollama runs remotely: does Ollama accept connections from outside? (set
OLLAMA_HOST=0.0.0.0)
4. Performance expectations
A ReAct loop with two to three tool calls typically takes 5 to 15 seconds. That feels slower than simple chat inference. The reason: the agent generates significantly more tokens than a simple answer (Thoughts, Actions, Observations, final answer).
5. What you should NOT do
sudo pip install nvidia-nat— global installation as root can mess up system-Python-based toolspip install nvidia-natwithout an active venv — lands in the user directory depending on config- Conda environment instead of venv — the NAT docs explicitly warn against it
What comes next?
With this setup, you have the orchestrator layer on your workstation. The exciting extensions are obvious:
- Connect MCP tools: NAT supports the Model Context Protocol natively. This lets you attach tools like filesystem access, GitHub API or your own REST endpoints
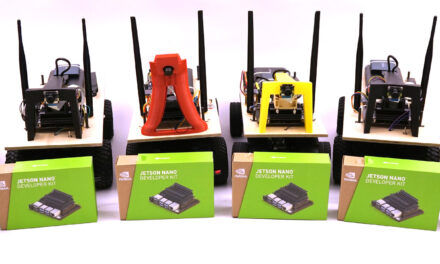
- Custom Python tool: e.g. an MQTT bridge to an ESP32 robot. That would be the exciting bridge between LLM agent and physical AI that personally interests me a lot
- A2A protocol: (Agent-to-Agent) orchestrate multiple agents, distribute tasks
- NAT as FastAPI server: with
nat serve— that would be the web UI hookup - Vision-Language-Models: if you want to feed the agent with images too, that’s the next model step
My next plan: a custom tool that communicates with an ESP32 robot car via MQTT. That turns the ReAct agent into a real hybrid between language model and embedded hardware — and physical AI gets a concrete, tangible meaning in my AI workshop.
Conclusion
The transition from the pure inference layer like Ollama to the orchestrator layer (NAT) is conceptually a bigger jump than it first appears. Suddenly you’re dealing with multi-step reasoning, tool selection, prompt templating and format robustness. These are all topics that played no role in pure inference. At the same time, the setup with NAT is surprisingly straightforward: one venv, one uv pip install, one YAML file — and you have the orchestrator standing. The complexity lies not in the setup, but in the details: the language drift in smaller models, the template variables, the prompt-engineering subtleties.
For me, this is the second pillar of the stack, and together with the first pillar — the inference server — I now have a solid foundation to tackle the next edge AI topics: VLMs, Physical AI via ESP32 bridges, and eventually the porting to a Jetson Thor, when I get that far.
Good luck with your own setup!


The tutorial offers a clear and practical guide for setting up and running the Tensorflow Object Detection Training Suite. Could…
This works using an very old laptop with old GPU >>> print(torch.cuda.is_available()) True >>> print(torch.version.cuda) 12.6 >>> print(torch.cuda.device_count()) 1 >>>…
Hello Valentin, I will not share anything related to my work on detecting mines or UXO's. Best regards, Maker
Hello, We are a group of students at ESILV working on a project that aim to prove the availability of…