

Anyone operating a powerful server with two NVIDIA GPUs (such as two RTX A6000s) quickly encounters a problem with the standard installation of Ollama: Ollama manages requests in a queue by default. Even with 96 GB of VRAM, parallel jobs often wait for each other instead of being calculated simultaneously.
The solution? We run two separate Ollama instances!
In this tutorial, I will show you how to configure Ollama so that Instance A runs exclusively on GPU 0 (Port 11434) and Instance B exclusively on GPU 1 (Port 11435). The result: True parallelism and clean memory separation.
Prerequisites
-
An Ubuntu server with installed NVIDIA drivers.
-
Two NVIDIA GPUs.
-
Ollama is already installed (standard installation).
-
Optional: A dedicated path for models (to save storage space).
Step 1: Identify GPUs
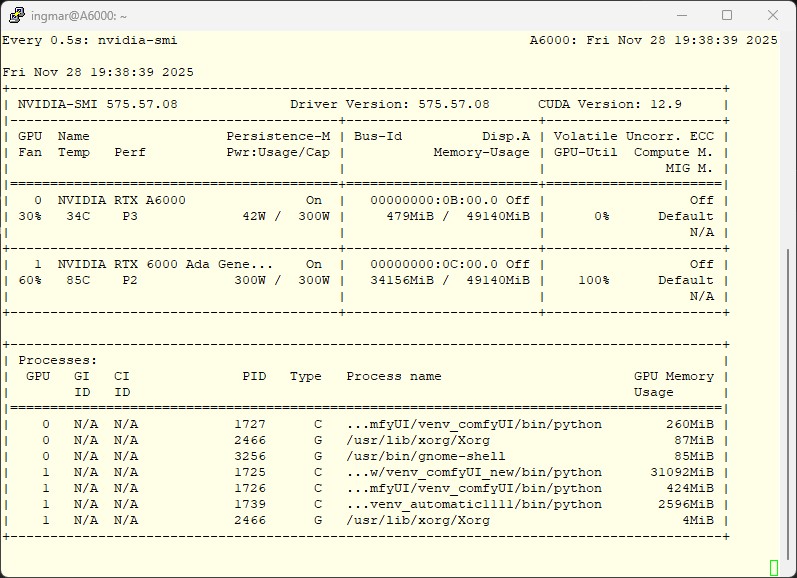
First, let’s get an overview of the hardware IDs.
Command: nvidia-smi
Usually, the GPUs are numbered from 0 to 1. Our goal:
-
Ollama 1: GPU 0
-
Ollama 2: GPU 1
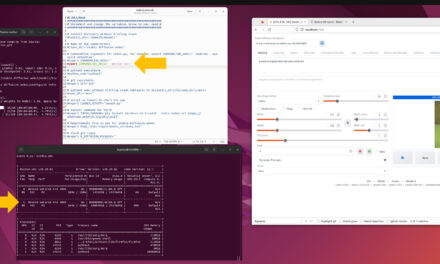
Ollama multi instance
Step 2: Restrict the First Instance (GPU 0)
The standard Ollama service (ollama.service) often tries to grab all resources. We force it onto the first card using a systemd override.
Run the following command:
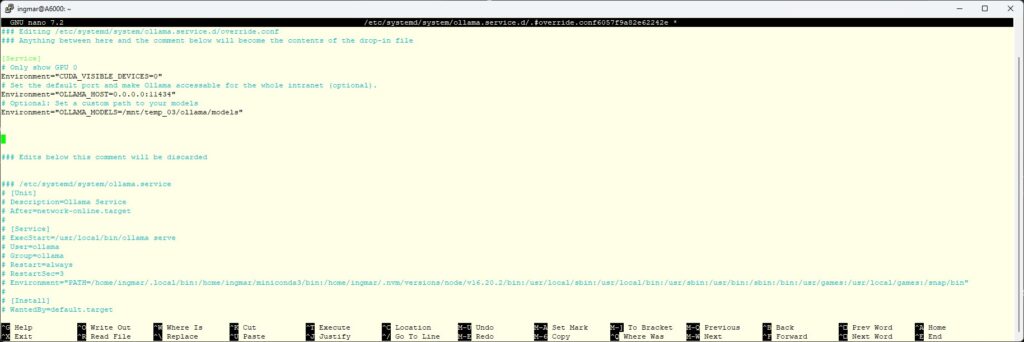
Command: sudo systemctl edit ollama.service
Paste the following content into the editor. This overrides the environment variables without touching the original file:
[Service]
# Make only GPU 0 visible
Environment="CUDA_VISIBLE_DEVICES=0"
# Explicitly set standard port (optional, but clean)
Environment="OLLAMA_HOST=0.0.0.0:11434"
# Optional: If you have a custom model path
Environment="OLLAMA_MODELS=/mnt/your/path/to/models"
Ollama multi instance set variables
Step 3: Create the Second Instance (GPU 1)
For the second GPU, we create a completely new service. We basically copy the logic of the first one, but change the port and the GPU ID.
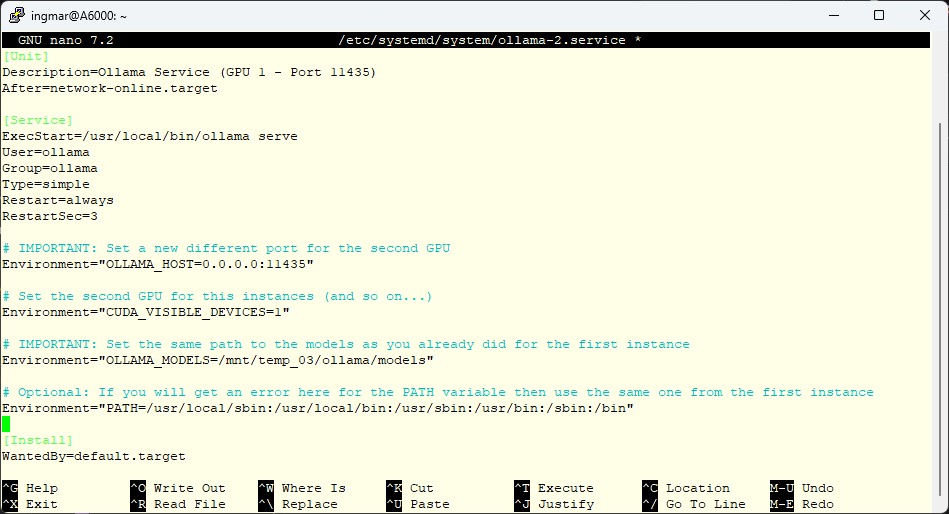
Create the file /etc/systemd/system/ollama-2.service:
Command: sudo nano /etc/systemd/system/ollama-2.service
[Unit]
Description=Ollama Service (GPU 1 - Port 11435)
After=network-online.target
[Service]
ExecStart=/usr/local/bin/ollama serve
User=ollama
Group=ollama
Type=simple
Restart=always
RestartSec=3
# IMPORTANT: New port and second GPU
Environment="OLLAMA_HOST=0.0.0.0:11435"
Environment="CUDA_VISIBLE_DEVICES=1"
# IMPORTANT: Use the same model path as Instance 1!
# This way, models only need to be downloaded once.
Environment="OLLAMA_MODELS=/mnt/your/path/to/models"
# Optional: Path variable (if necessary)
Environment="PATH=/usr/local/sbin:/usr/local/bin:/usr/sbin:/usr/bin:/sbin:/bin"
[Install]
WantedBy=default.target
Note: Make sure that the path for OLLAMA_MODELS is identical in both services so that the instances share the storage space.
Ollama second instance set variables
Step 4: Activation
Now we need to reload Systemd and start the services.
# Reload Systemd configs
sudo systemctl daemon-reload
# Restart first instance (so it releases GPU 1)
sudo systemctl restart ollama
# Enable second instance (autostart) and start
sudo systemctl enable ollama-2
sudo systemctl start ollama-2
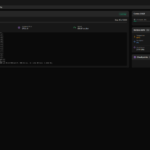
Step 5: Testing Both Ollama Instances
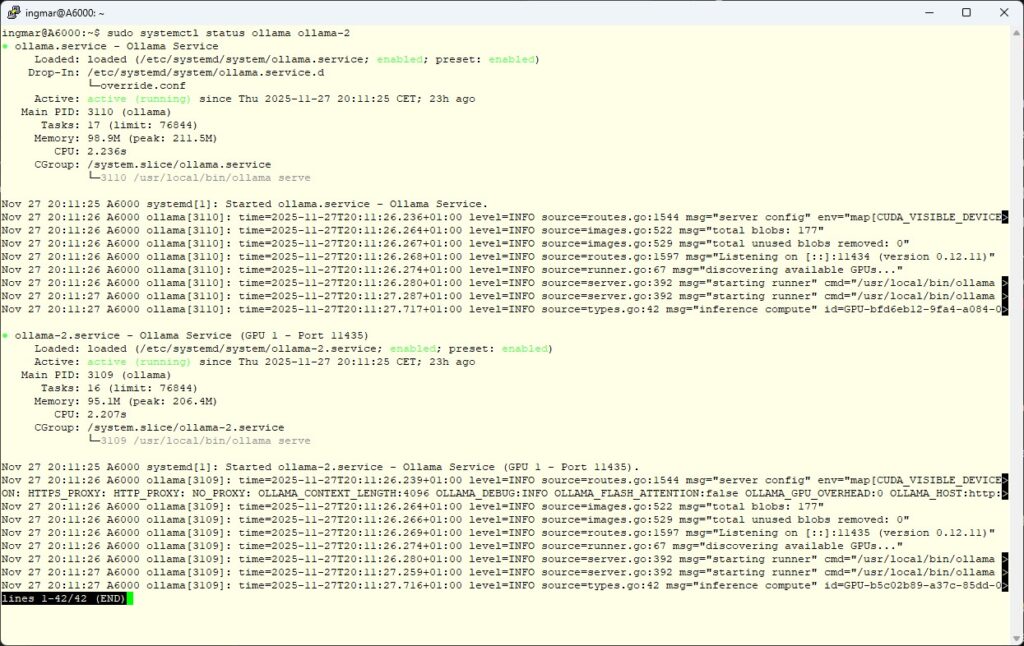
Are both instances running?
Command: sudo systemctl status ollama ollama-2
If both are green (active), you can test them.
Ollama check if all instances are running
Address Instance 1 (GPU 0): As normal via the standard command:
Command: ollama run llama3
Address Instance 2 (GPU 1): Here we pass the host/port along:
Command: OLLAMA_HOST=127.0.0.1:11435 ollama run llama3
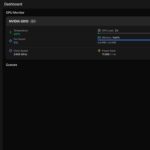
Pro Tip for Verification
Open a second terminal and start watch -n 0.5 nvidia-smi. If you now send requests to the different ports, you will see how the VRAM and GPU load are distributed exactly to the card you addressed.
Conclusion
With just a few lines of configuration, you have transformed your server into a parallel inference cluster. You can now run agents, RAG pipelines, or training jobs clearly separated from each other without them blocking one another. Another advantage is that you can now specifically distribute the load across the two or more GPUs in your system.
Good luck with the setup!


The tutorial offers a clear and practical guide for setting up and running the Tensorflow Object Detection Training Suite. Could…
This works using an very old laptop with old GPU >>> print(torch.cuda.is_available()) True >>> print(torch.version.cuda) 12.6 >>> print(torch.cuda.device_count()) 1 >>>…
Hello Valentin, I will not share anything related to my work on detecting mines or UXO's. Best regards, Maker
Hello, We are a group of students at ESILV working on a project that aim to prove the availability of…