

Phase 8: Compiling and Starting the Web UI
Now I can compile and start the web UI. First, I switch to the UI directory of the AI Toolkit:
Command: cd ui
If you haven’t cloned the AI Toolkit repository yet, you need to do that first. The UI directory should be located in the root directory of the AI Toolkit repository.
Now I start the build and start process:
Command: npm run build_and_start
This command performs two steps: First, all Node.js dependencies are installed and the UI is compiled (build), then the server is started (start). The process can take a few minutes, especially the first time, as all dependencies must be downloaded.
During the build process, you will see many outputs in the terminal. This is normal. If errors occur, check the error messages – often they are due to missing dependencies or network problems.
After a successful start, you will see a message that looks something like this:
Server running on http://0.0.0.0:8675
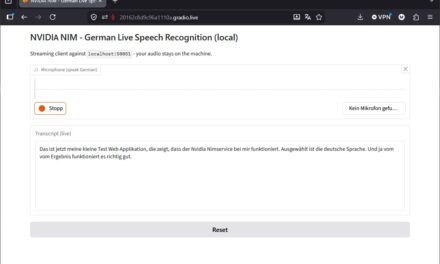
The web UI is now accessible! Open http://<IP-Address-AI-TOP-ATOM>:8675 in your browser (replace <IP-Address-AI-TOP-ATOM> with the IP address of your AI TOP ATOM).
GIGABYTE AI TOP ATOM – AI Toolkit by Ostris
To find the IP address of your AI TOP ATOM, use:
Command: hostname -I
If a firewall is active, you must open port 8675:
Command: sudo ufw allow 8675
Important Note: The Conda environment ai-toolkit must be activated when you start the UI. If the UI does not start or errors occur, check if the environment is activated.
Phase 9: Starting the First Training Job
A very good introduction to training with the AI Toolkit is provided by Ostris’s YouTube channel, with posts on different models and how you can train your own LoRA with the AI Toolkit, for example: AI Toolkit on YouTube
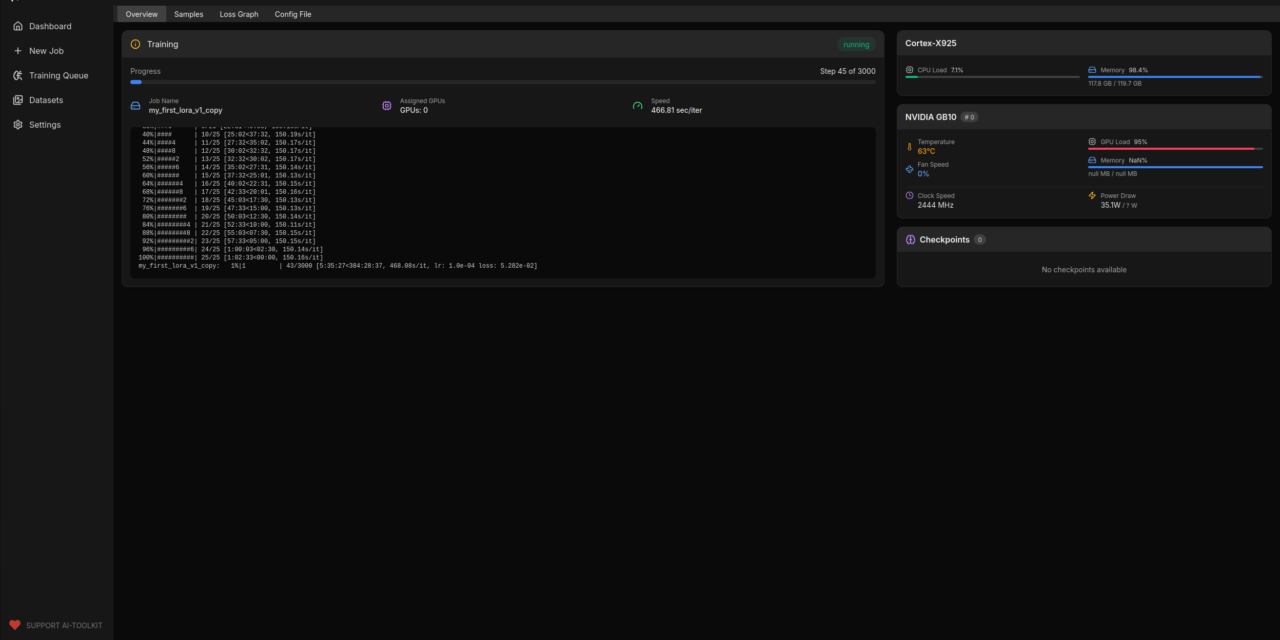
After the web UI has been successfully started, you can configure your first training job. The web interface offers various options for configuration:
-
Model selection and configuration
-
Dataset management
-
Training parameters (Learning Rate, Batch Size, etc.)
-
Extended configurations via the Advanced Config
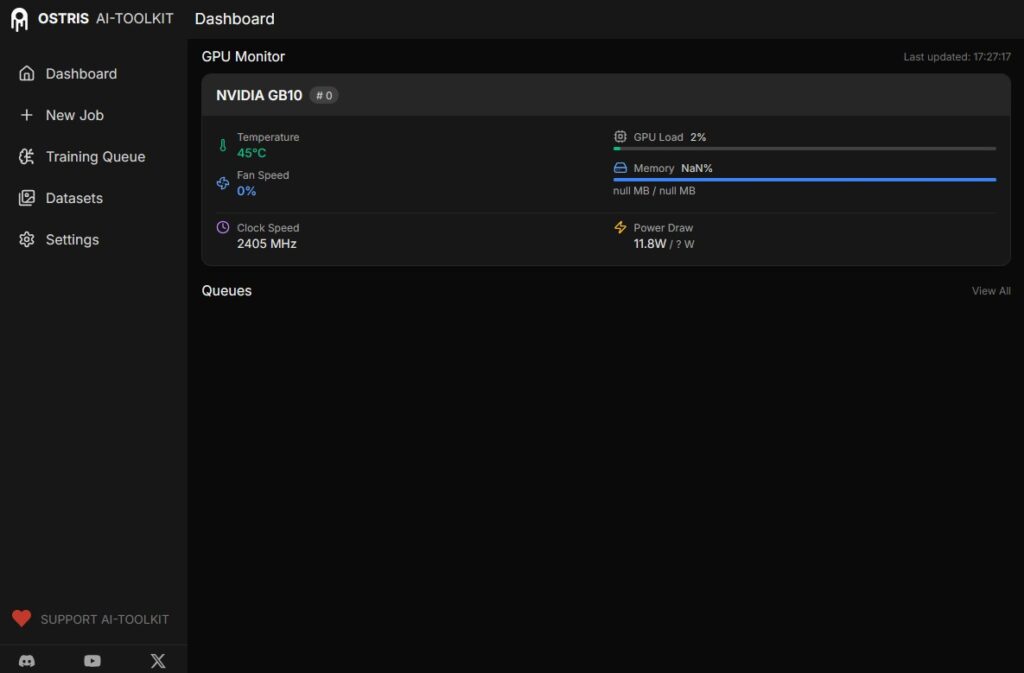
Configure your training job in the web UI and start it. You can track progress directly in the UI. You can monitor GPU usage in parallel with nvidia-smi or via the DGX Dashboard.
Tip: For your first test, I recommend using a small dataset and a smaller model to verify functionality before starting larger training jobs.

GIGABYTE AI TOP ATOM – AI Toolkit Ostris
Troubleshooting: Common Problems and Solutions
During my time with the AI Toolkit on the AI TOP ATOM, I encountered some typical problems. Here are the most common ones and how I solved them:
-
“Command not found” with conda commands: Miniconda is not in the PATH or the bash session was not restarted. Run
source ~/.bashrcor open a new terminal window. -
Conda environment is not activating: Check if the environment exists with
conda env list. If not, recreate it withconda create --name ai-toolkit python=3.11. -
PyTorch CUDA support not available: Check with
python -c "import torch; print(torch.cuda.is_available())". If False, check the CUDA drivers withnvidia-smiand ensure the correct PyTorch version was installed. -
npm command not found: npm was not installed. Install it with
sudo apt install npmor ensure that Node.js was correctly installed and is in the PATH. -
UI does not start or shows errors: Check if the Conda environment is activated. The UI must be started within the activated environment. Also check the logs in the terminal for detailed error messages.
-
Training job does not start or crashes: Training normally runs via a Python script. If the UI shows no output, you can start the training directly via the command line. To do this, copy the configuration from the Advanced Config into a YAML file and run:
python run.py path/to/train.yaml(with the Conda environment activated). -
Access to the UI from the network does not work: Check the firewall settings and ensure that port 8675 is open. Also check if both computers are on the same network.
-
Node.js version not compatible: Ensure you are using an ARM64 version of Node.js. The x86_64 version does not work on the AI TOP ATOM.
Starting Training Directly via the Command Line
If you have problems with the web UI or want to start the training directly via the command line, you can copy the configuration from the Advanced Config of the web UI and save it in a YAML file. Then start the training with:
Command: python run.py path/to/train.yaml
Important: The Conda environment ai-toolkit must be activated before you run this command. The training then runs directly in the terminal, and you will see all output in real time.
This method is particularly useful for debugging as you can see all error messages directly.
Reactivating the Conda Environment After a Restart
After a system restart, you must reactivate the Conda environment before starting the UI:
Command: conda activate ai-toolkit
If you want to start the UI automatically at system startup, you can create a systemd service or add a startup script to ~/.bashrc. Make sure the Conda environment is activated before the UI is started.
Rollback: Removing the AI Toolkit Again
If you want to completely remove the AI Toolkit from the AI TOP ATOM, run the following commands on the system:
First, stop the UI (if it’s running) with Ctrl+C in the terminal where it was started.
Remove the Conda environment:
Command: conda deactivate
Command: conda env remove --name ai-toolkit
If you also want to remove Miniconda:
Command: rm -rf ~/miniconda3
Remove the Miniconda entries from the ~/.bashrc file, if present.
If you want to remove Node.js:
Command: sudo rm -rf /opt/node-v24.11.1-linux-arm64
Remove the Node.js entries from the ~/.bashrc file.
If npm was installed via apt:
Command: sudo apt remove npm
Important Note: These commands remove all training data, models, and configurations stored in the Conda environment. Make sure you really want to remove everything before running these commands. Training checkpoints and models cannot be easily restored.
Summary & Conclusion
The installation of the AI Toolkit on the Gigabyte AI TOP ATOM is surprisingly straightforward thanks to compatibility with the NVIDIA DGX instructions. In about 30-45 minutes, I have set up the AI Toolkit and can now train my own models via the user-friendly web interface.
What particularly excites me: The Conda environment allows for a clean isolation from the system Python installation, and the web UI makes configuring and starting training jobs significantly easier than via the command line. The performance of the Blackwell GPU is fully utilized, and I can also start and monitor training jobs from other computers on the network.
I also find it particularly practical that the web UI offers an Advanced Config, which makes it possible to create complex configurations and export them directly as YAML files. This makes it easy to reproduce or share training jobs.
For teams or developers who want to train their own AI models, this is a perfect solution: A central server with full GPU power, on which training jobs can be started and monitored via an intuitive web interface. The Conda environment ensures that everything is cleanly isolated and can be easily removed.
If you have questions or encounter problems, feel free to look at the official NVIDIA DGX Spark documentation or the documentation of the AI Toolkit by Ostris. The community is very helpful, and most problems can be solved quickly.
Next Step: Preparing Own Datasets and Training Models
You have now successfully installed the AI Toolkit and the web UI is running. The basic installation works, but that is just the beginning. The next step is to prepare your own datasets and configure training jobs for your specific use cases.
The AI Toolkit supports various dataset formats and training methods. Experiment with different configurations to achieve the best results for your models. The web UI makes it easy to try out different parameters and compare the results.
A very good entry point is Ostris’s YouTube channel with posts on different models that he expands, for example, with his own LoRAs in his contributions: AI Toolkit on YouTube
Good luck experimenting with the AI Toolkit on your Gigabyte AI TOP ATOM. I am excited to see which models you train with it! Let me and my readers know here in the comments.
Click here for Part 1/2: Installing AI Toolkit on Gigabyte AI TOP ATOM – Step-by-Step Guide – Part 1-2


The tutorial offers a clear and practical guide for setting up and running the Tensorflow Object Detection Training Suite. Could…
This works using an very old laptop with old GPU >>> print(torch.cuda.is_available()) True >>> print(torch.version.cuda) 12.6 >>> print(torch.cuda.device_count()) 1 >>>…
Hello Valentin, I will not share anything related to my work on detecting mines or UXO's. Best regards, Maker
Hello, We are a group of students at ESILV working on a project that aim to prove the availability of…